Front Door with WordPress on Azure App Service
Outdated: this post is from 2019. It uses the Azure Front Door (classic) designer, which is being retired.
Here’s a quick overview of the steps you need to take to put Front Door in front of an Azure Web App. In this case, the web app runs a WordPress site.
Step 1: DNS
Suppose you deployed the Web App and its name is gebawptest.azurewebsites.net and you want to reach the site via wp.baeke.info. Traffic will flow like this:
user types wp.baeke.info ---CNAME to xyz.azurefd.net--> Front Door --- connects to gebawptest.azurewebsites.net using wp.baeke.info host headerIt’s clear that later, in Front Door, you will have to specify the host header (wp.baeke.info in this case). More on that later…
If you have worked with Azure Web App before, you probably know you need to configure the host header sent by the browser as a custom domain on the web app. Something like this:
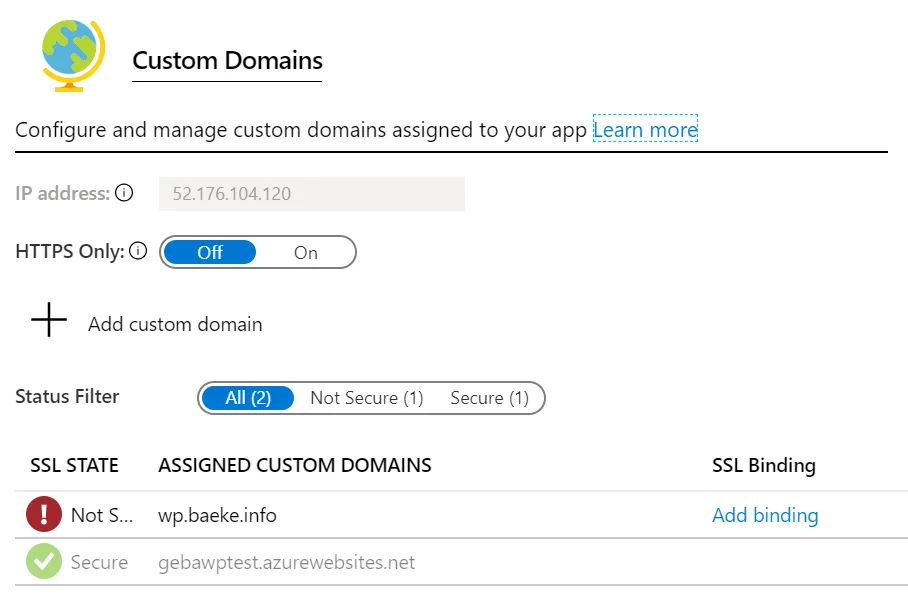
Custom domain in Azure Web App (no https configured – hence the red warning)
In this case, we do not want to resolve wp.baeke.info to the web app but to Front Door. To make the custom domain assignment work (because the web app will verify the custom name), add the following TXT record to DNS:
TXT awverify.wp gebawptest.azurewebsites.netFor example in CloudFlare:

awverify txt record in CloudFlare DNS
With the above TXT record, I could easily add wp.baeke.info as a custom domain to the gebawptest.azurewebsites.net web app.
Note: wp.baeke.info is a CNAME to your Front Door domain (see below)
Step 2: Front Door
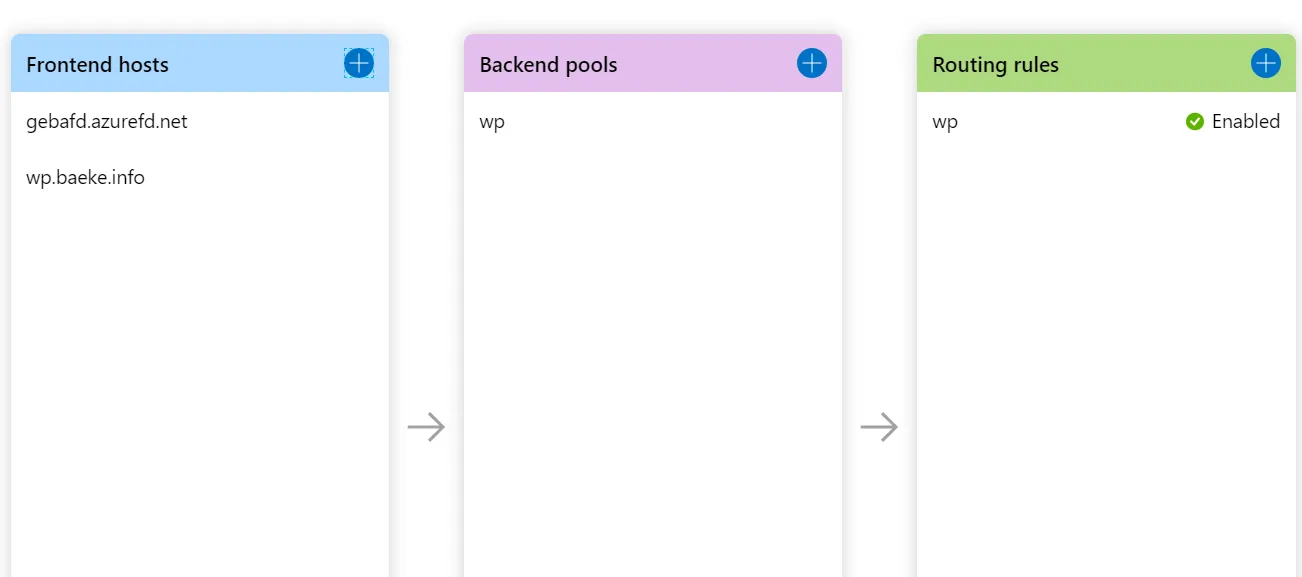
My Front Door designer looks like this:
Front Door designer
When you create a Front Door, you need to give it a name. In my case that is gebafd.azurefd.net. With wp.baeke.info as a CNAME for gebafd.azurefd.net, you can easily add wp.baeke.info as an additional Frontend host.
The backend pool is the Azure Web App. It’s configured as follows:
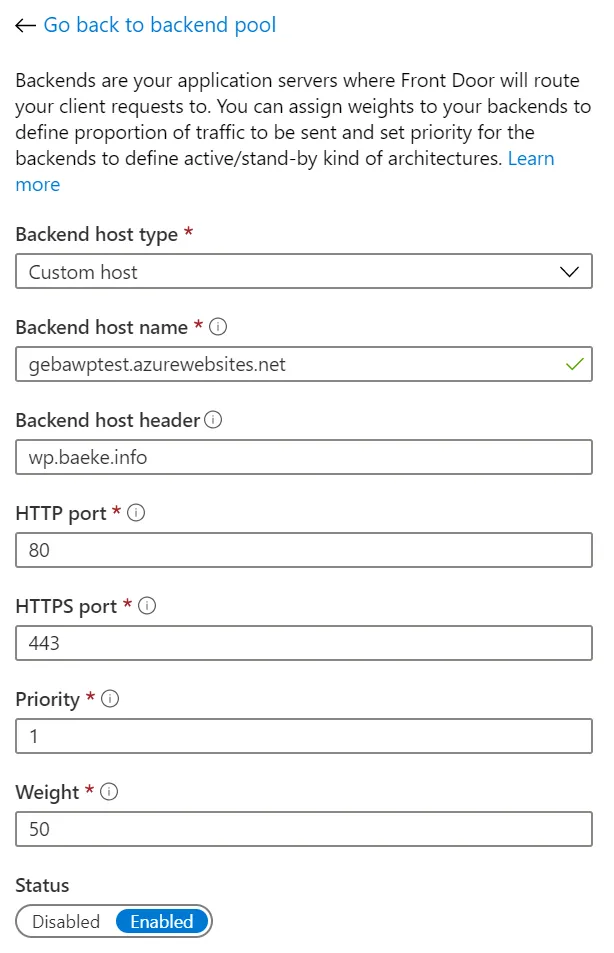
Front Door backend host (only one in the pool); could also have used the Azure App Service backend type
You should connect to the web app using its original name but send wp.baeke.info as the host header. This allows Front Door to connect to the web app correctly.
The last part of the Front Door config is a simple rule that connects the frontend wp.baeke.info to the backend pool using HTTP only.
Step 3: WordPress config
With the default Azure WordPress templates, you do not need to modify anything because wp-config.php contains the following settings:
define('WP_SITEURL', 'http://' . $_SERVER['HTTP_HOST'] . '/'); define('WP_HOME', 'http://' . $_SERVER['HTTP_HOST'] . '/');If you want, you can change this to:
define('WP_SITEURL', 'http://wp.baeke.info/' ); define('WP_HOME', 'http://wp.baeke.info/');Step 4: Blocking access from other locations
In general, you want users to only connect to the site via Front Door. To achieve this, add the following access restrictions to the Web App:
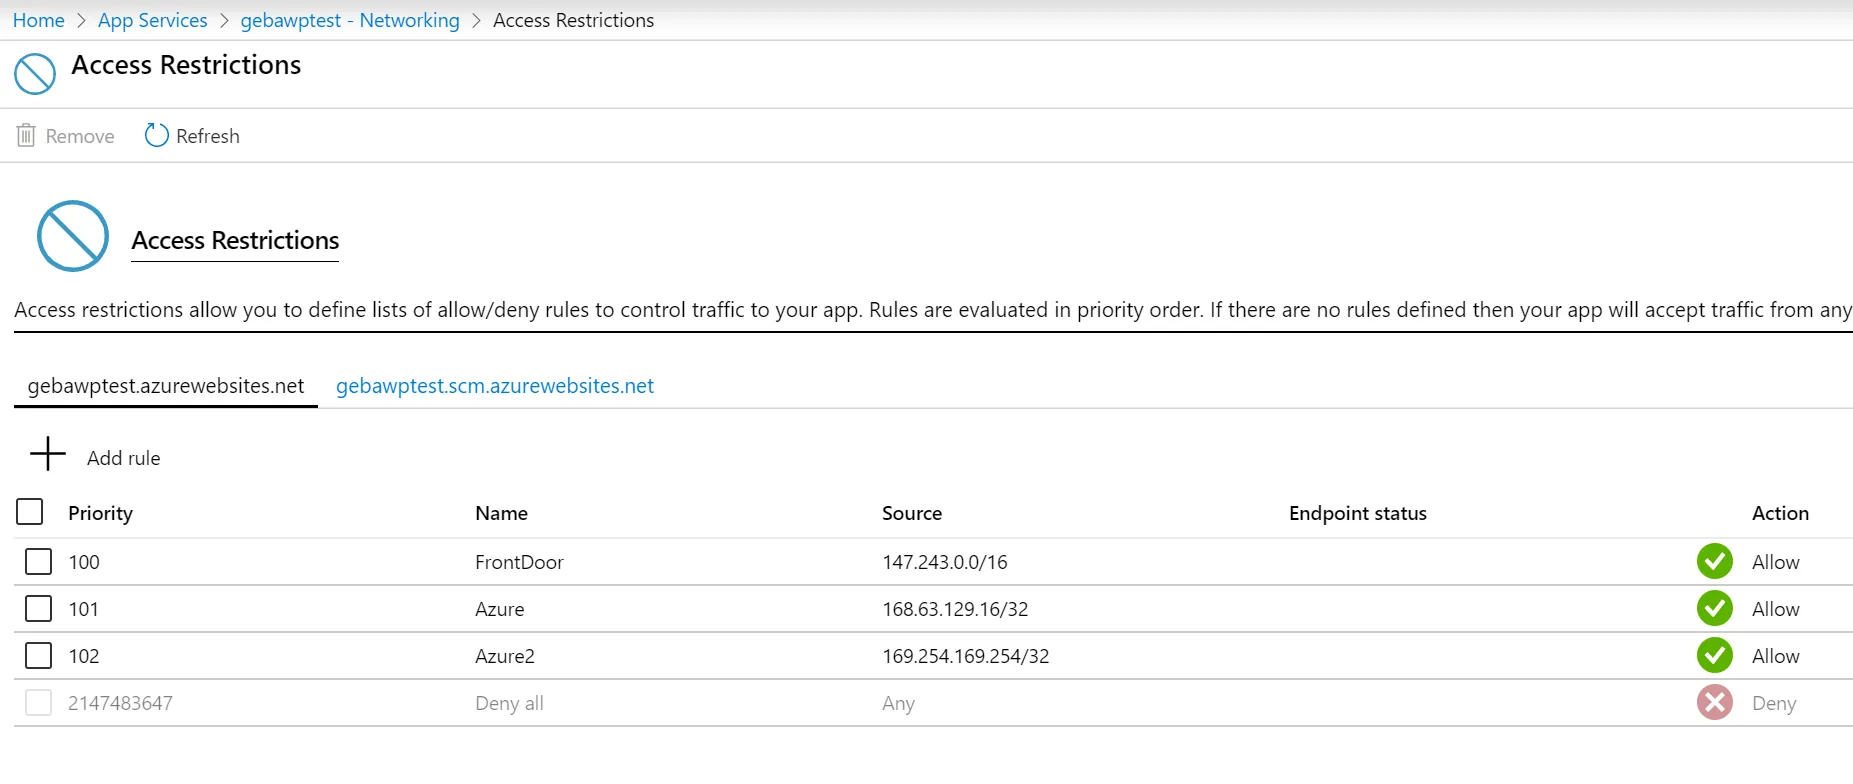
Access restrictions to only allow traffic from Front Door and Azure basic infrastructure services
#azure#cdn#frontdoor#wordpress
If this post helped you, you can buy me a coffee ☕
5 comments
Comments from the WordPress version of this blog.
Bikram Paul · April 1, 2020
awverify does work as TXT anymore in my experience when deploying my WP page for validating the subdomain/domain. Need to do the same setup but as a CNAME i.e. CNAME awverify.wp gebawptest.azurewebsites.ne
Geert Baeke · April 1, 2020
I will investigate and update. The docs still state to use TXT though
Nam · February 23, 2021
I confirmed that we can no longer use the TXT record, use CNAME instead worked well for me.
Geert Baeke · February 24, 2021
Thanks for the info!
Jon Morley-Jones · March 18, 2021
Thank you for this information. One additional thing I did to get my instance working was add the below in wp-config with
if (strpos($_SERVER[‘HTTP_X_FORWARDED_PROTO’], ‘https’) !== false)
$_SERVER[‘HTTPS’]=’on’;
else
$_SERVER[‘HTTPS’]=’off’;
For the Access Restriction, I used Service Tags.