Trying out Microsoft’s Graph RAG

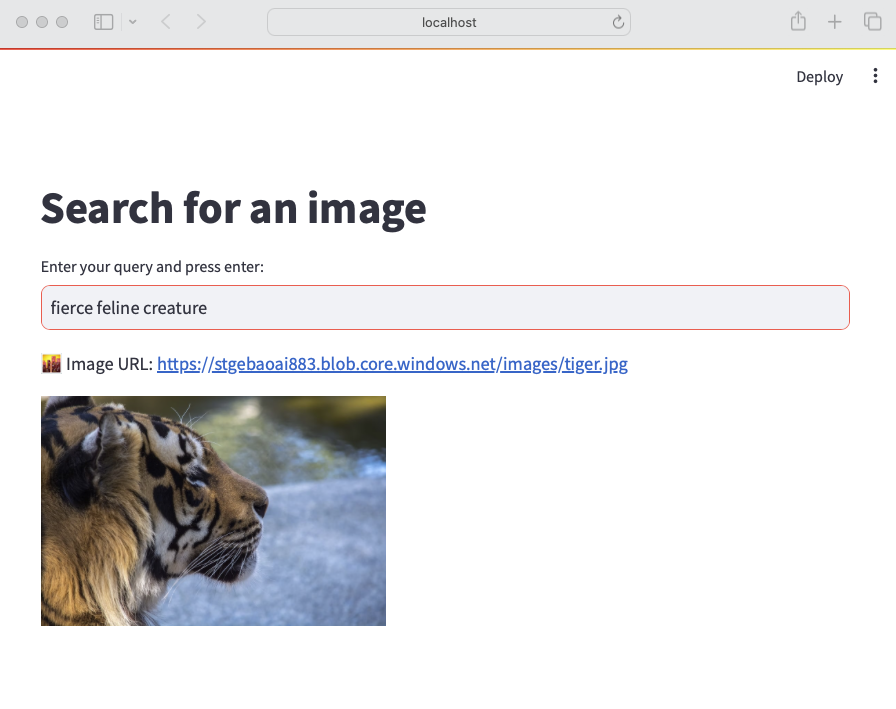
Whenever we build applications on top of LLMs such as OpenAI’s gpt-4o, we often use the RAG pattern. RAG stands for retrieval augmented generation. You use it to let the LLM answer questions about data it has never seen. To answer the question, you retrieve relevant information and hand it over to the LLM to generate the answer.

The diagram below illustrates both the data ingestion and querying part from a high level, using gtp-4 and a vector database in Azure, Azure AI Search.

RAG: ingestion and querying

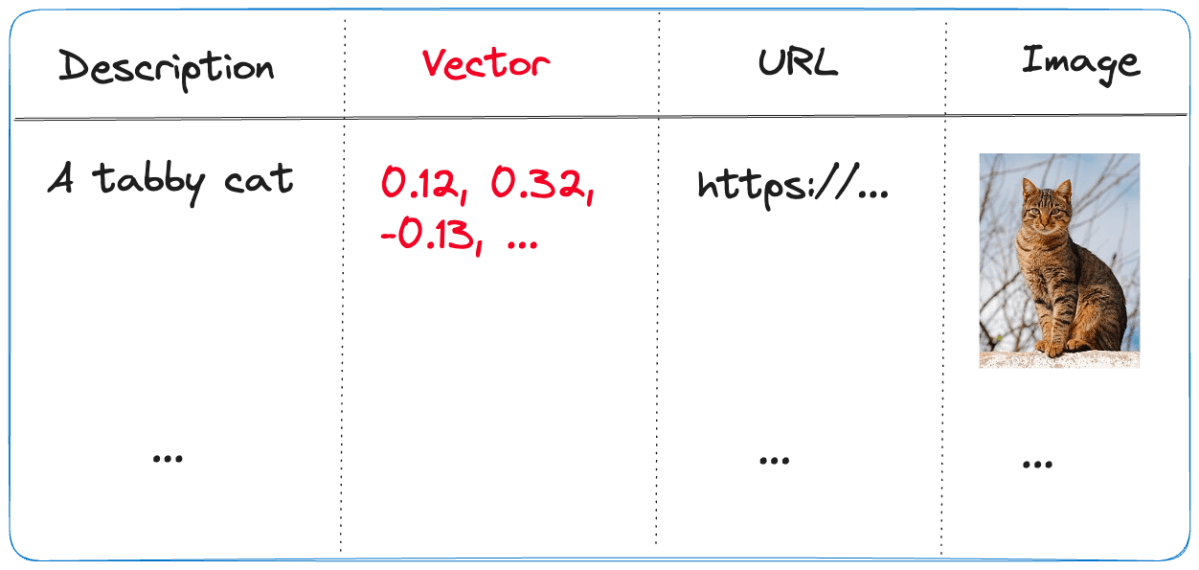
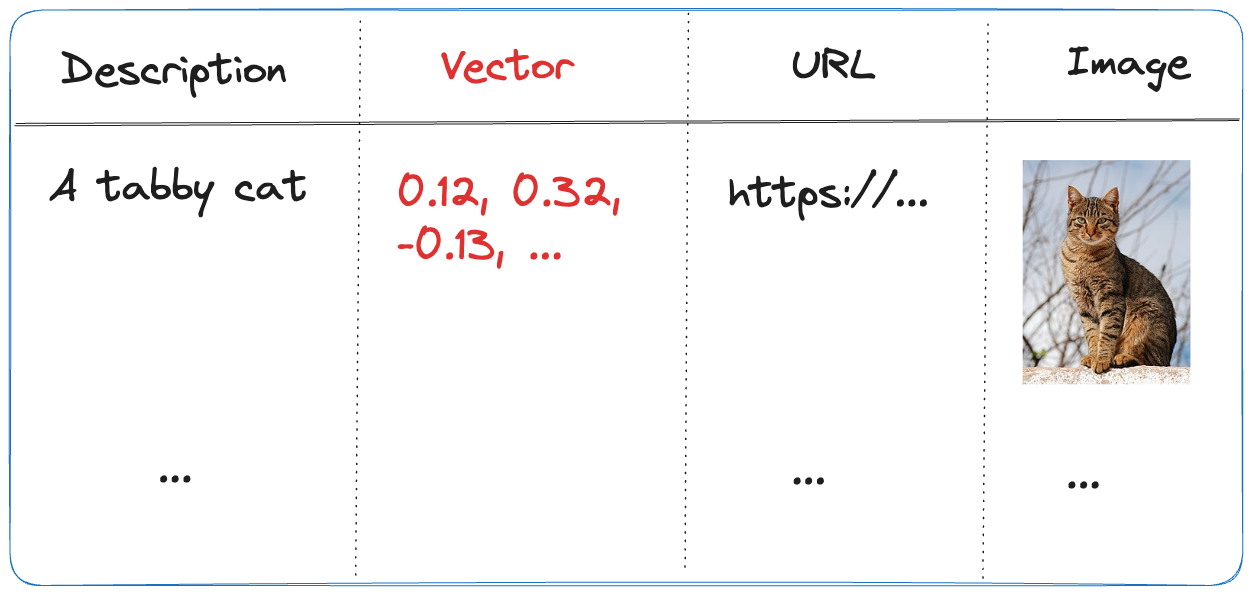
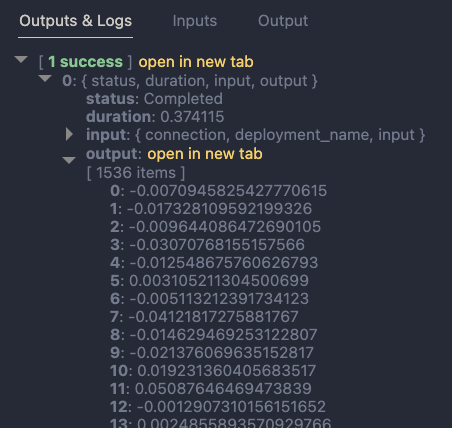
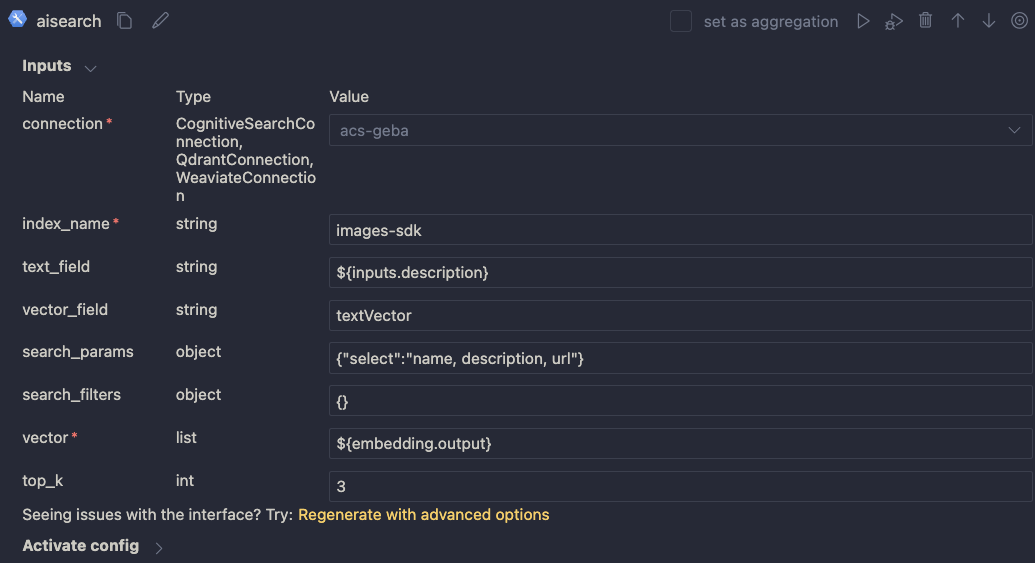
Above, our documents are chunked and vectorized. These vectors are stored in Azure AI Search. Vectors allow us to find text chunks that are similar to the query of the user. When a user types a question, we vectorize the question, find similar vectors and hand the top n matches to the LLM. The text chunks that are found are put in the prompt together with the original question. Check out this page to learn more about vectors.

Note that above is the basic scenario in its simplest form. You can optimize this process in several ways, both in the indexing and the retrieval phase. Check out the RAG From Scratch series on YouTube to learn more about this.

Limitations of baseline RAG

Although you can get far with baseline RAG, it is not very good at answering global questions about an entire dataset. If you ask “What are the main themes in the dataset?” it will be hard to find text chunks that are relevant to the question unless you have the main themes described in the dataset itself. Essentially, this is a query-focused summarization task versus an explicit retrieval task.

In the paper,
From Local to Global: A Graph RAG Approach to Query-Focused Summarization, Microsoft proposes a solution that is based on knowledge graphs and intermediate community summaries to answer these global questions more effectively.

If it is somewhat unclear what the difference between baseline RAG and Graph RAG looks like, watch this video on YouTube where it is explained in more detail:

Differences between baseline RAG and Graph RAG

Getting started by creating an index

Microsoft has an open source, Python-based implementation of Graph RAG for both local and global queries. We’ll discuss local queries a bit later in this post and focus on global for now. Check out the GitHub repo for more information.

If you have Python on your local machine, it is easy to try it out:

  • Make a folder and create a Python virtual environment in it
  • Make sure the Python environment is active and run pip install graphrag
  • In the folder, create a folder called input and put some text files in it with your content
  • From the folder that contains the input folder, run the following command: python -m graphrag.index --init --root .
  • This creates a .env file and a settings.yaml file.
  • In the .env file, enter your OpenAI key. This can also be an Azure OpenAI key. Azure OpenAI requires additional settings in the settings.yaml file: api_base, api_version, deployment_name.
  • I used OpenAI directly and modified the model in settings.yaml. Find the model setting and set it to gpt-4o.

You are now ready to run the indexing pipeline. Before running it, know that this will do a lot of LLM calls depending on the data you put in the index folder. In my tests, with 800KB of text data, indexing cost between 10 and 15 euros. Here’s the command:

python -m graphrag.index --root .

To illustrate what happens, take a look at the diagram below:

Indexing and querying process

Above, let’s look at it from top to bottom, excluding the user query section for now:

  • Source documents in the input folder are split into pieces of 300 tokens with 100 tokens overlap. Microsoft uses the cl100k_base tokenizer which is the one used by gpt-4 and not gpt-4o. That should not have an impact. You can adjust the token size and overlap. With a larger token size, less LLM calls are made in subsequent steps but element extraction might be less precise.
  • With the help of gpt-4o, elements are extracted from each chunk. These elements are the entities and relationships between entities in the graph that is being built. In addition, claims about the entities are extracted. The paper and diagram above uses the term covariates. This is a costly operation if you have a lot of data in the input folder.
  • Text descriptions of the elements are generated.

After these steps, a graph is built that contains all the entities, relationships, claims and element descriptions that gpt-4o could find. But the process does not stop there. To support global queries, the following happens:

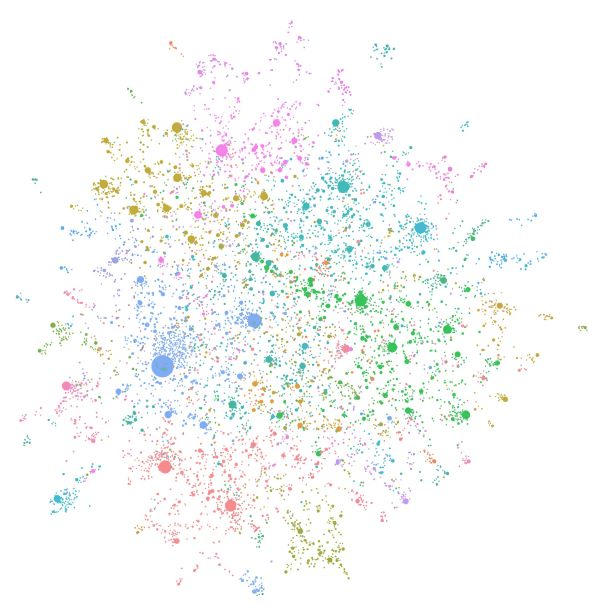
  • Detection of communities inside the graph. Communities are groups of closely related entities. They are detected using the Leiden algorithm. In my small dataset, about 250 communities were detected.
  • Per community, community summaries are created with gpt-4o and stored. These summaries can later be used in global queries.

To make all of the above work, a lot of LLM calls have to be made. The prompts that are used can be seen in the prompts folder:

Prompts used to build the graph and community descriptions

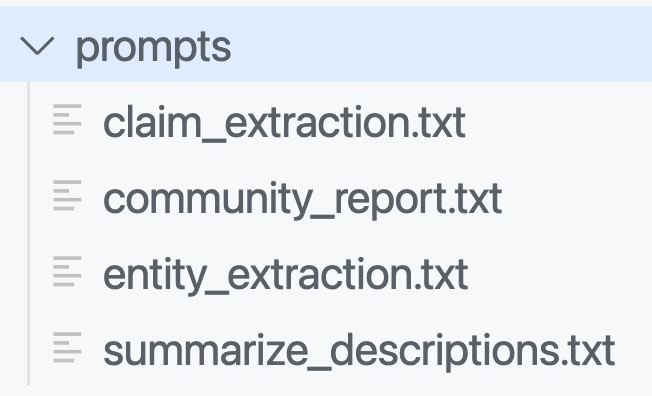
You can and probably should modify these prompts to match the domain of your documents. The entity extraction prompt contains examples to teach the LLM about the entities it should extract. By default, entities such as people, places, organizations, etc.. are detected. But if you work with building projects, buildings, bridges, construction materials, the prompt should be adjusted accordingly. The quality of the answers will depend greatly on those adjustments.

In addition to the graph, the solution uses the open source LanceDB to store embeddings for each text chuck. There is only one table in the database with four fields:

  • id: unique id for the chunk
  • text: the text in the chunk
  • vector: the vector of the chunk; by default the text-embedding-3-small model is used
  • attributes: e.g., {“title”: “\”title here\””}

The graph and related data is stored in parquet files in an artifacts folder inside another folder with a timestamp. For example:

Parquet files that contain the graph structure

If you have a parquet viewer, you can check the create_final_entities.parquet file to check the detected entities. You will find entity types like ORGANIZATION, PERSON, GEO, EVENT, CONCEPT, etc… Every entity has a description and links back to the text unit ids. The text units are the chunks.

Note that, if you want the graph in GraphML format, set snapshots.graphml to true in settings.yaml. Your artifacts folder will then contain .graphml files. You can load those in a viewer like Gephi:

Loading the graph in a viewer

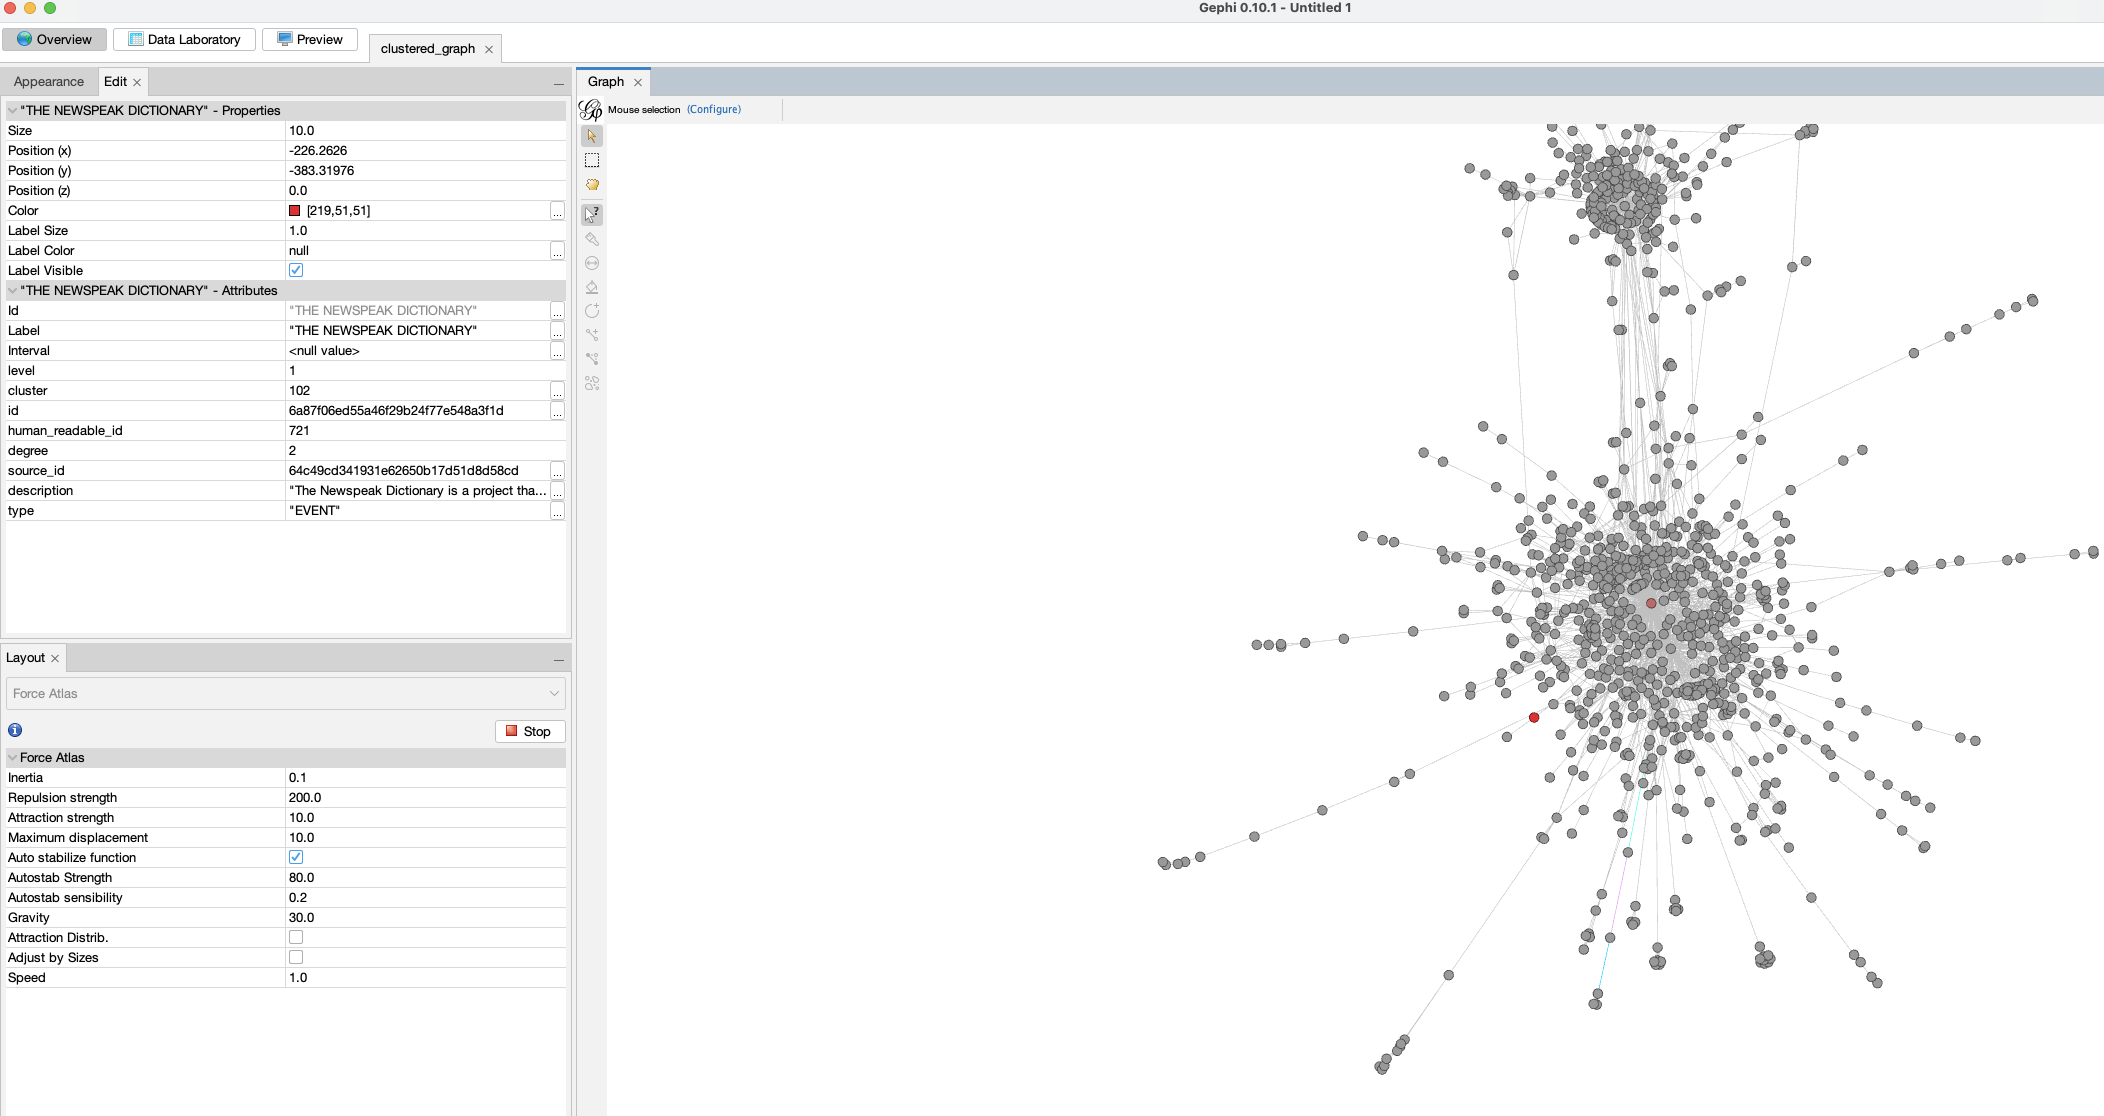
If you already ran the indexer without setting this value, you can just run it again. Graph RAG has a caching layer so you will not incur costs when you run the indexer again simply to generate the .graphml files.

Global Search

Now let’s do a global query. A global query uses the generated community summaries to answer the question. The intermediate answers are used to generate the final answer.

A global query is not just one LLM call but several ones. The total token cost is relatively high compared to a typical similarity search that uses between 3 to 5 retrieved chunks. It’s not uncommon to see >10 LLM calls with 200K token. You can control the token usage in settings.yaml. See the global_search settings at the bottom.

To do a global query, run the command below. I have the book 1984 in the corpus so let’s ask for the main themes:

python -m graphrag.query \
--root . \
--method global \
"What are the top themes in 1984?"

Note that an LLM can answer this on its own since it knows about 1984. That’s not the point here. The answer you get will come from the index:

### Top Themes in *1984*

**1. Totalitarianism and Absolute Control**

The Party in Oceania exercises absolute control over its citizens, manipulating historical records, maintaining a state of perpetual conflict, and enforcing oppressive policies through purges, arrests, tortures, imprisonments, and vaporizations [Data: Reports (211)]. The regime's control extends to every aspect of life, including personal relationships, sexual behavior, and even thoughts, enforced by the Thought Police and the omnipresent Telescreen [Data: Reports (141, 183, 223, 185, 191, 181, 151, 116, 186)].

**2. Surveillance and Psychological Manipulation**

Surveillance is a pervasive theme, with the Telescreen and the Thought Police constantly monitoring individuals to ensure compliance and suppress dissent [Data: Reports (52, 141, 183, 223, 185, 191, 181, 151, 116, 186)]. The Party uses psychological manipulation techniques such as doublethink, Newspeak, and the alteration of historical records to control and limit the range of thought among its citizens [Data: Reports (141, 175, 183, 181, 215, 149, 179, 177, 178, 165, 58)].

**3. Manipulation of Truth and Reality**

The Party manipulates historical records and information to maintain its narrative and control over reality. This is evident in Winston's work at the Ministry of Truth and the concept of doublethink, which allows individuals to accept two contradictory beliefs simultaneously [Data: Reports (141, 175, 183, 181, 215, 149, 179, 177, 178, 165, 58)]. The Memory Hole is used to destroy documents, ensuring that information is permanently erased, highlighting the Party's control over historical narratives [Data: Reports (52)].

**4. Continuous Warfare**

Oceania is engaged in a perpetual state of war with Eastasia and Eurasia. This continuous warfare serves to maintain the Party's control over the population and justify its oppressive policies [Data: Reports (211, 178, 214)]. The war consumes surplus goods, maintains a hierarchical structure, and impacts the mental states of individuals, ensuring that the populace remains divided and distracted [Data: Reports (211, 178, 214, 208)].

**5. Rebellion and Resistance**

Despite the oppressive regime, themes of rebellion and resistance are present, as seen through characters like Winston and Julia. Winston's clandestine activities, such as his relationship with Julia and his hope in the Proles, reflect his desire to rebel against the Party's oppressive regime [Data: Reports (141, 183, 151, 182, 101, 186)]. The Brotherhood represents an underground network aiming to overthrow the state of Oceania, highlighting the existence of resistance within the oppressive regime [Data: Reports (211, 64, 152)].

**6. Class Struggle and Social Hierarchy**

The distinction between the Inner Party, Outer Party, and Proles highlights the rigid social hierarchy within Oceania. The Party's control over the Proles and the limited privileges of the Outer Party members emphasize the theme of class struggle [Data: Reports (141, 66, 185, 211, 182, 124)]. The Proles, despite their subjugation, are seen as a potential source of hope and rebellion [Data: Reports (182, 64)].

**7. Language as a Tool of Control**

Newspeak, a language created by The Party, is designed to limit the range of thought and eliminate any possibility of rebellious thoughts. By controlling language, The Party effectively controls thought, making it impossible for individuals to conceptualize or express subversive ideas [Data: Reports (177, 179, 181, 149, 114)].

**8. Fear and Psychological Torture**

The Party uses fear and psychological torture to maintain control, exemplified by the use of Room 101, where individuals are subjected to their worst fears. Winston's torture with the cage containing rats demonstrates the regime's ability to break individuals' spirits [Data: Reports (169, 145, 224, 220)].

These themes collectively illustrate the oppressive nature of the regime in *1984* and its impact on personal freedom, truth, and reality. The Party's extensive use of surveillance, psychological manipulation, and control over information ensures its dominance and the suppression of any potential dissent.

Local Search

A local search generates answers by combining data from the knowledge-graph with text chunks of the raw documents. This method is suitable for questions that require an understanding of specific entities mentioned in the documents (e.g. Who does Winston interact with?). The following notebook contains more information about a local search with Python: https://github.com/microsoft/graphrag/blob/a22003c302bf4ffeefec76a09533acaf114ae7bb/examples_notebooks/local_search.ipynb#L43

To do a local search from the CLI, use the following command:

python -m graphrag.query \
--root . \
--method local \
"Who is Winston? Who does he interact with and why?"

A local search uses similarity search to find entities in the graph as entry points. Once these entry points are found, the graph is used to find further entities of interest. A local search requires the LanceDB embeddings store while a global search does not.

The response to the above question:

### Who is Winston?

Winston is a complex character from George Orwell's novel "Nineteen Eighty-Four." He is a member of the Outer Party and works at the Ministry of Truth, where his job involves altering historical records to fit the Party's propaganda. Winston is deeply resentful of the Party and Big Brother, harboring a sense of intellectual inferiority and mental domination by figures like O'Brien. His life is marked by intense fear, paranoia, and physical and emotional suffering, particularly during his interactions with O'Brien, who tortures and interrogates him [Data: Entities (8, 3)].

Winston's reflections on reality, power, and the nature of suffering are central to his character. He contemplates the symbolic meaning of chess, the principles of Ingsoc, and the dominion of The Party. His dreams and memories, including the tragic death of his mother and sister, the bells of St. Clement's, and his early childhood, provide a poignant backdrop to his internal struggles [Data: Entities (8)].

### Interactions and Relationships

#### Julia
Winston's most significant relationship is with Julia, a fellow Party member. Despite the risks, they engage in a love affair, renting a room from Mr. Charrington for their secret meetings. Julia represents a source of intimacy and rebellion for Winston, as they navigate their dangerous liaison under the watchful eyes of The Party [Data: Entities (8)].

#### O'Brien
O'Brien is another crucial figure in Winston's life. Initially, Winston feels a sense of connection and admiration towards O'Brien, hoping that his political orthodoxy is not perfect. However, O'Brien ultimately becomes his torturer, subjecting Winston to severe psychological and physical pain. Despite this, Winston experiences moments of connection and even a peculiar intimacy with O'Brien [Data: Entities (8)].

#### Mr. Charrington
Mr. Charrington is the shop owner who rents a room to Winston and Julia for their secret meetings. Initially, he appears discreet and non-judgmental, but later reveals a more authoritative and alert persona, indicating his role in the Party's surveillance [Data: Entities (317)].

#### Other Characters
Winston also interacts with various other characters, such as Syme, Parsons, and the old man in the pub. These interactions reveal his curiosity about the past and the changes brought about by The Party. For instance, Syme is a colleague who discusses the principles of Newspeak with Winston, while Parsons is a fellow employee at the Ministry of Truth [Data: Entities (8, 83)].

### Conclusion

Winston is a deeply reflective and observant character, constantly grappling with the oppressive nature of The Party and his own internal conflicts. His interactions with Julia, O'Brien, Mr. Charrington, and others provide a multifaceted view of his struggles and the dystopian world he inhabits. Through these relationships, Winston's character is fleshed out, revealing the complexities of life under totalitarian rule.

Note that the output contains references to entities that were found. For example, the section about Mr. Charrington specifies entity 317. In the Gephi Data Laboratory, we can easily find that entity using the human_readable_id:

Finding referenced entities

When you are building an application, the UI could provide links to the entities for further inspection.

Conclusion

Retrieval-Augmented Generation (RAG) has emerged as a powerful technique for enhancing language models’ ability to answer questions about specific datasets. While baseline RAG excels at answering specific queries by retrieving relevant text chunks, it struggles with global questions that require a comprehensive understanding of the entire dataset. To address this limitation, Microsoft has introduced Graph RAG, an innovative approach that leverages knowledge graphs and community summaries to provide more effective answers to global queries.

Graph RAG’s indexing process involves chunking documents, extracting entities and relationships, building a graph structure, and generating community summaries. This approach allows for more nuanced and context-aware responses to both local and global queries. While Graph RAG offers significant advantages in handling complex, dataset-wide questions, it’s important to note that it comes with higher computational costs and requires careful prompt engineering to achieve optimal results. As the field of AI continues to evolve, techniques like Graph RAG represent an important step towards more comprehensive and insightful information retrieval and generation systems.

Embracing the Age of AI Transformation: A New Era for Innovation and Expertise

⚠️ This is an AI-generated article based on a video to transcript generator I created to summarise Microsoft Build sessions. This article is used as an example for a LinkedIn post.

This article is based on the Microsoft Build keynote delivered on Tuesday, May 21st, 2024. It was created with gpt-4o. The post is unedited and as such contains errors such as PHY models instead of Phi etc… Most errors come from errors in the transcription phase.

Here’s the generated content ⬇️

As the digital age advances, we’re witnessing an unprecedented transformation powered by artificial intelligence (AI). Three decades ago, the vision was “information at your fingertips.” Today, we stand on the cusp of a new era: “expertise at your fingertips.” This shift from mere access to information to access to actionable expertise is revolutionizing industries across the globe. From farms to classrooms, boardrooms to labs, AI is proving to be a universal tool for everyone, everywhere.

The Evolution of AI: From Information to Expertise

In the early days of computing, the primary challenge was to make computers understand us rather than us having to understand them. We dreamed of a world where vast amounts of data could be harnessed to help us reason, plan, and act more effectively. Fast forward 70 years, and we’re seeing those dreams realized through groundbreaking advancements in AI. This new generation of AI is reshaping every layer of technology, from data center infrastructures to edge devices, enabling distributed, synchronous data parallel workloads.

Scaling Laws: Driving the Intelligence Revolution

Much like Moore’s Law propelled the information revolution, the scaling laws of deep neural networks (DNNs) are now driving the intelligence revolution. These laws, combined with innovative model architectures and data utilization methods, are leading to rapid advancements in AI. The result is a natural, multimodal user interface that supports text, speech, images, and video, along with memory and reasoning capabilities that reduce cognitive load and enhance productivity.

AI in Action: Real-World Impact

The transformative power of AI is not just theoretical. Real-world applications are demonstrating its potential to change lives. Consider the rural Indian farmer who used AI to navigate government farm subsidies, or the developer in Thailand leveraging the latest AI models to optimize workflows. These examples highlight the democratization of AI, where cutting-edge technology developed on one side of the world can directly benefit individuals on the other.

Microsoft Copilot: Your Everyday AI Companion

One of the most exciting developments in this AI revolution is Microsoft Copilot. This platform brings knowledge and expertise directly to users, helping them act on it effectively. Microsoft has introduced several key components to enhance Copilot’s capabilities:

  1. Copilot Plus PCs: The fastest AI-first PCs, equipped with powerful NPUs for lightning-fast local inference, offering unprecedented speed and efficiency.
  2. Windows Copilot Runtime: Making Windows the best platform for building AI applications with local APIs, no-code integrations, and support for over 40 models out of the box.
  3. Azure AI Studio: An end-to-end development environment for building, training, and fine-tuning AI models, now generally available with built-in safety features.

Expanding Horizons: AI Infrastructure and Models

Microsoft is building the most comprehensive AI infrastructure with Azure, scaling AI capacity globally while ensuring sustainability. This includes partnerships with industry leaders like NVIDIA and AMD to provide the best performance and cost-efficiency for AI workloads. Additionally, Microsoft offers a broad selection of foundation models, including GPT-4, trained on Azure, and the new PHY family of small language models designed for efficient on-device inferencing.

Real-Time Intelligence and Fabric Integration

Microsoft Fabric is another game-changer, offering an integrated SaaS platform for data analytics and AI capabilities. With real-time intelligence, Fabric enables instant, actionable insights from streaming data, helping businesses stay proactive and make informed decisions. This platform’s seamless integration with tools like Esri for spatial analytics and Azure AI Search for retrieval-augmented generation (RAG) applications further extends its utility.

Empowering Developers: From Idea to Code

GitHub Copilot, the first major product of the generative AI age, is revolutionizing software development. With over 1.8 million subscribers, Copilot assists developers in their native languages, streamlining the coding process. The new GitHub Copilot extensions allow developers to customize and integrate third-party services, enhancing the overall development experience.

The Future of AI: A Call to Innovate

The advancements in AI are opening up new possibilities for innovation and transformation. As we continue to build and refine these platforms, the real impact will come from the developers and innovators who leverage this technology to create meaningful solutions. This is a call to all developers: embrace this special moment in history, take advantage of the tools at your disposal, and build the future.

Conclusion

The age of AI transformation is here, and it’s redefining how we interact with technology. From personal assistants to team collaborators, from education to healthcare, AI is poised to make a significant impact. Microsoft’s commitment to providing the infrastructure, tools, and platforms necessary for this revolution is clear. Now, it’s up to us to harness this power and drive the next wave of innovation. Welcome to the new era of AI.

Load balancing OpenAI API calls with LiteLLM

If you have ever created an application that makes calls to Azure OpenAI models, you know there are limits to the amount of calls you can make per minute. Take a look at the settings of a GPT model below:

GPT deployment settings

Above, the tokens per minute (TPM) rate limit is set to 60 000 tokens. This translates to about 360 requests per minute. When you exceed these limits, you get 429 Too Many Requests errors.

There are many ways to deal with these limits. A few of the main ones are listed below:

  • You can ask for a PAYGO quota increase: remember that high quotas do not necessarily lead to consistent lower-latency responses
  • You can use PTUs (provisioned throughput units): highly recommended if you want consistently quick responses with the lowest latency. Don’t we all? 😉
  • Your application can use retries with backoffs. Note that OpenAI libraries use automatic retries by default. For Python, it is set to two but that is configurable.
  • You can use multiple Azure OpenAI instances and load balance between them

In this post, we will take a look at implementing load balancing between OpenAI resources with an open source solution called LiteLLM. Note that, in Azure, you can also use Azure API Management. One example is discussed here. Use it if you must but know it is not simple to configure.

A look at LiteLLM

LiteLLM has many features. In this post, I will be implementing it as a standalone proxy, running as a container in Azure Kubernetes Service (AKS). The proxy is part of a larger application illustrated in the diagram below:

LLM-based document processor

The application above has an upload service that allows users to upload a PDF or other supported document. After storing the document in an Azure Storage Account container, the upload service sends a message to an Azure Service Bus topic. The process service uses those messages to process each file. One part of the process is the use of Azure OpenAI to extract fields from the document. For example, a supplier, document number or anything else.

To support the processing of many documents, multiple Azure OpenAI resources are used: one in France and one in Sweden. Both regions have the gpt-4-turbo model that we require.

The process service uses the Python OpenAI library in combination with the instructor library. Instructor is great for getting structured output from documents based on Pydantic classes. Below is a snippet of code:

from openai import OpenAI
import instructor

client = instructor.from_openai(OpenAI(
        base_url=azure_openai_endpoint,
        api_key=azure_openai_key
))

The only thing we need to do is to set the base_url to the LiteLLM proxy. The api_key is configurable. By default it is empty but you can configure a master key or even virtual keys for different teams and report on the use of these keys. More about that later.

The key point here is that LiteLLM is a transparent proxy that fully supports the OpenAI API. Your code does not have to change. The actual LLM does not have to be an OpenAI LLM. It can be Gemini, Claude and many others.

Let’s take a look at deploying the proxy in AKS.

Deploying LiteLLM on Kubernetes

Before deploying LiteLLM, we need to configure it via a config file. In true Kubernetes style, let’s do that with a ConfigMap:

apiVersion: v1
kind: ConfigMap
metadata:
  name: litellm-config-file
data:
  config.yaml: |
      model_list: 
        - model_name: gpt-4-preview
          litellm_params:
            model: azure/gpt-4-preview
            api_base: os.environ/SWE_AZURE_OPENAI_ENDPOINT
            api_key: os.environ/SWE_AZURE_OPENAI_KEY
          rpm: 300
        - model_name: gpt-4-preview
          litellm_params:
            model: azure/gpt-4-preview
            api_base: os.environ/FRA_AZURE_OPENAI_ENDPOINT
            api_key: os.environ/FRA_AZURE_OPENAI_KEY
          rpm: 360
      router_settings:
        routing_strategy: least-busy
        num_retries: 2
        timeout: 60                                  
        redis_host: redis
        redis_password: os.environ/REDIS_PASSWORD
        redis_port: 6379
      general_settings:
        master_key: os.environ/MASTER_KEY

The configuration contains a list of models. Above, there are two models with the same name: gpt-4-preview. Each model points to a deployed model in Azure with the same name (can be different) and its own API base and key. For example, the first model uses an API base and API key for my instance in Sweden. However, by using os.environ/ and appending an environment variable, we can tell LiteLLM to use an environment variable. Of course, that means we have to set these environment variables in the LiteLLM container. We will do that later.

When the code in the process service uses the gpt-4-preview model via the proxy, the proxy will perform load balancing based on the router settings.

To spin up more than one instance of LiteLLM, a Redis instance is required. Redis is used to share information between the instances to make routing decisions. The routing strategy is set to least-busy.

Note that retries is set to 2. You can turn off retries in your code and let the proxy handle this for you.

To support mounting the secrets as environment variables, I use a .env file in combination with a secretGenerator in Kustomize:

STORAGE_CONNECTION_STRING=<placeholder for storage connection string>
CONTAINER=<placeholder for container name>
AZURE_AI_ENDPOINT=<placeholder for Azure AI endpoint>
AZURE_AI_KEY=<placeholder for Azure AI key>
AZURE_OPENAI_ENDPOINT=<placeholder for Azure OpenAI endpoint>
AZURE_OPENAI_KEY=<placeholder for Azure OpenAI key>

LLM_LITE_SWE_AZURE_OPENAI_ENDPOINT=<placeholder for LLM Lite SWE Azure OpenAI endpoint>
LLM_LITE_SWE_AZURE_OPENAI_KEY=<placeholder for LLM Lite SWE Azure OpenAI key>

LLM_LITE_FRA_AZURE_OPENAI_ENDPOINT=<placeholder for LLM Lite FRA Azure OpenAI endpoint>
LLM_LITE_FRA_AZURE_OPENAI_KEY=<placeholder for LLM Lite FRA Azure OpenAI key>

TOPIC_KEY=<placeholder for topic key>
TOPIC_ENDPOINT=<placeholder for topic endpoint>
PUBSUB_NAME=<placeholder for pubsub name>
TOPIC_NAME=<placeholder for topic name>
SB_CONNECTION_STRING=<placeholder for Service Bus connection string>

REDIS_PASSWORD=<placeholder for Redis password>
MASTER_KEY=<placeholder for Cosmos DB master key>

POSTGRES_DB_URL=postgresql://USER:PASSWORD@SERVERNAME-pg.postgres.database.azure.com:5432/postgres

There are many secrets here. Some are for LiteLLM, although weirdly prefixed with LLM_LITE instead. I do that sometimes! The others are to support the upload and process services.

To get these values into secrets, I use the following kustomization.yaml:

apiVersion: kustomize.config.k8s.io/v1beta1
kind: Kustomization
namespace: inv-demo


resources:
- namespace.yaml
- pubsub.yaml
- upload.yaml
- process.yaml
- llmproxy.yaml
- redis.yaml

secretGenerator:
- name: invoices-secrets
  envs:
  - .env
  
generatorOptions:
  disableNameSuffixHash: true

The secretGenerator will create a secret called invoices-secrets in the inv-demo namespace. We can reference the secrets in the LiteLLM Kubernetes deployment:

apiVersion: apps/v1
kind: Deployment
metadata:
  name: litellm-deployment
  labels:
    app: litellm
spec:
  replicas: 2
  selector:
    matchLabels:
      app: litellm
  template:
    metadata:
      labels:
        app: litellm
    spec:
      containers:
      - name: litellm
        image: ghcr.io/berriai/litellm:main-latest
        args:
        - "--config"
        - "/app/proxy_server_config.yaml"
        ports:
        - containerPort: 4000
        volumeMounts:
        - name: config-volume
          mountPath: /app/proxy_server_config.yaml
          subPath: config.yaml
        env:
        - name: SWE_AZURE_OPENAI_ENDPOINT
          valueFrom:
            secretKeyRef:
              name: invoices-secrets
              key: LLM_LITE_SWE_AZURE_OPENAI_ENDPOINT
        - name: SWE_AZURE_OPENAI_KEY
          valueFrom:
            secretKeyRef:
              name: invoices-secrets
              key: LLM_LITE_SWE_AZURE_OPENAI_KEY
        - name: FRA_AZURE_OPENAI_ENDPOINT
          valueFrom:
            secretKeyRef:
              name: invoices-secrets
              key: LLM_LITE_FRA_AZURE_OPENAI_ENDPOINT
        - name: FRA_AZURE_OPENAI_KEY
          valueFrom:
            secretKeyRef:
              name: invoices-secrets
              key: LLM_LITE_FRA_AZURE_OPENAI_KEY
        - name: MASTER_KEY
          valueFrom:
            secretKeyRef:
              name: invoices-secrets
              key: MASTER_KEY
        - name: DATABASE_URL
          valueFrom:
            secretKeyRef:
              name: invoices-secrets
              key: POSTGRES_DB_URL
      volumes:
        - name: config-volume
          configMap:
            name: litellm-config-file

The ConfigMap content is mounted as /app/proxy_server_config.yaml. You need to specify the config file via the --config parameter, supplied in args.

Next, we simply mount all the environment variables that we need. The LiteLLM ConfigMap uses several of those via the os.environ references. There is also a DATABASE_URL that is not mentioned in the ConfigMap. The URL points to a PostgreSQL instance in Azure where information is kept to support the LiteLLM dashboard and other settings. If you do not want the dashboard feature, you can omit the database URL.

There’s one last thing: the process service needs to connect to LiteLLM via Kubernetes internal networking. Of course, that means we need a service:

apiVersion: v1
kind: Service
metadata:
  name: litellm-service
spec:
  selector:
    app: litellm
  ports:
  - protocol: TCP
    port: 80
    targetPort: 4000
  type: ClusterIP

With this service definition, the process service can set the OpenAI base URL as http://litellm-service to route all requests to the proxy via its internal IP address.

As you can probably tell from the kustomization.yaml file, the ConfigMap, Deployment and Service are in llmproxy.yaml. The other YAML files do the following:

  • namespace.yaml: creates the inv-demo namespace
  • upload.yaml: deploys the upload service (written in Python and uses FastAPI, 1 replica))
  • process.yaml: deploys the process service (written in Python as a Dapr grpc service, 2 replicas)
  • pubsub.yaml: creates a Dapr pubsub component that uses Azure Service Bus
  • redis.yaml: creates a standalone Redis instance to support multiple replicas of the LiteLLM proxy

To deploy all of the above, you just need to run the command below:

kubectl apply -k .

⚠️ Although this can be used in production, several shortcuts are taken. One thing that would be different is secrets management. Secrets would be in a Key Vault and made available to applications via the Secret Store CSI driver or other solutions.

With everything deployed, I see the following in k9s:

The view from k9s

As a side note, I also use Diagrid to provide insights about the use of Dapr on the cluster:

upload and process are communicating via pubsub (Service Bus)

Dapr is only used between process and upload. The other services do not use Dapr and, as a result, are not visible here. The above is from Diagrid Conductor Free. As I said…. total side note! 🤷‍♂️

Back to the main topic…

The proxy in action

Let’s see if the proxy uses both Azure OpenAI instances. The dashboard below presents a view of the metrics after processing several documents:

OpenAI usage in France and Sweden

It’s clear that the proxy uses both resources. Remember that this is the least-busy routing option. It picks the deployment with the least number of ongoing calls. Both these instances are only used by the process service so the expectation is a more or less even distribution.

LiteLLM Dashboard

If you configured authentication in combination with providing a URL to a PostGreSQL database, you can access the dashboard. To see the dashboard in action without deploying it, see https://litellm.vercel.app/docs/proxy/demo.

One of the things you can do is creating teams. Below, you see a team called dev which has access to only the gpt-4-preview model with unlimited TPM and RPM:

dev team in LiteLLM

In addition to the team, a virtual key is created and assigned to the team. This virtual key starts with sk- and is used as the OpenAI API key in the process service:

LiteLLM virtual key for the dev team

We can now report on the use of OpenAI by the dev team:

Usage for the dev team

Above, there’s a small section that’s unassigned because I used LiteLLM without a key and a master key before switching to a team-based key.

The idea here is that you can deploy the LiteLLM proxy centrally and hand out virtual keys to teams so they can all access their models via the proxy. We have not tested this in a production setting yet but it is certainly something worth exploring.

Conclusion

I have only scratched the surface of LiteLLM here but my experience with it so far is pretty good. If you want to deploy it as a central proxy server that developers can use to access models, deployment to Kubernetes and other environments with the container image is straightforward.

In this post I used Kubernetes but that is not required. It runs in Container Apps and other container runtimes as well. In fact, you do not need to run it in a container at all. It also works as a standalone application or can be used directly in your Python apps.

There is much more to explore but for now, if you need a transparent OpenAI-based proxy that works with many different models, take a look at LiteLLM.

Use Azure OpenAI on your data with Semantic Kernel

I have written before about Azure OpenAI on your data. For a refresher, see Microsoft Learn. In short, Azure OpenAI on your data tries to make it easy to create an Azure AI Search index that supports advanced search mechanisms like vector search, potentially enhanced with semantic reranking.

On of the things you can do is simply upload your documents and start asking questions about these documents, right from within the Azure OpenAI Chat playground. The screenshot below shows the starting screen of a step-by-step wizard to get your documents into an index:

Upload your documents to Azure OpenAI on your data

Note that whatever option you choose in the wizard, you will always end up with an index in Azure AI Search. When the index is created, you can start asking questions about your data:

Your questions are answered with links to source documents (citations)

Instead of uploading your documents, you can use any Azure AI Search index. You will have the ability to map the fields from your index to the fields Azure OpenAI expects. You will see an example in the Semantic Kernel code later and in the next section.

Extensions to the OpenAI APIs

To make this feature work, Microsoft extended the OpenAI APIs. By providing extra information to the API about Azure AI Search, mapped fields, type of search, etc… the APIs retrieve relevant content, add that to the prompt and let the model answer. It is retrieval augmented generation (RAG) but completely API driven.

The question I asked in the last screenshot was: “Does Redis on Azure support vector queries?”. The API creates an embedding for that question to find similar vectors. The vectors are stored together with their source text (from your documents). That text is added as context to the prompt, allowing the chosen model to answer as shown above.

Under the hood, the UI makes a call to the URL below:

{openai.api_base}/openai/deployments/{deployment_id}/extensions/chat/completions?api-version={openai.api_version}

This looks similar to a regular chat completions call except for the extensions part. When you use this extension API, you can supply extra information. Using the Python OpenAI packages, the extra information looks like below:

dataSources=[
  {
    "type": "AzureCognitiveSearch",
    "parameters": {
      "endpoint": "'$search_endpoint'",
      "indexName": "'$search_index'",
      "semanticConfiguration": "default",
      "queryType": "vectorSimpleHybrid",
      "fieldsMapping": {
        "contentFieldsSeparator": "\n",
        "contentFields": [
          "Content"
        ],
        "filepathField": null,
        "titleField": "Title",
        "urlField": "Url",
        "vectorFields": [
          "contentVector"
        ]
   ... many more settings (shortened here)

The dataSources section is used by the extension API to learn about the Azure AI Search resource, the API key to use (not shown above), the type of search to perform (hybrid) and how to map the fields in your index to the fields this API expects. For example, we can tell the API about one or more contentFields. Above, there is only one such field named Content. That’s the name of a field in your chosen index.

You can easily get a Python code example to use this API from the Chat Completions playground:

Get sample code by clicking View code in the playground

How to do this in Semantic Kernel?

In what follows, I will show snippets of a full sample you can find on GitHub. The sample uses Streamlit to provide the following UI:

Sample Streamlit app

Above, (1) is the original user questions. Using Azure OpenAI on your data, we use Semantic Kernel to provide a response with citations (2). As an extra, all URLs returned by the vector search are shown in (3). They are not reflected in the response because not all retrieved results are relevant.

Let’s look at the code now…

st.session_state.kernel = sk.Kernel()

# Azure AI Search integration
azure_ai_search_settings = sk.azure_aisearch_settings_from_dot_env_as_dict()
azure_ai_search_settings["fieldsMapping"] = {
    "titleField": "Title",
    "urlField": "Url",
    "contentFields": ["Content"],
    "vectorFields": ["contentVector"], 
}
azure_ai_search_settings["embeddingDependency"] = {
    "type": "DeploymentName",
    "deploymentName": "embedding"  # you need an embedding model with this deployment name is same region as AOAI
}
az_source = AzureAISearchDataSources(**azure_ai_search_settings, queryType="vectorSimpleHybrid", system_message=system_message) # set to simple for text only and vector for vector
az_data = AzureDataSources(type="AzureCognitiveSearch", parameters=az_source)
extra = ExtraBody(dataSources=[az_data]) if search_data else None

Above we create a (semantic) kernel. Don’t bother with the session state stuff, that’s specific to Streamlit. After that, the code effectively puts together the Azure AI Search information to be added to the extension API:

  • get Azure AI Search settings from a .env file: contains the Azure AI Search endpoint, API key and index name
  • add fieldsMapping to the Azure AI Search settings: contentFields and vectorFields are arrays; we need to map the fields in our index to the fields that the API expects
  • add embedding information: the deploymentName is set to embedding; you need an embedding model with that name in the same region as the OpenAI model you will use
  • create an instance of class AzureAISearchDataSources: creates the Azure AI Search settings and add additional settings such as queryType (hybrid search here)
  • create an instance of class AzureDataSources: this will tell the extension API that the data source is AzureCognitiveSearch with the settings provided via the AzureAISearchDataSources class; other datasources are supported
  • the call to the extension API needs the dataSources field as discussed earlier: the ExtraBody class allows us to define what needs to be added to the POST body of a chat completions call; multiple dataSources can be provided but here, we have only one datasource (of type AzureCognitiveSearch); we will need this extra variable later in our request settings

Note: I have a parameter in my code, search_data. Only if search_data is True, Azure OpenAI on your data should be enabled. If it is false, the variable extra should be None. You will see this variable pop up in other places as well

In Semantic Kernel, you can add one or more services to the kernel. In this case, we only add a chat completions service that points to a gpt-4-preview deployment. A .env file is used to get the Azure OpenAI endpoint, key and deployment.

service_id = "gpt"
deployment, api_key, endpoint = azure_openai_settings_from_dot_env(include_api_version=False)
chat_service = sk_oai.AzureChatCompletion(
    service_id=service_id,
    deployment_name=deployment,
    api_key=api_key,
    endpoint=endpoint,
    api_version="2023-12-01-preview" if search_data else "2024-02-01",  # azure openai on your data in SK only supports 2023-12-01-preview
    use_extensions=True if search_data else False # extensions are required for data search
)
st.session_state.kernel.add_service(chat_service)

Above, there are two important settings to make Azure OpenAI on your data work:

  • api_version: needs to be set to 2023-12-01-preview; Semantic Kernel does not support the newer versions at the time of this writing (end of March, 2024). However, this will be resolved soon.
  • use_extensions: required to use the extension API; without it the call to the chat completions API will not have the extension part.

We are not finished yet. We also need to supply the ExtraBody data (extra variable) to the call. That is done via the AzureChatPromptExecutionSettings:

req_settings = AzureChatPromptExecutionSettings(
    service_id=service_id,
    extra_body=extra,
    tool_choice="none" if search_data else "auto", # no tool calling for data search
    temperature=0,
    max_tokens=1000
)

In Semantic Kernel, we can create a function from a prompt with chat history and use that prompt to effectively create the chat experience:

prompt_template_config = PromptTemplateConfig(
    template="{{$chat_history}}{{$user_input}}",
    name="chat",
    template_format="semantic-kernel",
    input_variables=[
        InputVariable(name="chat_history", description="The history of the conversation", is_required=True),
        InputVariable(name="user_input", description="The user input", is_required=True),
    ],
)

# create the chat function
if "chat_function" not in st.session_state:
    st.session_state.chat_function = st.session_state.kernel.create_function_from_prompt(
        plugin_name="chat",
        function_name="chat",
        prompt_template_config=prompt_template_config,
    )

Later, we can call our chat function and provide KernelArguments that contain the request settings we defined earlier, plus the user input and the chat history:

arguments = KernelArguments(settings=req_settings)

arguments["chat_history"] = history
arguments["user_input"] = prompt
response = await st.session_state.kernel.invoke(st.session_state.chat_function, arguments=arguments)

The important part here is that we invoke our chat function. With the kernel’s chat completion service configured to use extensions, and the extra request body field added to the request settings, you effectively use the Azure OpenAI on your data APIs as mentioned earlier.

Conclusion

Semantic Kernel supports Azure OpenAI on your data. To use the feature effectively, you need to:

  • Prepare the extra configuration (ExtraBody) to send to the extension API
  • Enable the extension API in your Azure chat completion service and ensure you use the supported API version
  • Add the ExtraBody data to your AzureChatPromptExecutionSettings together with settings like temperature etc…

Although it should be possible to use Azure OpenAI on your data together with function calling, I could not get that to work. Function calling requires a higher API version, which is not supported by Semantic Kernel in combination with Azure OpenAI on your data yet!

The code on GitHub can be toggled to function mode by setting MODE in .env to anything but search. In that case though, add your data is not used. Be sure to restart the Streamlit app after you change that setting in the .env file. In function mode you can ask about the current time and date. If you provide a Bing api key, you can also ask questions that require a web search.

So you want a chat bot to talk to your SharePoint data?

It’s a common request we hear from clients: “We want a chatbot that can interact with our data in SharePoint!” The idea is compelling – instead of relying on traditional search methods or sifting through hundreds of pages and documents, users could simply ask the bot a question and receive an instant, accurate answer. It promises to be a much more efficient and user-friendly experience.

The appeal is clear:

  • Improved user experience
  • Time savings
  • Increased productivity

But how easy is it to implement a chatbot for SharePoint and what are some of the challenges? Let’s try and find out.

The easy way: Copilot Studio

I have talked about Copilot Studio in previous blog posts. One of the features of Copilot Studio is generative answers. With generative answers, your copilot can find and present information for different sources like web sites or SharePoint data. The high level steps to work with SharePoint data are below:

  • Configure your copilot to use Microsoft Entra ID authentication
  • In the Create generative answers node, in the Data sources field, add the SharePoint URLs you want to work with

From a high level, this is all you need to start asking questions. One advantage of using this feature is that the SharePoint data is accessed on behalf of the user. When generative answers searches for SharePoint data, it only returns information that the user has access to.

It is important to note that the search relies on a call to the Graph API search endpoint (https://graph.microsoft.com/v1.0/search/query) and that only the top three results that come back from this call are used. Generative answers only works with files up to 3MB in size. It is possible that the search returns documents that are larger than 3MB. They would not be processed. If all results are above 3MB, generative answers will return an empty response.

In addition, the user’s question is rewritten to only send the main keywords to the search. The type of search is a keyword search. It is not a similarity search based on vectors.

Note: the type of search will change when Microsoft enables Semantic Index for Copilot for your tenant. Other limitations, like the 3MB size limit, will be removed as well.

Pros:

  • easy to configure (UI)
  • uses only documents the user has access to (Entra ID integration)
  • no need to create a pipeline to process SharePoint data; simply point at SharePoint URLs 🔥
  • an LLM is used “under the hood”; there is no need to setup an Azure OpenAI instance

Cons:

  • uses keyword search which can result in less relevant results
  • does not use vector search and/or semantic reranking (e.g., like in Azure AI Search)
  • number of search results that can provide context is not configurable (maximum 3)
  • documents are not chunked; search can not retrieve relevant pieces of text from a document
  • maximum size is 3MB; if the document is highly relevant to answer the user’s query, it might be dropped because of its size

Although your mileage may vary, the limitations make it hard to build a chat bot that provides relevant and qualitative answers. What can we do to fix that?

Copilot Studio with Azure OpenAI on your data

Copilot Studio has integration with Azure OpenAI on your data. Azure OpenAI on your data makes it easy to create an Azure AI Search index based on your documents. Such an index creates chunks of larger documents and uses vectors to match a user’s query to similar chunks. Such queries usually result in more relevant pieces of text from multiple documents. In addition to vector search, you can combine vector search with keyword search and optionally rerank the search results semantically. In most cases, you want these advanced search options because relevant context is key for the LLM to work with!

The diagram below shows the big picture:

Using AI Search to query documents with vectors

The diagram above shows documents in a storage account (not SharePoint, we will get to that). With Azure OpenAI on your data, you simply point to the storage account, allowing Azure AI Search to build an index that contains one or more document chunks per document. The index contains the text in the chunk and a vector of that text. Via the Azure OpenAI APIs, chat applications (including Copilot Studio) can send user questions to the service together with information about the index that contains relevant content. Behind the scenes, the API searches for similar chunks and uses them in the prompt to answer the user’s question. You can configure the number of chunks that should be put in the prompt. The number is only limited by the OpenAI model’s context limit (8k, 16k, 32k or 128k tokens).

You do not need to write code to create this index. Azure OpenAI on your data provides a wizard to create the index. The image below shows the wizard in Azure AI Studio (https://ai.azure.com):

Azure OpenAI add your data

Above, instead of pointing to a storage account, I selected the Upload files/folder feature. This allows you to upload files to a storage account first, and then create the index from that storage account.

Azure OpenAI on your data is great, but there is this one tiny issue: there is no easy way to point it to your SharePoint data!

It would be fantastic if SharePoint was a supported datasource. However, it is important to realise that SharePoint is not a simple datasource:

  • What credentials are used to create the index?
  • How do you ensure that queries use only the data the user has access to?
  • How do you keep the SharePoint data in sync with the Azure AI Search index? And not just the data, the ACLs (access control lists) too.
  • What SharePoint data do you support? Just documents? List items? Web pages?

The question now becomes: “How do you get SharePoint data into AI Search to improve search results?” Let’s find out.

Creating an AI Search index with SharePoint data

Azure AI Search offers support for SharePoint as a data source. However, it’s important to note that this feature is currently in preview and has been in that state for an extended period of time. Additionally, there are several limitations associated with this functionality:

  • SharePoint .ASPX site content is not supported.
  • Permissions are not automatically ingested into the index. To enable security trimming, you will need to add permission-related information to the index manually, which is a non-trivial task.

In the official documentation, Microsoft clearly states that if you require SharePoint content indexing in a production environment, you should consider creating a custom connector that utilizes SharePoint webhooks in conjunction with the Microsoft Graph API to export data to an Azure Blob container. Subsequently, you can leverage the Azure Blob indexer to index the exported content. This approach essentially means that you are responsible for developing and maintaining your own custom solution.

Note: we do not follow the approach with webhooks because of its limitations

What to do?

When developing chat applications that leverage retrieval-augmented generation (RAG) with SharePoint data, we typically use a Logic App or custom job to process the SharePoint data in bulk. This Logic App or job ingests various types of content, including documents and site pages.

To maintain data integrity and ensure that the system remains up-to-date, we also utilize a separate Logic App or job that monitors for changes within the SharePoint environment and updates the index accordingly.

However, implementing this solution in a production environment is not a trivial task, as there are numerous factors to consider:

  • Logic Apps have limitations when it comes to processing large volumes of data. Custom code can be used as a workaround.
  • Determining the appropriate account credentials for retrieving the data securely.
  • Identifying the types of changes to monitor: file modifications, additions, deletions, metadata updates, access control list (ACL) changes, and more.
  • Ensuring that the index is updated correctly based on the detected changes.
  • Implementing a mechanism to completely rebuild the index when the data chunking strategy changes, typically involving the creation of a new index and updating the bot to utilize the new index. Index aliases can be helpful in this regard.

In summary, building a custom solution to index SharePoint data for chat applications with RAG capabilities is a complex undertaking that requires careful consideration of various technical and operational aspects.

Security trimming

Azure AI Search does not provide document-level permissions. There is also no concept of user authentication. This means that you have to add security information to an Azure AI Search index yourself and, in code, ensure that AI Search only returns results that the logged on user has access to.

Full details are here with the gist of it below:

  • add a security field of type collection of strings to your index; the field should allow filtering
  • in that field, store group Ids (e.g., Entra ID group oid’s) in the array
  • while creating the index, retrieve the group Ids that have at least read access to the document you are indexing; add each group Id to the security field

When you query the index, retrieve the logged on user’s list of groups. In your query, use a filter like the one below:

{
"filter":"group_ids/any(g:search.in(g, 'group_id1, group_id2'))"
}

Above, group_ids is the security field and group_id1 etc… are the groups the user belongs to.

For more detailed steps and example C# code, see https://learn.microsoft.com/en-us/azure/search/search-security-trimming-for-azure-search-with-aad.

If you want changes in ACLs in SharePoint to be reflected in your index as quickly as possible, you need a process to update the security field in your index that is triggered by ACL changes.

Conclusion

Crafting a chat bot that seamlessly works with SharePoint data to deliver precise answers is no simple feat. Should you manage to obtain satisfactory outcomes leveraging generative responses within Copilot Studio, it’s advisable to proceed with that route. Even if you do not use Copilot Studio, you can use Graph API search within custom code.

If you want more accurate search results and switch to Azure AI Search, be mindful that establishing and maintaining the Azure AI Search index, encompassing both SharePoint data and access control lists, can be quite involved.

It seems Microsoft is relying on the upcoming Semantic Index capability to tackle these hurdles, potentially in combination with Copilot for Microsoft 365. When Semantic Index ultimately becomes available, executing a search through the Graph API could potentially fulfill your requirements.

Embedding flows created with Microsoft Prompt Flow in your own applications

A while ago, I wrote about creating your first Prompt Flow in Visual Studio Code. In this post, we will embed such a flow in a Python application built with Streamlit. The application allows you to search for images based on a description. Check the screenshot below:

Streamlit app to search for images based on a description

There are a few things we need to make this work:

  • An index in Azure AI Search that contains descriptions of images, a vector of these descriptions and a link to the image
  • A flow in Prompt Flow that takes a description as input and returns the image link or the entire image as output
  • A Python application (the Streamlit app above) that uses the flow to return an image based on the description

Let’s look at each component in turn.

Azure AI Search Index

Azure AI Search is a search index that supports keyword search, vector search and semantic reranking. You can combine keyword and vector search in what is called a hybrid search. The hybrid search results can optionally be reranked further using a state-of-the-art semantic reranker.

The index we use is represented below:

Index in Azure AI Search
  • Description: contains the description of the image; the image description was generated with the gpt-4-vision model and is larger than just a few words
  • URL: the link to the actual image; the image is not stored in the index, it’s just shown for reference
  • Vector: vector generated by the Azure OpenAI embedding model; it generates 1536 floating point numbers that represent the meaning of the description

Using vectors and vector search allows us to search not just for cat but also for words like kat (in Dutch) or even feline creature.

The flow we will create in Prompt Flow uses the Azure AI Search index to find the URL based on the description. However, because Azure AI Search might return images that are not relevant, we also use a GPT model to make the final call about what image to return.

Flow

In Prompt Flow in Visual Studio Code, we will create the flow below:

Flow we will embed in the Streamlit app

It all starts from the input node:

Input node

The flow takes one input: description. In order to search for this description, we need to convert it to a vector. Note that we could skip this and just do a text search. However, that will not get us the best results.

To embed the input, we use the embedding node:

Embedding node

The embedding node uses a connection called open_ai_connection. This connection contains connection information to an Azure OpenAI resource that hosts the embedding model. The model deployment’s name is embedding. The input to the embedding node is the description from the input. The output is a vector:

Output of embedding node

Now that we have the embedding, we can use a Vector DB Lookup node to perform a vector search in Azure AI Search:

Azure AI Search

Above, we use another connection (acs-geba) that holds the credentials to connect to the Azure AI Search resource. We specify the following to perform the search:

  • index name to search: images-sdk here
  • what text to put in the text_field: the description from the input; this search will be a hybrid search; we search with both text and a vector
  • vector field: the name of the field that holds the vector (textVector field in the images-sdk index)
  • search_params: here we specify the fields we want to return in the search results; name, description and url
  • vector to find similar vectors for: the output from the embedding node
  • the number of similar items to return: top_k is 3

The result of the search node is shown below:

Search results

The result contains three entries from the search index. The first result is the closest to the description from our input node. In this case, we could just take the first result and be done with it. But what if we get results that do not match the description?

To make the final judgement about what picture to return, let’s add an LLM node:

LLM Node

The LLM node uses the same OpenAI connection and is configured to use the chat completions API with the gpt-4 model. We want this node to return proper JSON by setting the response_format to json_object. We also need a prompt, which is a ninja2 template best_image.jinja2:

system:
You return the url to an image that best matches the user's question. Use the provided context to select the image. Return the URL in JSON like so:
{ "url": "the_url_from_search" }

Only return an image when the user question matches the context. If not found, return JSON with the url empty like { "url": "" }

user question:
{{description}}

context : {{search_results}}

The template above sets the system prompt and specifically asks to return JSON. With the response format set to JSON, the word JSON (in uppercase) needs to be in the prompt or you will get an error.

The prompt defines two parameters:

  • description: we connect the description from the input to this parameter
  • search_results: we connect the results from the aisearch node to this parameter

In the screenshot above, you can see this mapping being made. It’s all done in the UI, no code required.

When this node returns an output, it will be in the JSON format we specified. However, that does still not mean that the URL will be correct. The model might still return an incorrect url, although we try to mitigate that in the prompt.

Below is an example of the LLM output when the description is cat:

Model picked the cat picture

Now that we have the URL, I want the flow to output two values:

  • the URL: the URL as a string, not wrapped in JSON
  • the base-64 representation of the image that can we used directly in an HTML IMG tag

We use two Python tools for this and bring the results to the output node. Python tools use custom Python code:

Setting the output

The code in get_image is below:

from promptflow import tool
import json, base64, requests

def url_to_base64(image_url):
    response = requests.get(image_url)
    return 'data:image/jpg;base64,' + base64.b64encode(response.content).decode('utf-8')

@tool
def my_python_tool(image_json: str) -> str:
    url = json.loads(image_json)["url"]

    if url:
        base64_string = url_to_base64(url)
    else:
        base64_string = url_to_base64("https://placehold.co/400/jpg?text=No+image")

    return base64_string

The node executes the function that is marked with the @tool decorator and sends it the output from the LLM node. The code grabs the url and downloads and transforms the image to its base64 representation. You can see how the output from the LLM node is mapped to the image_json parameter below:

linking the function parameter to the LLM output

The code in get_url is similar. It just extracts the url as a string from the input JSON coming from the url.

The output node is the following:

Output node

The output has two properties: data (the base64-encoded image) and the url to the image. Later, in the Python code that uses this flow, the output will be a Python dict with a data and url entry.

Using the flow in your application

Although you can host this flow as an API using either an Azure Machine Learning endpoint or a Docker container, we will simply embed the flow in our Python application and call it like a regular Python function.

Here is the code, which uses Streamlit for the UI:

from promptflow import load_flow
import streamlit as st

# load Prompt Flow from parent folder
flow_path = "../."
f = load_flow(flow_path)

# Streamlit UI
st.title('Search for an image')

# User input
user_query = st.text_input('Enter your query and press enter:')

if user_query:
    # extract url from dict and wrap in img tag
    flow_result = f(description=user_query)
    image = flow_result["data"]
    url = flow_result["url"]

    img_tag = f'<a href="{url}"><img src="{image}" alt="image" width="300"></a>'
     
    # just use markdown to display the image
    st.markdown(f"🌆 Image URL: {url}")
    st.markdown(img_tag, unsafe_allow_html=True)

To load the flow in your Python app as a function:

  • import load_flow from the promptflow module
  • set a path to your flow (relative or absolute): here we load the flow that is in the parent directory that contains flow.dag.yaml.
  • use load_flow to create the function: above the function is called f

When the user enters the query, you can simply use f(description="user's query...") to obtain the output. The output is a Python dict with a data and url entry.

In Streamlit, we can use markdown to display HTML directly using unsafe_allow_html=True. The HTML is simply an <img> tag with the src attribute set to the base64 representation of the image.

Connections

Note that the flow on my system uses two connections: one to connect to OpenAI and one to connect to Azure AI Search. By default, Prompt Flow stores these connections in a SQLite database in the .promptflow folder of your home folder. This means that the Streamlit app work on my machine but will not work anywhere else.

To solve this, you can override the connections in your app. See https://github.com/microsoft/promptflow/blob/main/examples/tutorials/get-started/flow-as-function.ipynb for more information about these overrides.

Conclusion

Embedding a flow as a function in a Python app is one of the easiest ways to use a flow in your applications. Although we used a straightforward Streamlit app here, you could build a FastAPI server that provides endpoints to multiple flows from one API. Such an API can easily be hosted as a container on Container Apps or Kubernetes as part of a larger application.

Give it a try and let me know what you think! 😉

Super fast bot creation with Copilot Studio and the Azure OpenAI Assistants API

In a previous post, I discussed the Microsoft Bot Framework SDK that provides a fast track to deploying intelligent bots with the help of the Assistants API. Yet, the journey doesn’t stop there. Copilot Studio, a low-code tool, introduces an even more efficient approach, eliminating the need for intricate bot coding. It empowers developers to quickly design and deploy bots, focusing on functionality over coding complexities.

In this post, we will combine Copilot Studio with the Assistants API. But first, let’s take a quick look at the basics of Copilot Studio.

Copilot Studio

Copilot Studio, known before as Power Virtual Agents, is part of Microsoft’s Power Platform. It allows anyone to create a bot fast with it’s intent-based authoring experience. To try it out, just click the Try Free button on the Copilot Studio web page.

Note: I will not go into licensing here. I do not have a Phd in Power Platform Licensing yet! 😉

When you create a new bot, you will get the screen below:

New bot creation screen

You simply give your bot a name and a language. Right from the start, you can add Generative AI capabilities by providing a website URL. If that website is searchable by Bing, users can ask questions about content on that website.

However, this does not mean Copilot Studio can carry a conversation like ChatGPT. It simply means that, when Copilot Studio cannot identify an intent, it will search the website for answers and provide the answer to you. You can ask follow-up questions but it’s not a full ChatGPT experience. For example, you cannot say “Answer the following questions in bullet style” and expect the bot to remember that. It will simply throw an error and try to escalate you to a live agent after three tries.

Note: this error & escalate mechanism is a default; you can change that if you wish

So what is an intent? If you look at the screenshot below, you will see some out of the box topics available to your bot.

Topics and Plugins screen

Above, you see a list of topics and plugins. I have not created any plugins so there are only topics: regular topics and system topics. Whenever you send a message, the system tries to find out what your intent is by checking matching phrases defined in a trigger.

If you click on the Greeting topic, you will see the following:

Greeting topic (click to enlarge)

This topic is triggered by a number of phrases. When the user sends a message like Hi!, that message will match the trigger phrases (intent is known). A response message will be sent back: “Hello, how can I help you today?”.

It’s important to realise that no LLM (large language model) is involved here. Other machine learning stuff is at play here.

The behaviour is different when I send a message that is not matched to any of the topics. Because I setup the bot with my website (https://atomic-temporary-16150886.wpcomstaging.com), the following happens when I ask: “What is the OpenAI Assistants API?”

Generative Answers from https://atomic-temporary-16150886.wpcomstaging.com

Check the topic above. We are in the Conversational Boosting topic now. It was automatically created when I added my website in the Generative Answers section during creation:

Boosting topic triggered when intent in not knowsn

If you look closely, you will notice that the trigger is set to On Unknown Intent. This means that this topic is used whenever you type something that cannot be matched to other topics. Behind the scenes, the system searches the website and returns a summary of the search to you, totally driven by Azure OpenAI. You do not need an Azure OpenAI resource to enable this.

This mixing and matching of intents is interesting in several ways:

  • you can catch specific intents and answer accordingly without using an OpenAI model: for example, when a user wants to book a business trip, you can present a form which will trigger an API that talks to an internal booking system
  • to answer from larger knowledge bases, you can add either use a catch-all such as the Conversational Boosting topic or even use custom intents that use the Create Generative Answers node to go to any supported data source

Besides web sites, other data sources are supported such as SharePoint, custom documents or even Azure OpenAI Add your data.

What we want to do is different. We want to use Copilot Studio to provide a full ChatGPT experience. We will not need Generative Answers to do so. Instead, we will use the OpenAI Assistants API behind the scenes.

Copilot Studio and Azure OpenAI Assistants

We want to achieve the following:

  • When a new conversation is started: create a new tread
  • When the user sends a message: add the message to the thread, run the thread and send the response back to Copilot Studio.
  • When the user asks to start over, start a new conversation which starts a new thread

One way of doing this, is to write a small API that can create a thread and add messages to it. Here’s the API I wrote using Python FastAPI:

from fastapi import FastAPI, Depends, HTTPException, status
from fastapi.security.api_key import APIKeyHeader, APIKey
from pydantic import BaseModel
import logging
import uvicorn
from openai import AzureOpenAI
from dotenv import load_dotenv
import os
import time
import json

load_dotenv("../.env")

# Configure logging
logging.basicConfig(level=logging.INFO)
logger = logging.getLogger(__name__)

# Define API key header; set it in ../.env
API_KEY = os.getenv("API_KEY")

# Check for API key
if API_KEY is None:
    raise ValueError("API_KEY environment variable not set")

API_KEY_NAME = "access_token"
api_key_header = APIKeyHeader(name=API_KEY_NAME, auto_error=True)

async def get_api_key(api_key_header: str = Depends(api_key_header)):
    if api_key_header == API_KEY:
        return api_key_header
    else:
        raise HTTPException(
            status_code=status.HTTP_403_FORBIDDEN, detail="Could not validate credentials"
        )

app = FastAPI()

# Pydantic models
class MessageRequest(BaseModel):
    message: str
    thread_id: str

class MessageResponse(BaseModel):
    message: str

class ThreadResponse(BaseModel):
    thread_id: str

# set the env vars below in ../.env
client = AzureOpenAI(
    api_key=os.getenv('AZURE_OPENAI_API_KEY'),
    azure_endpoint=os.getenv('AZURE_OPENAI_ENDPOINT'),
    api_version=os.getenv('AZURE_OPENAI_API_VERSION')
)

# this refers to an assistant without functions
assistant_id = "asst_fRWdahKY1vWamWODyKnwtXxj"

def wait_for_run(run, thread_id):
    while run.status == 'queued' or run.status == 'in_progress':
        run = client.beta.threads.runs.retrieve(
                thread_id=thread_id,
                run_id=run.id
        )
        time.sleep(0.5)

    return run

# Example endpoint using different models for request and response
@app.post("/message/", response_model=MessageResponse)
async def message(item: MessageRequest, api_key: APIKey = Depends(get_api_key)):
    logger.info(f"Message received: {item.message}")

    # Send message to assistant
    message = client.beta.threads.messages.create(
        thread_id=item.thread_id,
        role="user",
        content=item.message
    )

    run = client.beta.threads.runs.create(
        thread_id=item.thread_id,
        assistant_id=assistant_id # use the assistant id defined aboe
    )

    run = wait_for_run(run, item.thread_id)

    if run.status == 'completed':
        messages = client.beta.threads.messages.list(limit=1, thread_id=item.thread_id)
        messages_json = json.loads(messages.model_dump_json())
        message_content = messages_json['data'][0]['content']
        text = message_content[0].get('text', {}).get('value')
        return MessageResponse(message=text)
    else:
        return MessageResponse(message="Assistant reported an error.")


@app.post("/thread/", response_model=ThreadResponse)
async def thread(api_key: APIKey = Depends(get_api_key)):
    thread = client.beta.threads.create()
    logger.info(f"Thread created with ID: {thread.id}")
    return ThreadResponse(thread_id=thread.id)

# Uvicorn startup
if __name__ == "__main__":
    uvicorn.run(app, host="127.0.0.1", port=8324)

Note: you can find this code on GitHub as well: https://github.com/gbaeke/azure-assistants-api/tree/main/api

Some things to note here:

  • I am using an assistant I created in the Azure OpenAI Assistant Playground and reference it by its ID; this assistant does not use any tools or files
  • I require an API key via a custom HTTP header access_token; later Copilot Studio will need this key to authenticate to the API
  • I define two methods: /thread and /message

If you have followed the other posts about the Assistants API, the code should be somewhat self-explanatory. The code focuses on the basics so not a lot of error checking for robustness.

If you run the above code, you can use a .http file in Visual Studio Code to test it. This requires the REST Client extension. Here’s the file:

POST http://127.0.0.1:8324/message
Content-Type: application/json
access_token: 12345678

{
    "message": "How does Copilot Studio work?",
    "thread_id": "thread_S2mwvse5Zycp6BOXNyrUdlaK"
}

###

POST http://127.0.0.1:8324/thread
Content-Type: application/json
access_token: 12345678

In VS Code, with the extension loaded, you will see Send Request links above the POST commands. Click them to execute the requests. Click the thread request first and use the thread ID from the response in the body of the message request.

After you verified that it works, we can expose the API to the outside world with ngrok.

Using ngrok

If you have never used ngrok, download it for your platform. You should also get an authtoken by signing up and providing it to ngrok.

When the API is running, in a terminal window, type ngrok http 8324. You should see something like:

ngrok running

Check the forwarding URL. This is a public URL you can use. We will use this URL from Copilot Studio.

Note: in reality, we would publish this API to container apps or another hosting platform

Using the API from Copilot Studio

In Copilot Studio, I created a new bot without generative answers. The first thing we need to do is to create a thread when a new conversation starts:

In the UI, it looks like below:

Welcoming the user and starting a new thread

You can use the Conversation Start system topic to create the thread. The first section of the topic looks like below:

Starting a new conversation

Above there are three nodes:

  • Trigger node: On Conversation Start
  • Message: welcoming the user
  • Set variable: a global variable is set that’s available to all topics; the variable holds the URL of the API to call; that is the ngrok public url in this case

Below the set variable node, there are two other nodes:

Two last nodes of the Conversation Start topic

The HTTP Request node, unsurprisingly, can do HTTP requests. This is a built-in node in Copilot Studio. We call the /thread endpoint via the URL, which is the global url + “/thread” appended. The method is POST. In Headers and Body, you need to set the access_token header to the API key that matches the one from the code. There is no body to send here. When the request is successful, we save the thread ID to another global variable, global.thread_id. We need that variable is the /message calls later. The variable is of type record and holds the full JSON response from the /thread endpoint.

To finish the topic, we tell the user a new thread has started.

Now that we have a thread, how do we add a message to the thread? In the System Topics, I renamed the Fallback topic to Main intent. It is triggered when the intent is unknown, similar to how generative answers are used by default:

Fallback topic renamed to Main Intent

The topic is similar to the previous one:

Main intent topic

Above, HTTP Request is used again, this time to call the /message endpoint. This time Headers and Body needs some more information. In addition to the access_token header, the request requires a JSON body:

/message request body

The API expects JSON with two fields:

  • message: we capture what the user typed via System.Activity.Text
  • thread_id: stored in Global.thread_id.thread_id. The Global.thread_id variable is of type record (result from the /thread call) and contains a thread_id value. Great naming by yours truly here!

The last node in the topic simply takes the response record from the HTTP Request and sends the message field from that record back to the chat user.

You can now verify if the chat bot works from the Chat pane:

Testing the bot

You can carry on a conversation with the assistant virtually indefinitely. As mentioned in previous posts, the assistants API tries to use up the model’s context window and only starts to trim messages from the thread when the context limit is reached.

If your assistant has tools and function calling, it’s possible it sends back images. The API does not account for that. Only text responses are retrieved.

Note: the API and bot configuration is just the bare minimum to get this to work; there is more work to do to make this fully functional, like showing image responses etc…

Adding a Teams channel

Copilot Studio bots can easily by tied to a channel. One of those channels is Teams. You can also do that with the Bot Framework SDK if you combine it with an Azure Bot resource. But it is easier with Copilot Studio.

Before you enable a channel, ensure your bot is published. Go to Publish (left pane) and click the Publish button.

Note: whenever you start a new ngrok session and update the URL in the bot, publish the bot again

Next, go to Settings and then Channels. I enabled the Teams channel:

Teams channel enabled

In the right pane, there’s a link to open the bot directly in Teams. It could be that does not work in your organisation but it does in mine:

Our Copilot Studio assistant in Teams

Note that it might be needed to restart the conversation if there is something wrong. By default, the chat bot has a Start Over topic. I modified that topic to redirect to Conversation Start. That results in the creation of a new thread:

Redirect to Conversation Start when user types start over or similar phrases

The user can simple type something like Start Over. The bot would respond as follows:

Starting over

Conclusion

If you want to use a low-code solution to build the front-end of an Azure OpenAI Assistant, using Copilot Studio in conjunction with the Assistants API is one way of achieving that.

Today, it does require some “pro-code” as the glue between both systems. I can foresee a future with tighter integration where this is just some UI configuration. I don’t know if the teams are working on this, but I surely would like to see it.

Fast chat bot creation with the OpenAI Assistants API and the Microsoft Bot Framework SDK

This post is part of a series of blog posts about the Azure OpenAI Assistants API. Here are the previous posts:

In all of those posts, we demonstrated the abilities of the Azure OpenAI Assistants API in a Python notebook. In this post, we will build an actual chat application with some help of the Bot Framework SDK.

The Bot Framework SDK is a collection of libraries and tools that let you build, test and deploy bot applications. The target audience is developers. They can write the bot in C#, TypeScript or Python. If you are more of a Power Platform user/developer, you can also use Copilot Studio. I will look at the Assistants API and Copilot Studio in a later post.

The end result after reading this post is a bot you can test with the Bot Framework Emulator. You can download the emulator for your platform here.

When you run the sample code from GitHub and connect the emulator to the bot running on you local machine, you get something like below:

Bot with answers provided by Assistants API

Writing a basic bot

You can follow the Create a basic bot quickstart on Microsoft Learn to get started. It’s a good quickstart and it is easy to follow.

On that page, switch to Python and simply follow the instructions. The end-to-end sample I provide is in Python so using that language will make things easier. At the end of the quickstart, you will have a bot you can start with python app.py. The post also tells you how to connect the Bot Framework Emulator to your bot that runs locally on your machine. The quickstart bot is an echo bot that simply echoes the text you type:

Echo bot in action… oooh exciting 😀

A quick look at the bot code

If you check the bot code in bot.py, you will see two functions:

  • on_members_added_activity: do something when a new chat starts; we can use this to start a new assistant thread
  • on_message_activity: react to a user sending a message; here, we can add the message to a thread, run it, and send the response back to the user

👉 This code uses a tiny fraction of features of the Bot Framework SDK. There’s a huge list of capabilities. Check the How-To for developers, which starts with the basics of sending and receiving messages.

Below is a diagram of the chat and assistant flow:

Assistant Flow

In the diagram, the initial connection triggers on_members_added_activity. Let’s take a look at it:

async def on_members_added_activity(
        self,
        members_added: ChannelAccount,
        turn_context: TurnContext
    ):
        for member_added in members_added:
            if member_added.id != turn_context.activity.recipient.id:
                # Create a new thread
                self.thread_id = assistant.create_thread()
                await turn_context.send_activity("Hello. Thread id is: " + self.thread_id)

The function was modified to create a thread and store the thread.id as a property thread_id of the MyBot class. The function create_thread() comes from a module called assistant.py, which I added to the folder that contains bot.py:

def create_thread():
    thread = client.beta.threads.create()
    return thread.id

Easy enough, right?

The second function, on_message_activity, is used to respond to new chat messages. That’s number 2 in the diagram above.

async def on_message_activity(self, turn_context: TurnContext):
        # add message to thread
        run = assistant.send_message(self.thread_id, turn_context.activity.text)
        if run is None:
            print("Result of send_message is None")
        tool_check = assistant.check_for_tools(run, self.thread_id)
        if tool_check:
            print("Tools ran...")
        else:
            print("No tools ran...")
        message = assistant.return_message(self.thread_id)
        await turn_context.send_activity(message)

Here, we use a few helper methods. It could actually be one function but I decided to break them up somewhat:

  • send_message: add a message to the thread created earlier; we grab the text the user entered in the chat via turn_context.activity.text
  • check_for_tools: check if we need to run a tool (function) like hr_search or request_raise and add tool results to the messages
  • return_message: return the last message from the messages array and send it back to the chat via turn_context.send_activity; that’s number 5 in the diagram

💡 The stateful nature of the Azure OpenAI Assistants API is of great help here. Without it, we would need to use the Chat Completions API and find a way to manage the chat history ourselves. There are various ways to do that but not having to do that is easier!

A look at assistant.py

Check assistant.py on GitHub for the details. It contains the helper functions called from on_message_activity.

In assistant.py, the following happens:

If you have read the previous blog post on retrieval, you should already be familiar with all of the above.

What’s new are the assistant helper functions that get called from the bot.

  • create_thread: creates a thread and returns the thread id
  • wait_for_run: waits for a thread run to complete and returns the run; used internally; never gets called from the bot code
  • check_for_tools: checks a run for required_action, performs the actions by running the functions and returning the results to the assistant API; we have two functions: hr_query and request_raise.
  • send_message: sends a message to the assistant picked up from the bot
  • return_message: picks the latest message from the messages in a thread and returns it to the bot

To get started, this is relatively easy. However, building a chat bot that does exactly what you want and refuses to do what you don’t want is not particularly easy.

Should you do this?

Combining the Bot Framework SDK with OpenAI is a well-established practice. You get the advantages of building enterprise-ready bots with the excellent conversational capabilities of LLMs. At the moment, production bots use the OpenAI chat completions API. Due to the stateless nature of that API you need to maintain the chat history and send it to the API to make it aware of the conversation so far.

As already discussed, the Assistants API is stateful. That makes it very easy to send a message and get the response. The API takes care of chat history management.

As long as the Assistants API does not offer ways to control the chat history by limiting the amount of interactions or summarising the conversation, I would not use this API in production. It’s not recommended to do that anyway because it is in preview (February 2024).

However, as soon as the API is generally available and offers chat history control, using it with the Bot Framework SDK, in my opinion, is the way to go.

For now, as a workaround, you could limit the number of interactions and present a button to start a new thread if the user wants to continue. Chat history is lost at that moment but at least the user will be aware of it.

Conclusion

The OpenAI Assistants API and the Bot Framework SDK are a great match to create chat bots that feel much more natural than with the Bot Framework SDK on its own. The statefulness of the assistants API makes it easier than the chat completions API.

This post did not discuss the ability to connect Bot Framework bots with an Azure Bot Service. Doing so makes it easy to add your bot to multiple channels such as Teams, SMS, a web chat control and much more. We’ll keep that for another post. Maybe! 😀

Retrieval with the Azure OpenAI Assistants API

In two previous blog posts, I wrote an introduction to the Azure OpenAI Assistants API and how to work with custom functions. In this post, we will take a look at an assistant that can answer questions about documents. We will create an HR Assistant that has access to an HR policy document. In addition, we will provide a custom function that employees can use to request a raise.

Retrieval

The OpenAI Assistants API (not the one in Azure) supports a retrieval tool. You can simply upload one or more documents, turn on retrieval and you are good to go. The screenshot below shows the experience on https://platform.openai.com:

Creating an HR Assistant at OpenAI

The important parts above are:

  • the Retrieval tool was enabled
  • Innovatek.pdf was uploaded, making it available to the Retrieval tool

To test the Assistant, we can ask questions in the Playground:

Asking HR-related questions

When asked about company cars, the assistant responds with content from the uploaded pdf file. After upload, OpenAI converted the document to text, chunked it and stored it in vector storage. I believe they even use Azure AI Search to do so. At query time, the vector store returns one or more pieces of text related to the question to the assistant. The assistant uses those pieces of text to answer the user’s question. It’s a typical RAG scenario. RAG stands for Retrieval Augmented Generation.

At the time of writing (February, 2024), the Azure OpenAI Assistants API did not support the retrieval tool. You can upload files but those files can only be used by the code_interpreter tool. That tool can also look in the uploaded files to answer the query but that is very unreliable and slow so it’s not recommended to use it for retrieval tasks.

Can we work around this limitation?

The Azure OpenAI Assistants API was in preview when this post was written. While in preview, limitations are expected. More tools like Web Search and Retrieval will be added as the API goes to general availability.

To work around the limitation, we can do the following ourselves:

  • load and chunk our PDF
  • store the chunks, metadata and embeddings in an in-memory vector store like Chroma
  • create a function that takes in a query and return chunks and metadata as a JSON string
  • use the Assistant API function calling feature to answer HR-related questions using that function

Let’s see how that works. The full code is here: https://github.com/gbaeke/azure-assistants-api/blob/main/files.ipynb

Getting ready

I will not repeat all code here and refer to the notebook. The first code block initialises the AzureOpenAI client with our Azure OpenAI key, endpoint and API version loaded from a .env file.

Next, we setup the Chroma vector store and load our document. The document is Innovatek.pdf in the same folder as the notebook.

from langchain_community.document_loaders import PyPDFLoader
from langchain_openai import AzureOpenAIEmbeddings
from langchain.text_splitter import RecursiveCharacterTextSplitter
from langchain_community.vectorstores import Chroma

pdf = PyPDFLoader("./Innovatek.pdf").load()
text_splitter = RecursiveCharacterTextSplitter(
    chunk_size=1000,
    chunk_overlap=200
)
documents = text_splitter.split_documents(pdf)
print(documents)
print(len(documents))
db = Chroma.from_documents(documents, AzureOpenAIEmbeddings(client=client, model="embedding", api_version="2023-05-15"))

# query the vector store
query = "Can I wear short pants?"
docs = db.similarity_search(query, k=3)
print(docs)
print(len(docs))

If you have ever used LangChain before, this code will be familiar:

  • load the PDF with PyPDFLoader
  • create a recursive character text splitter that splits text based on paragraphs and words as much as possible; check out this notebook for more information about splitting
  • split the PDF in chunks
  • create a Chroma database from the chunks and also pass in the embedding model to use; we use the OpenAI embedding model with a deployment name of embedding; you need to ensure an embedding model with that name is deployed in your region
  • with the db created, we can use the similarity_search method to retrieve 3 chunks similar to the query Can I wear short pants? This returns an array of objects of type Document with properties like page_content and metadata.

Note that you will always get a response from this similarity search, no matter the query. Later, the assistant will decide if the response is relevant.

We can now setup a helper function to query the document(s):

import json

# function to retrieve HR questions
def hr_query(query):
    docs = db.similarity_search(query, k=3)
    docs_dict = [doc.__dict__ for doc in docs]
    return json.dumps(docs_dict)

# try the function; docs array as JSON
print(hr_query("Can I wear short pants?"))

We will later pass the results of this function to the assistant. The function needs to return a string, in this case a JSON dump of the documents array.

Now that we have this setup, we can create the assistant.

Creating the assistant

In the notebook, you will see some sample code that uploads a document for use with an assistant. We will not use that file but it is what you would do to make the file available to the retrieval tool.

In the client.beta.assistants.create method, we provide instructions to tell the assistant what to do. For example, to use the hr_query function to answer HR related questions.

The tools parameter shows how you can provide functions and tools in code rather than in the portal. In our case, we define the following:

  • the request_raise function: allows the user to request a raise, the assistant should ask the user’s name if it does not know; in the real world, you would use a form of authentication in your app to identify the user
  • the hr_query function: performs a similarity search with Chroma as discussed above; it calls our helper function hr_query
  • the code_interpreter tool: needed to avoid errors because I uploaded a file and supply the file ids via the file_ids parameter.

If you check the notebook, you should indeed see a file_ids parameter. When the retrieval tool becomes available, this is how you provide access to the uploaded files. Simply uploading a file is not enough, you need to reference it. Instead of providing the file ids in the assistant, you can also provide them during a thread run.

⚠️ Note that we don’t need the file upload, code_interpreter and file_ids. They are provided as an example of what you would do when the retrieval tool is available.

Creating a thread and adding a message

If you have read the other posts, this will be very familiar. Check the notebook for more information. You can ask any question you want by simply changing the content parameter in the client.beta.threads.messages.create method.

When you run the cell that adds the message, check the run’s model dump. It should indicate that hr_query needs to be called with the question as a parameter. Note that the model can slightly change the parameter from the original question.

⚠️ Depending on the question, the assistant might not call the function. Try a question that is unrelated to HR and see what happens. Even some HR-related questions might be missed. To avoid that, the user can be precise and state the question is HR related.

Call function(s) when necessary

The code block below calls the hr_query or request_raise function when indicated by the assistant’s underlying model. For request_raise we simply return a string result. No real function gets called.

if run.required_action:
    # get tool calls and print them
    # check the output to see what tools_calls contains
    tool_calls = run.required_action.submit_tool_outputs.tool_calls
    print("Tool calls:", tool_calls)

    # we might need to call multiple tools
    # the assistant API supports parallel tool calls
    # we account for this here although we only have one tool call
    tool_outputs = []
    for tool_call in tool_calls:
        func_name = tool_call.function.name
        arguments = json.loads(tool_call.function.arguments)

        # call the function with the arguments provided by the assistant
        if func_name == "hr_query":
            result = hr_query(**arguments)
        elif func_name == "request_raise":
            result = "Request sumbitted. It will take two weeks to review."

        # append the results to the tool_outputs list
        # you need to specify the tool_call_id so the assistant knows which tool call the output belongs to
        tool_outputs.append({
            "tool_call_id": tool_call.id,
            "output": json.dumps(result)
        })

    # now that we have the tool call outputs, pass them to the assistant
    run = client.beta.threads.runs.submit_tool_outputs(
        thread_id=thread.id,
        run_id=run.id,
        tool_outputs=tool_outputs
    )

    print("Tool outputs submitted")

    # now we wait for the run again
    run = wait_for_run(run, thread.id)
else:
    print("No tool calls identified\n")

After running this code in response to the user question about company cars, let’s see what the result is:

Assistant response

The assistant comes up with this response after retrieving several pieces of text from the Chroma query. With the retrieval tool, the response would be similar with one big advantage. The retrieval tool would include sources in its response for you to display however you want. Above, I have simply asked the model to include the sources. The model will behave slightly differently each time unless you give clear instructions about the response format.

Retrieval and large amounts of documents

The retrieval tool of the Assistants API is not built to deal with massive amounts of data. The number of documents and sizes of those documents are limited.

In enterprise scenarios with large knowledge bases, you would use your own search indexes and a data processing pipeline to store your content in these indexes. For Azure customers, the indexes will probably be stored in Azure AI Search, which supports hybrid (text & vector) search plus semantic reranking to come up with the most relevant results.

Conclusion

The Azure OpenAI Assistants API will make it very easy to retrieve content from a limited amount of uploaded documents once the retrieval tool is added to the API.

To work around the missing retrieval tool today, you can use a simple vector storage solution and a custom function to achieve similar results.

Using tools with the Azure OpenAI Assistants API

Introduction

In a previous blog post, I wrote an introduction about the Azure OpenAI Assistants API. As an example, I created an assistant that had access to the Code Interpreter tool. You can find the code here.

In this post, we will provide the assistant with custom tools. These custom tools use the function calling features of more recent GPT models. As a result, these custom tools are called functions in the Assistants API. What’s in a name right?

There are a couple of steps you need to take for this to work:

  • Create an assistant and give it a name and instructions.
  • Define one or more functions in the assistant. Functions are defined in JSON. You need to provide good descriptions for the function and all of its parameters.
  • In your code, detect when the model chooses one or more functions that should be executed.
  • Execute the functions and pass the results to the model to get a final response that uses the function results.

From the above, it should be clear that the model, gpt-3.5-turbo or gpt-4, does not call your code. It merely proposes functions and their parameters in response to a user question.

For instance, if the user asks “Turn on the light in the living room”, the model will check if there is a function that can do that. If there is, it might propose to call function set-lamp with parameters such as the lamp name and maybe a state like true or false. This is illustrated in the diagram below when the call to the function succeeds.

Assistant Function Calling Flow

Creating the assistant in Azure OpenAI Playground

Unlike the previous post, the assistant will be created in Azure OpenAI Playground. Our code will then use the assistant using its unique identifier. In the Azure OpenAI Playground, the Assistant looks like below:

Home Assistant in the portal

Let’s discuss the numbers in the diagram:

  1. Once you save the assistant, you get its ID. The ID will be used in our code later
  2. Assistant name
  3. Assistant instructions: description of what the assistant can do, that it has functions, and how it should behave; you will probably need to experiment with this to let the assistant do exactly what you want
  4. Two function definitions: set_lamp and set_lamp_brightness
  5. You can test the functions in the chat panel. When the assistant detects that a function needs to be called, it will propose the function and its parameters and ask you to provide a result. The result you type is then used to formulate a response like The living room lamp has been turned on.

Let’s take a look at the function definition for set_lamp:

{
  "name": "set_lamp",
  "description": "Turn lamp on or off",
  "parameters": {
    "type": "object",
    "properties": {
      "lamp": {
        "type": "string",
        "description": "Name of the lamp"
      },
      "state": {
        "type": "boolean"
      }
    },
    "required": [
      "lamp",
      "state"
    ]
  }
}

The other function is similar but the second parameter is an integer between 0 and 100. When you notice your function does not get called, or the parameters are wrong, you should try to improve the description of both the function and each of the parameters. The underlying GPT model uses these descriptions to try and match a user question to one or more functions.

Let’s look at some code. See https://github.com/gbaeke/azure-assistants-api/blob/main/func.ipynb for the example notebook.

Using the assistant from your code

We start with an Azure OpenAI client, as discussed in the previous post.

import os
from dotenv import load_dotenv
from openai import AzureOpenAI
load_dotenv()

# Create Azure OpenAI client
client = AzureOpenAI(
    api_key=os.getenv('AZURE_OPENAI_API_KEY'),
    azure_endpoint=os.getenv('AZURE_OPENAI_ENDPOINT'),
    api_version=os.getenv('AZURE_OPENAI_API_VERSION')
)

# assistant ID as created in the portal
assistant_id = "YOUR ASSISTANT ID"

Creating a thread and adding a message

We will add the following message to a new thread: “Turn living room lamp and kitchen lamp on. Set both lamps to half brightness.“.

The model should propose multiple functions to be called in a certain order. The expected order is:

  • turn on living room lamp
  • turn on kitchen lamp
  • set living room brightness to 50
  • set kitchen brightness to 50
# Create a thread
thread = client.beta.threads.create()

import time
from IPython.display import clear_output

# function returns the run when status is no longer queued or in_progress
def wait_for_run(run, thread_id):
    while run.status == 'queued' or run.status == 'in_progress':
        run = client.beta.threads.runs.retrieve(
                thread_id=thread_id,
                run_id=run.id
        )
        time.sleep(0.5)

    return run


# create a message
message = client.beta.threads.messages.create(
    thread_id=thread.id,
    role="user",
    content="Turn living room lamp and kitchen lamp on. Set both lamps to half brightness."
)

# create a run 
run = client.beta.threads.runs.create(
    thread_id=thread.id,
    assistant_id=assistant_id # use the assistant id defined in the first cell
)

# wait for the run to complete
run = wait_for_run(run, thread.id)

# show information about the run
# should indicate that run status is requires_action
# should contain information about the tools to call
print(run.model_dump_json(indent=2))

After creating the thread and adding a message, we use a slightly different approach to check the status of the run. The wait_for_run function keeps running as long as the status is either queued or in_progress. When it is not, the run is returned. When we are done waiting, we dump the run as JSON.

Here is where it gets interesting. A run has many properties like created_at, model and more. I our case, we expect a response that indicates we need to take action by running one or more functions. This is indicated by the presence of the required_action property. It actually will ask for tool outputs and will present a list of tool calls to perform (tool, function, whatever… 😀). Here’s a JSON snippet as part of the run JSON dump:

"required_action": {
    "submit_tool_outputs": {
      "tool_calls": [
        {
          "id": "call_2MhF7oRsIIh3CpLjM7RAuIBA",
          "function": {
            "arguments": "{\"lamp\": \"living room\", \"state\": true}",
            "name": "set_lamp"
          },
          "type": "function"
        },
        {
          "id": "call_SWvFSPllcmVv1ozwRz7mDAD6",
          "function": {
            "arguments": "{\"lamp\": \"kitchen\", \"state\": true}",
            "name": "set_lamp"
          },
          "type": "function"
        }, ... more function calls follow...

Above it’s clear that the assistant wants you to submit a tool output for multiple functions. Only the first two are shown:

  • Function set_lamp with arguments for lamp and state as “living room” and ‘true”
  • Function set_lamp with arguments for lamp and state as “kitchen” and ‘true”
  • The other two functions propose set_lamp_brightness for both lamps with brightness set to 50

Defining the functions

Our code will need some real functions to call that actually do something. In this example, we use these two dummy functions. In reality, you could integrate this with Hue or other smart lighting. In fact, I have something like that: https://github.com/gbaeke/openai_assistant.

Here are the dummy functions:

make_error = False

def set_lamp(lamp="", state=True):
    if make_error:
        return "An error occurred"
    return f"The {lamp} is {'on' if state else 'off'}"

def set_lamp_brightness(lamp="", brightness=100):
    if make_error:
        return "An error occurred"
    return f"The brightness of the {lamp} is set to {brightness}"

The functions should return a string that the model can interpret. Be as concise as possible to save tokens…💰

Doing the tool/function calls

In the next code block, we check if the run requires action, get the tool calls we need to do and then iterate through the tool_calls array. At each iteration we check the function name, call the function and add the result to a results array. The results array is then passed to the model. Check out the code below and its comments:

import json

# we only check for required_action here
# required action means we need to call a tool
if run.required_action:
    # get tool calls and print them
    # check the output to see what tools_calls contains
    tool_calls = run.required_action.submit_tool_outputs.tool_calls
    print("Tool calls:", tool_calls)

    # we might need to call multiple tools
    # the assistant API supports parallel tool calls
    # we account for this here although we only have one tool call
    tool_outputs = []
    for tool_call in tool_calls:
        func_name = tool_call.function.name
        arguments = json.loads(tool_call.function.arguments)

        # call the function with the arguments provided by the assistant
        if func_name == "set_lamp":
            result = set_lamp(**arguments)
        elif func_name == "set_lamp_brightness":
            result = set_lamp_brightness(**arguments)

        # append the results to the tool_outputs list
        # you need to specify the tool_call_id so the assistant knows which tool call the output belongs to
        tool_outputs.append({
            "tool_call_id": tool_call.id,
            "output": json.dumps(result)
        })

    # now that we have the tool call outputs, pass them to the assistant
    run = client.beta.threads.runs.submit_tool_outputs(
        thread_id=thread.id,
        run_id=run.id,
        tool_outputs=tool_outputs
    )

    print("Tool outputs submitted")

    # now we wait for the run again
    run = wait_for_run(run, thread.id)
else:
    print("No tool calls identified\n")

# show information about the run
print("Run information:")
print("----------------")
print(run.model_dump_json(indent=2), "\n")

# now print all messages in the thread
print("Messages in the thread:")
print("-----------------------")
messages = client.beta.threads.messages.list(thread_id=thread.id)
print(messages.model_dump_json(indent=2))

At the end, we dump both the run and the messages JSON. The messages should indicate some final response from the model. To print the messages in a nicer way, you can use the following code:

import json

messages_json = json.loads(messages.model_dump_json())

def role_icon(role):
    if role == "user":
        return "👤"
    elif role == "assistant":
        return "🤖"

for item in reversed(messages_json['data']):
    # Check the content array
    for content in reversed(item['content']):
        # If there is text in the content array, print it
        if 'text' in content:
            print(role_icon(item["role"]),content['text']['value'], "\n")
        # If there is an image_file in the content, print the file_id
        if 'image_file' in content:
            print("Image ID:" , content['image_file']['file_id'], "\n")

In my case, the output was as follows:

Question and final model response (after getting tool call results)

I set make_error to True. In that case, the tool responses indicate an error at every call. The model reports that back to the user.

What makes this unique?

Function calling is not unique to the Assistants API. Function calling is a feature of more recent GPT models, to allow those models to propose one or more function to call from your code. You can simply use the Chat Completion API to pass in your function descriptions in JSON.

If you use frameworks like Semantic Kernel or LangChain, you can use function calling with the abstractions that they provide. In most cases that means you do not have to create the function JSON description. Instead, you just write your functions in native code and annotate them as a tool or make them part of a plugin. You can then pass a list of tools to an agent or plugins to a kernel and you’re done! In fact, LangChain (and soon Semantic Kernel) already supports the Assistant API.

One of the advantages that the Assistants API has, is the ability to define all your functions within the assistant. You can do that with code but also via the portal. The Assistants API also makes it a bit simpler to process the tool responses although the difference is not massive.

Being able to test your functions in the Assistant Playground is a big benefit as well.

Conclusion

Function calling in the Assistants API is not very different from function calling in the Chat Completion API. It’s nice you can create and update your function definitions in the portal and directly try them in the chat panel. Working with the tool calls and tool responses is also a bit easier.