Deploying a multi-agent solution with MCP and A2A to Azure Container Apps

In previous posts, we discussed multi-agent scenarios, how A2A servers work (here and here) and how to deploy the infrastructure to host a multi-agent application on Azure with Azure Container Apps and AI Foundry.

In this post, we will take a look at deploying the different components of the solution as containers in Azure Container Apps. This is what we will build:

Multi-agent solution with MCP and A2A

There are four main components:

ComponentDescription
Conversation AgentPresents a chat interface to the user. Built with Chainlit and Semantic Kernel. Uses an OpenAI model. This could be switched to an Azure OpenAI model easily.

The agent uses two tools, rag and web, hosted by the MCP server.
MCP Tools ServerMCP server built with Python FastMCP. It exposes two tools, web and rag. The tools use an A2A client to interact with the A2A servers for the web and rag agents.

Not exposed to the Internet. Used to demonstrate MCP and A2A together. We could have called the A2A servers directly from the conversation agent without MCP.
A2A Server for Foundry Agent (does RAG)This agent uses an Azure AI Foundry Agent with a hosted file-based RAG tool to provide answers about Contoso products.

Not exposed to the Internet. Communicates privately with the Azure AI Foundry project.
A2A Server for OpenAI Agent (does web searches)This agent uses an OpenAI Agent SDK agent with the hosted web search tool.

Not exposed to the Internet. Communicates over the Internet with the OpenAI backend. This could easily be replaced with an Azure AI Foundry Agent that uses Bing Search. As this is an example about A2A, using a different technology makes more sense. 😊

Before delving into the four different components, it is important to know that the mcp, web and rag containers do not use their internal ingresses to communicate over TLS. That means that the mcp container for example, will talk to the web container using http://ca-web instead of something like https://ca-web.internal.ACA_environment_default_domain.

There is something to be said for using messaging to facilitate communication between agents. They are a form of microservices after all. In this example however, all communication is synchronous and uses HTTP.

This is a technical example that could be implemented in a single in-process agent with two tools. However, the emphasis is on multi-agent communication across process boundaries with Google’s Agent2Agent protocol.

Let’s gets started with the Conversation Agent!

Conversation Agent

The conversation agent maintains a conversation with the end user and keeps track of chat history. The agent, written in Semantic Kernel, has two tools:

  • web-search: uses the OpenAI Agent A2A server to search the web via OpenAI’s hosted web search tool
  • rag-search: uses the Azure AI Foundry A2A server to search for Contoso projects via a hosted RAG tool

The user interface to the agent is provided by Chainlit:

Chainlit UI

Above, I asked for information about a project. The agent is configured to use the rag-search tool to find project information. Under the hood, an A2A Server that wraps an Azure AI Foundry Agent is used to obtain this information. Via a filter, Chainlit supports visualizing when tools are called as can be seen at the top of the screen. It basically has hooks into the kernel object that gets created by Semantic Kernel.

The code for this Chainlit-hosted agent is on GitHub. The code in main.py uses an environment variable, MCP_SERVER_URL, that contains the address of the MCP server. As discussed above this will be http://containername/mcp (e.g., http://ca-mcp/mcp).

Following the typical Semantic Kernel approach, a kernel is created . Here is a snippet of code:

# Create the Semantic Kernel
        kernel = Kernel()
        
        # Add AI service to kernel
        ai_service = OpenAIChatCompletion(ai_model_id="gpt-4o")
        kernel.add_service(ai_service)
        logger.debug("Kernel and AI service initialized successfully")
        
        # Add MCP tools plugin to kernel (uses global client)
        tools_plugin = MCPToolsPlugin()
        kernel.add_plugin(tools_plugin, plugin_name="mcp_tools")
        logger.debug("MCP tools plugin added to kernel")

Note that we are not using Semantic Kernel’s built-in support for remote MCP servers that use streamable HTTP. Instead, we create a plugin via the MCPToolsPlugin class. That class defines two kernel functions, rag_search and web_search. In such a function, you can do what you want. I did not have to use MCP and could have called the A2A servers directly using the A2A client.

In our functions, we do use the MCP client from FastMCP to call the appropriate tool on the MCP server. The call to the A2A servers is implemented in the MCP server’s tools.

⚠️ This approach was chosen to illustrate that even if your framework does not natively support MCP, under the hood this is always LLM function calling. Kernel functions in Semantic Kernel are simply an abstraction on top of function calling. If you use Semantic Kernel’s native support for MCP, the tools on the MCP server would automatically be created as kernel functions. This native support requires much less code.

Now that we have the conversation agent up and running with Chainlit and Semantic Kernel, let’s look at the MCP server.

MCP Server

The conversation agent uses an MCP client (from the FastMCP library) to call tools hosted by the MCP server. This illustrates the separation of tool implementation from agent implementation.

The MCP server is implemented in main.py. In its most basic form, an MCP server with a few tools is really simple. This MCP server just defines two tools: a web tool and a rag tool.

The web tool looks like this:

@mcp.tool()
async def web_tool(query: str) -> str:
    """
    Perform a web search for the given query.
    
    Args:
        query: The search query to perform
        
    Returns:
        Search results as a string
    """
    logger.info(f"Web tool called with query: {query}")
    logger.info(f"Using web A2A agent at: {WEB_A2A_BASE_URL}")
    
    try:
        return await _send_a2a_message(query, WEB_A2A_BASE_URL)
    except Exception as e:
        logger.error(f"Error performing web search: {e}")
        return f"Error performing web search: {str(e)}"

This tool only does one thing: send a message to the A2A server on the address in WEB_A2A_BASE_URL. In Azure Container Apps, this URL is http://ca-web. The rag tool is implemented in a similar way. You can check the code of the _send_a2a_message function on GitHub.

⚠️ The addresses of the A2A servers are supplied to the mcp container app via environment variables WEB_A2A_BASE_URL and RAG_A2A_BASE_URL.

We now have the following implemented:

conversation --tool call--> MCP Server --run tool--> A2A Server

All traffic is synchronous and over http (not https)! Everything depends on the correct tool call being made by the conversation agent and the agents in the A2A servers. The rest is just plumbing! No magic! 😊

A2A Servers

You can check my earlier posts about A2A servers for background information:

It is important to note that the A2A server (rag) uses Azure AI Foundry. To authenticate to AI Foundry, we need to use a managed identity.

The rag container needs the following environment variables:

  • RAG_A2A_BASE_URL: required to set the correct url in the agent card
  • INTERNAL_PORT: port to run on (e.g., 80)
  • FOUNDRY_PROJECT: url to the Foundry project (e.g., https://FOUNDRY-RESOURCE.services.ai.azure.com/api/projects/FOUNDRY-PROJECT
  • ASSISTANT_ID: id of the agent you want to use; needs to exist in Foundry project
  • CLIENT_ID: the client id of the user assigned managed identity; this identity is created in the Bicep script; a role is assigned as well

During deployment of the container apps, a managed identity (that has the client id above) is assigned to the container. In the A2A server code that contains the code to talk to Foundry, this identity is used as follows:

if client_id:
            logger.info(f"Using ManagedIdentityCredential with client ID: {client_id}")
            credential = ManagedIdentityCredential(client_id=client_id)
        else:
            logger.info("Using DefaultAzureCredential")
            credential = DefaultAzureCredential()

This allows for the use of the Azure CLI identity when the rag agent is running on you local machine. Full code is in Agent_Executor.py.

⚠️ If you run the rag A2A server on your local machine, ensure you allow your IP address in the firewall settings of the Azure AI Foundry resource.

Full code for the A2A servers:

Deployment

To make it easy to deploy the containers to the Azure Container Apps environment (discussed in previous post), use the following script: https://github.com/gbaeke/multi_agent_aca/blob/main/deploy_containers.sh

At the top of the script, change the variables to match your environment:

ACR_NAME="SHORT_ACR_NAME"
ACR_URL="SHORT_ACR_NAME.azurecr.io"
RESOURCE_GROUP="RESOURCE_GROUP"
CONTAINER_APP_ENV="CONTAINER_APP_ENV_NAME"
MANAGED_IDENTITY="MANAGED_IDENTITY_NAME"

To deploy, simply run deploy_containers.sh --to-build conversation,mcp,web,rag. This does the following:

  • Builds and pushes the four containers using an ACR Task (no local Docker required)
  • Deploys the four containers with appropriate secrets and environment variables; serets are read from a .env file

Ensure that you have this .env in the same folder with the following values:

OPENAI_API_KEY="your_openai_api_key_here"
# Replace with your actual OpenAI API key

FOUNDRY_PROJECT="your_foundry_project_url"
# The URL of the Foundry project endpoint you're connecting to
# Find it in the properties of the AI Foundry project

ASSISTANT_ID="your_assistant_id_here"
# The unique ID of the agent you're referencing

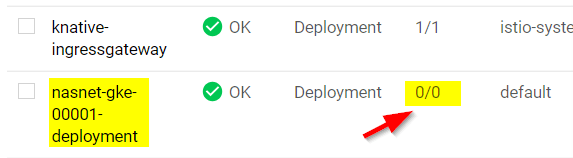
This should deploy the four containers as shown below:

conversation, mcp, web and rag containers

Now grab the ingress URL (aka Application Url) of the conversation container:

Application URL (ingress URL) to the conversation app

Paste that URL in your browser. Hopefully the Chainlit UI is shown. If not, check the following:

  • Chainlit container has the MCP_SERVER_URL set to http://ca-mcp/mcp and also has you OpenAI key in OPENAI_API_KEY
  • MCP container has the WEB_A2A_BASE_URL and RAG_A2A_BASE_URL url set to http://ca-web and http://ca-rag
  • Web container has WEB_A2A_BASE_URL set to http://ca-web and also has an OPENAI_API_KEY
  • Rag container has RAG_A2A_BASE_URL set to http://ca-rag and has environment variables set to use the Azure AI Foundry agent; also check the managed identity of the container has access rights to AI Foundry

Normally these should all be set by both the Bicep and the container deployment script.

Wrapping Up

If you’ve made it this far and tried to implement this yourself, you’ve likely realized how much effort it takes to get everything up and running. About 99% of the work is infrastructure and plumbing; only 1% is actual agent code. In more complex agentic applications, the ratio may shift slightly, but infrastructure will still dominate the effort.

We have not even touched on things like logging, metrics, tracing the end-to-end communication path, load balancing, saving agent state and much, much more.

This brings me back to a key point from an earlier post:


If you can build your multi-agent solution in-process, or use an agent PaaS like Azure AI Foundry, do it.


Only choose the approach I described above when no other viable option exists or when you’re building larger solutions where multiple teams develop agents that must coexist within the same system.

Using tasks with streaming in Google Agent2Agent (A2A)

In a previous post we created a simple A2A agent that uses synchronous message exchange. An A2A client sends a message and the A2A server, via the Agent Executor, responds with a message.

But what if you have a longer running task to perform and you want to inform the client that the task in ongoing? In that case, you can enable streaming on the A2A server and use a task that streams updates and the final result to the client.

The sequence diagram illustrates the flow of messages. It is based on the streaming example in the A2A specification.

A2A tasks with streaming updates

In this case, the A2A client needs to perform a streaming request which is sent to the /message/stream endpoint of the A2A server. The code in the AgentExecutor will need to create a task and provide updates to the client at regular intervals.

⚠️ If you want to skip directly to the code, check out the example on GitHub.

Let’s get into the details in the following order:

  • Writing an agent that provides updates while it is doing work: I will use the OpenAI Agents SDK with its support for agent hooks
  • Writing an AgentExecutor that accepts a message, creates a task and provides updates to the client
  • Updating the A2A Server to support streaming
  • Updating the A2A Client to support streaming

AI Agent that provides updates

Although streaming updates is an integral part of A2A, the agent that does the actual work needs to provide feedback about its progress. That work is up to you, the developer.

In my example, I use an agent created with the OpenAI Agents SDK. This SDK supports AgentHooks that execute at certain events:

  • Agent started/finished
  • Tool call started/finished

The agent class in agent.py on GitHub uses an asyncio queue to emit both the hook events and the agent’s reponse to the caller. The A2A AgentExecutor uses the invoke_stream() method which returns an AsyncGenerator.

You can run python agent.py independently. This should result in the following:

The agent has a tool that returns the current date. The hooks emit the events as shown above followed by the final result.

We can now use this agent from the AgentExecutor and stream the events and final result from the agent to the A2A Client.

AgentExecutor Tasks and Streaming

Instead of simply returning a message to the A2A client, we now need to initiate a long-running task that sends intermediate updates to the client.. Under the hood this uses SSE (Server Sent Events) between the A2A Client and A2A Server.

The file agent_executor.py on GitHub contains the code that makes this happen. Let’s step through it:

message_text = context.get_user_input()  # helper method to extract the user input from the context
        logger.info(f"Message text: {message_text}")

        task = context.current_task
        if not task:
            task = new_task(context.message)
            await event_queue.enqueue_event(task)

Above, we extract the user’s input from the incoming message and we check if the context already contains a task. If not, we create the task and we queue it. This informs the client a task was created and that sse can be used to obtain intermediate results.

Now that we have a task (a new or existing one), the following code is used:

updater = TaskUpdater(event_queue, task.id, task.contextId)
async for event in self.agent.invoke_stream(message_text):
    if event.event_type == StreamEventType.RESPONSE:
        # send the result as an artifact
        await updater.add_artifact(
            [Part(root=TextPart(text=event.data['response']))],
            name='calculator_result',
        )

        await updater.complete()
            
    else:
        await updater.update_status(
        TaskState.working,
        new_agent_text_message(
            event.data.get('message', ''),
            task.contextId,
            task.id,
        ),
    )

We first create a TaskUpdater instance that has the event queue, current task Id and contextId. The task updater is used to provide status updates, complete or even cancel a task.

We then call invoke_stream(query) on our agent and grab the events it emits. If we get a event type of RESPONSE, we create an artifact with the agent response as text and mask the task as complete. In all other cases, we send a status event with updater.update_status(). A status update contains a task state (working in this case) and a message about the state. The message we send is part of the event that is emitted from invoke_stream() and includes things like agent started, tool started, etc…

So in short, to send streaming updates:

  • Ensure your agents emit events of some sort
  • Use those events in the AgentExecutor and create a task that sends intermediate updates until the agent has finished

However, our work is not finished. The A2A Server needs to be updated to support streaming.

A2A Server streaming support

The A2A server code in is main.py on GitHub. To support streaming, we need to update the capabilities of the server:

capabilities = AgentCapabilities(streaming=True, pushNotifications=True)

⚠️ pushNotifications=True is not required for streaming. I include it here to show that sending a push notification to a web hook is also an option.

That’s it! The A2A Server now supports streaming. Easy! 😊

Streaming with the A2A Client

Instead of sending a message to the non-streaming endpoint, the client should now use the streaming endpoint. Here is the code to do that (check test_client.py for the full code):

message_payload = Message(
            role=Role.user,
            messageId=str(uuid.uuid4()),
            parts=[Part(root=TextPart(text=question))],
        )
        streaming_request = SendStreamingMessageRequest(
            id=str(uuid.uuid4()),
            params=MessageSendParams(
                message=message_payload,
            ),
        )
        print("Sending message")

        stream_response = client.send_message_streaming(streaming_request)

To send to the streaming endpoint, the SendStreamingMessageRequest() function is your friend, together with client.send_message_streaming()

We can now grab the responses as they come in:

async for chunk in stream_response:
            # Only print status updates and text responses
            chunk_dict = chunk.model_dump(mode='json', exclude_none=True)
            
            if 'result' in chunk_dict:
                result = chunk_dict['result']
                
                # Handle status updates
                if result.get('kind') == 'status-update':
                    status = result.get('status', {})
                    state = status.get('state', 'unknown')
                    
                    if 'message' in status:
                        message = status['message']
                        if 'parts' in message:
                            for part in message['parts']:
                                if part.get('kind') == 'text':
                                    print(f"[{state.upper()}] {part.get('text', '')}")
                    else:
                        print(f"[{state.upper()}]")
                
                # Handle artifact updates (contain actual responses)
                elif result.get('kind') == 'artifact-update':
                    artifact = result.get('artifact', {})
                    if 'parts' in artifact:
                        for part in artifact['parts']:
                            if part.get('kind') == 'text':
                                print(f"[RESPONSE] {part.get('text', '')}")
                
                # Handle initial task submission
                elif result.get('kind') == 'task':
                    print(f"[TASK SUBMITTED] ID: {result.get('id', 'unknown')}")
                    
                # Handle final completion
                elif result.get('final') is True:
                    print("[TASK COMPLETED]")

This code checks the the type of content coming in:

  • status-update: when AgentExecutor sends a status update
  • artifact-update: when AgentExecutor sends an artifact with the agent’s response
  • task: when tasks are submitted and completed

Running the client and asking what today’s date is, results in the following response:

Streaming is working as intended! But what if you use a client that does not support streaming? That actually works and results in a full response with the agent’s answer in the result field. You would also get a history field that contains the initial user question, including all the task updates.

Here’s a snippet of that result:

{
  "id": "...",
  "jsonrpc": "2.0",
  "result": {
    "artifacts": [
      {
        "artifactId": "...",
        "name": "calculator_result",
        "parts": [
          {
            "kind": "text",
            "text": "Today's date is July 13, 2025."
          }
        ]
      }
    ],
    "contextId": "...",
    "history": [
      {
        "role": "user",
        "parts": [
          {
            "kind": "text",
            "text": "What is today's date?"
          }
        ]
      },
      {
        "role": "agent",
        "parts": [
          {
            "kind": "text",
            "text": "Agent 'CalculatorAgent' is starting..."
          }
        ]
      }
    ],
    "id": "...",
    "kind": "task",
    "status": {
      "state": "completed"
    }
  }
}

Wrapping up

You have now seen how to run longer running tasks and provide updates along the way via streaming. As long as your agent code provides status updates, the AgentExecutor can create a task and provide task updates and the task result to the A2A Server which uses SSE to send them to the A2A Client.

In an upcoming post, we will take a look at running a multi-agent solution in the Azure cloud.

Google’s A2A: taking a closer look

In the previous post, I talked about options to build multi-agent solutions. The last option used Google’s A2A. A2A provides a wrapper around your agent, basically a JSON-RPC API, that standardizes how you talk to your agent. In this post we take a closer look at the basics of A2A with simple synchronous message exchange.

⚠️ A2A is still in development. We do not use it in production yet!

The idea is to build solutions that look like this (just one of the many possibilities):

The conversation agent is an agent that uses tools to get the job done. It wouldn’t be much of an agent without tools right? The tools are custom tools created by the developer that call other agents to do work. The other agents can be written in any framework and use any development language. How the agent works internally is irrelevant. When the conversation agent detects (via standard function calling) that the RAG tool needs to be executed, that tool will call the RAG agent over A2A and return the results.

A2A does not dictate how you build your agent. In the example below, an Azure AI Foundry Agent sits at the core. That agent can use any of its hosted tools or custom tools to get the job done. Because this is a RAG Agent, it might use the built-in Azure AI Search or SharePoint knowledge source. As a developer, you use the Azure AI Foundry SDK or Semantic Kernel to interact with your agent as you see fit. Although you do not have to, it is common to wrap your agent in a class and provide one or more methods to interact with it. For example, an invoke() method and an invoke_streaming() method.

Here is a minimal example for the AI Foundry Agent (the yellow box):

class RAGAgent:
    def __init__(self):
        # INITIALIZATION CODE NOT SHOWN
        self.project = AIProjectClient(
            credential=DefaultAzureCredential(),
            endpoint=endpoint)
        self.agent = self.project.agents.get_agent(agent_id)

    async def invoke(self, question: str) -> str:
        thread = self.project.agents.threads.create()

        message = self.project.agents.messages.create(
            thread_id=thread.id,
            role="user",
            content=question
        )
        run = self.project.agents.runs.create_and_process(
            thread_id=thread.id,
            agent_id=self.agent.id)
        messages = list(self.project.agents.messages.list(thread_id=thread.id, order=ListSortOrder.ASCENDING))

        # ...

This code has nothing to do with Google A2A and could be implemented in many other ways. This is about to change because we will now call the above agent from A2A’s AgentExecutor. The AgentExecutor is a key server‑side interface: when a client sends a message, the A2A server calls execute() on your AgentExecutor instance, and your implementation handles the logic and sends updates via an event queue. Here’s how your agent is used by A2A. When a client sends a message it works its way down to your agent via several A2A components:

It’s important to understand the different types of message exchange in A2A. This post will not look at all of them. You can find more information in the A2A documentation. This post uses synchronous messaging via message/send where the response is a simple message and not a, potentially longer running, task.

Let’s dive into the AgentExecutor (it processes the message we send) and work our way up to the A2A client.

AgentExecutor

Let’s take a look at a bare bones implementation of AgentExecutor that works with plain/text input and output messages and without streaming:

Client --message--> A2A Server --> Agent Executor --> Agent

and

Agent --> Agent Executor --> A2A Server --message--> Client
class RAGAgentExecutor(AgentExecutor):

    def __init__(self):
        self.agent = RAGAgent()

    async def execute(self, context: RequestContext, event_queue: EventQueue):
        message_text = context.get_user_input()
        
        result = await self.agent.invoke(message_text)

        await event_queue.enqueue_event(new_agent_text_message(result))
        
    async def cancel(self, context: RequestContext, event_queue: EventQueue):
        raise Exception("Cancel not supported")

When a message is sent to the A2A server via JSON-RPC, the execute() method of the RAGAgentExecutor is called. At server startup, __init__ creates our AI Foundry RAGAgent which does the actual work.

Inside the execute() method, we assume the context contains a message. We use the get_user_input() helper to extract the message text (user query). We then simply call our agent’s invoke() method with that query and return the result via the event_queue. The A2A server uses an event_queue to provide responses back to the caller. In this case, the response will be a simple plain/text message.

This is probably as simple as it gets and is useful to understand A2A’s basic operation. In many cases though, you might want to return a longer running task instead of a message and provide updates to the client via streaming. That would require creating the task and streaming the task updates to the client. The client would need to be modified to handle this.

But wait, we still need to create the server that uses this AgentExecutor. Let’s take a look!

A2A Server

The A2A Python SDK uses starlette and uvicorn to create the JSON-RPC server. You don’t really need to know anything about this because A2A does this under the covers for you. The server needs to do a couple of things:

  • Create one or more skills: skills represent a specific capability or function your agent offers—for instance, “currency conversion,” “document summary” or “meeting scheduling”.
  • Create an agent card: an agent card is like a business card for your agent; it tells others what the agent can do; the above skills are part of the agent card; the agent card is published at /.well-known/agent.json on the agents domain (e.g., localhost:9999 on your local machine)
  • Create a request handler: the request handler ties the server to the AgentExecutor you created earlier
  • Create the A2AStarletteApplication: it ties the agent card and the request handler together
  • Serve the A2AStarletteApplication with uvicorn on an address and port of your choosing

This is what it looks like in code:

import logging
import uvicorn
from a2a.server.apps import A2AStarletteApplication
from a2a.server.request_handlers import DefaultRequestHandler
from a2a.server.tasks import InMemoryTaskStore
from a2a.types import AgentCapabilities, AgentCard, AgentSkill
from agent_executor import RagAgentExecutor

def main():
    skill = AgentSkill(
        id="rag_skill",
        name="RAG Skill",
        description="Search knowledge base for project information",
        tags=["rag", "agent", "information"],
        examples=["What is project Astro and what tech is used in it?"],
    )
    agent_card = AgentCard(
        name="RAG Agent",
        description="A simple agent that searches the knowledge base for information",
        url="http://localhost:9998/",
        defaultInputModes=["text"],
        defaultOutputModes=["text"],
        skills=[skill],
        version="1.0.0",
        capabilities=AgentCapabilities(),
    )
    request_handler = DefaultRequestHandler(
        agent_executor=RagAgentExecutor(),
        task_store=InMemoryTaskStore(),
    )
    server = A2AStarletteApplication(
        http_handler=request_handler,
        agent_card=agent_card,
    )
    uvicorn.run(server.build(), host="0.0.0.0", port=9998)
if __name__ == "__main__":
    main()

Validating the agent card

When you run the A2A server on your local machine and expose it to the public with ngrok or other tools, you can use https://a2aprotocol.ai/a2a-protocol-validator to validate it. When I do this for the RAG Agent, I get the following:

In JSON, the agent card is as follows:

{
  "capabilities": {},
  "defaultInputModes": [
    "text"
  ],
  "defaultOutputModes": [
    "text"
  ],
  "description": "A simple agent that searches the knowledge base for information",
  "name": "RAG Agent",
  "protocolVersion": "0.2.5",
  "skills": [
    {
      "description": "Search knowledge base for project information",
      "examples": [
        "What is project Astro and what tech is used in it?"
      ],
      "id": "rag_agent",
      "name": "RAG Agent",
      "tags": [
        "rag",
        "agent",
        "information"
      ]
    }
  ],
  "url": "http://Geerts-MacBook-Air-2.local:9998/",
  "version": "1.0.0"
}

Now it is time to actually start talking to the agent.

Using the A2A client to talk to the agent

With the server up and running and the Agent Card verified, how do we exchange messages with the server?

In our case, where the server supports only text and there is no streaming, the client can be quite simple:

  • Create an httpx client and set timeout higher depending on how long it takes to get a response; this client is used by the A2ACardResolver and A2AClient
  • Retrieve the agent card with the A2ACardResolver
  • Create a client with A2AClient. It needs the agent card as input and will use the url in the agent card to connect to the A2A server
  • Create a Message, include it in a MessageRequest and send the MessageRequest with the client. We use the non-streaming message_send() method.
  • Handle the response from the client

The code below shows what this might look like:

import uuid

import httpx
from a2a.client import A2ACardResolver, A2AClient
from a2a.types import (
    AgentCard,
    Message,
    MessageSendParams,
    Part,
    Role,
    SendMessageRequest,
    TextPart,
)

PUBLIC_AGENT_CARD_PATH = "/.well-known/agent.json"
BASE_URL = "http://localhost:9998"


async def main() -> None:
    timeout = httpx.Timeout(200.0, read=200.0, write=30.0, connect=10.0)
    async with httpx.AsyncClient(timeout=timeout) as httpx_client:
        # Initialize A2ACardResolver
        resolver = A2ACardResolver(
            httpx_client=httpx_client,
            base_url=BASE_URL,
        )

        final_agent_card_to_use: AgentCard | None = None

        try:
            print(
                f"Fetching public agent card from: {BASE_URL}{PUBLIC_AGENT_CARD_PATH}"
            )
            _public_card = await resolver.get_agent_card()
            print("Fetched public agent card")
            print(_public_card.model_dump_json(indent=2))

            final_agent_card_to_use = _public_card

        except Exception as e:
            print(f"Error fetching public agent card: {e}")
            raise RuntimeError("Failed to fetch public agent card")

        client = A2AClient(
            httpx_client=httpx_client, agent_card=final_agent_card_to_use
        )
        print("A2AClient initialized")

        message_payload = Message(
            role=Role.user,
            messageId=str(uuid.uuid4()),
            parts=[Part(root=TextPart(text="Is there a project with the word Astro? If so, describe it."))],
        )
        request = SendMessageRequest(
            id=str(uuid.uuid4()),
            params=MessageSendParams(
                message=message_payload,
            ),
        )
        print("Sending message")

        response = await client.send_message(request)
        print("Response:")
        print(response.model_dump_json(indent=2))


if __name__ == "__main__":
    import asyncio

    asyncio.run(main())

Above, the entire response is printed as JSON. That is useful to learn what the responses look like. This is part of the response:

{
  "id": "6cc795d8-fa84-4734-8b5a-dccd3a22142d",
  "jsonrpc": "2.0",
  "result": {
    "contextId": null,
    "extensions": null,
    "kind": "message",
    "messageId": "fead200d-0ea4-4ccb-bf1c-ed507b38d79d",
    "metadata": null,
    "parts": [
      {
        "kind": "text",
        "metadata": null,
        "text": "RESPONSE FROM RAG AGENT"
      }
    ],
    "referenceTaskIds": null,
    "role": "agent",
    "taskId": null
  }
}

Simply sending the response as a string on the event queue results in a message with one text part. The result from the RAG agent is in the text property. For a longer running task with streaming updates, the response would be quite different.

You can now easily interact with your agent using this client. For example:

  • use the client in any application (need not be an agent)
  • use the client in a workflow engine like LangGraph
  • use the client in an agent tool; the agent can be written in any framework; when the agent identifies a tool call is needed, the tool is run which contains A2AClient code to interact with the A2A Agent

The entire flow

The diagram below shows the end-to-end flow:

Try it yourself

On GitHub, check https://github.com/gbaeke/multi_agent_aca/tree/main/a2a_simple for a skeleton implementation of a calculator agent. The CalculatorAgent class’s invoke() method always returns “I did not do anything!” It’s up to you to change that!

You can run this A2A server as-is and connect to it with test_client.py. To use an actual agent, update the CalculatorAgent class’s invoke() method with a real agent written in your preferred framework.

Check the README.md for more instructions.

That’s it for this post! In a next one, we will look at a more complex example that streams messages to the client. Stay tuned!

Cloud Run on Google Kubernetes Engine

In this short post, we will take a look at Cloud Run on Google Kubernetes Engine (GKE). To get this to work, you will need to deploy a Kubernetes cluster. Make sure you use nodes with at least 2 vCPUs and 7.5 GB of memory. Take a look here for more details. You will notice that you need to include Istio which will make the option to enable Cloud Run on GKE available.

To create a Cloud Run service on GKE, navigate to Cloud Run in the console and click Create Service. For location, you can select your Kubernetes cluster. In the screenshot below, the default namespace of my cluster gebacr in zone us-central1-a was chosen:

Cloud Run service on GKE

In Connectivity, select external:

External connectivity to the service

In the optional settings, you can specify the allocated memory and maximum requests per container.

When finished, you will see a deployment on your cluster:

Cloud Run Kubernetes deployment (note that the Cloud Run service is nasnet-gke)

Notice that, like with Cloud Run without GKE, the deployment is scaled to zero when it is not in use!

To connect to the service, check the URL given to you by Cloud Run. It will be in the form of: http://SERVICE.NAMESPACE.example.com. For example: http://nasnet-gke.default.example.com. Clearly, we will not be able to connect to that from the browser.

To fix that, you can patch the domain name to something that can be resolved, for instance a xip.io address. First get the external IP of the istio-ingressgateway:

kubectl get service istio-ingressgateway --namespace istio-system

Next, patch the config-domain configmap to replace example.com with <EXTERNALIP>.xip.io

kubectl patch configmap config-domain --namespace knative-serving --patch \
'{"data": {"example.com": null, "[EXTERNAL-IP].xip.io": ""}}'

In my example Cloud Run service, I now get the following URL (not the actual IP):

http://nasnet-gke.default.107.198.183.182.xip.io/

Note: instead of patching the domain, you could also use curl to connect to the external IP of the ingress and pass the host header nasnet-gke.default.example.com.

With that URL, I can connect to the service. In case of a cold start (when the ReplicaSet has been scaled to 0), it takes a bit longer that “native” Cloud Run which takes a second or so.

It is clear that connecting to the Cloud Run service on GKE takes a bit more work than with “native” Cloud Run. Enabling HTTPS is also more of a pain on GKE where in “native” Cloud Run, you merely need to validate your domain and Google will configure a Let’s Encrypt certificate for the domain name you have configured. Cloud Run cold starts also seem faster.

That’s it for this quick look. In general, try to use Cloud Run versus Cloud Run on GKE as much as possible. Less fuss, more productivity! 😉