
In this blog post, we will create a flow with Prompt Flow in Visual Studio Code. Prompt Flow is a suite of development tools to build LLM-based AI applications. It tries to cover the end-to-end development cycle, including prototyping, testing and deployment to production.
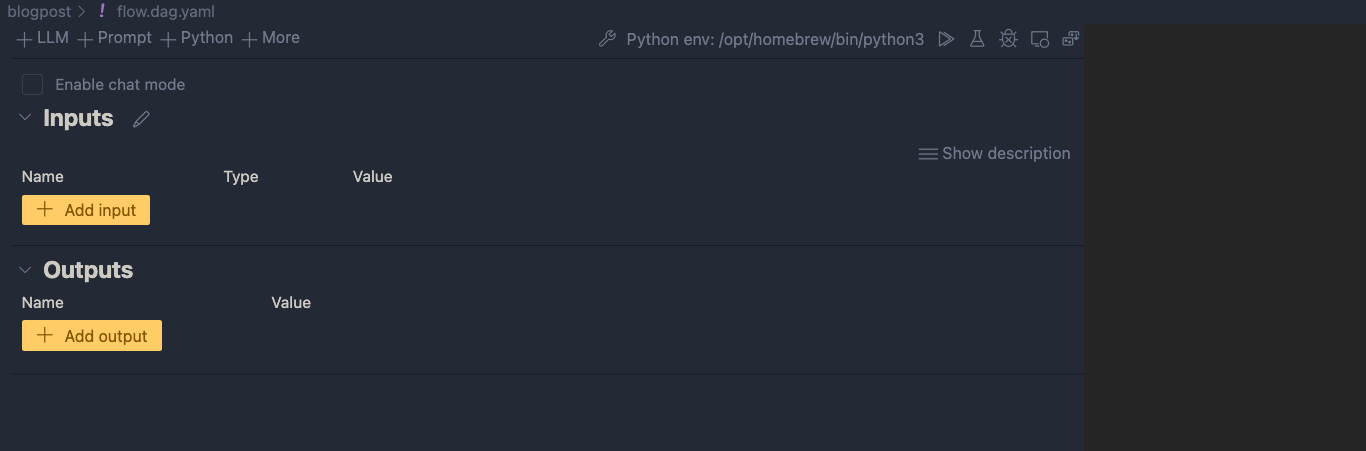
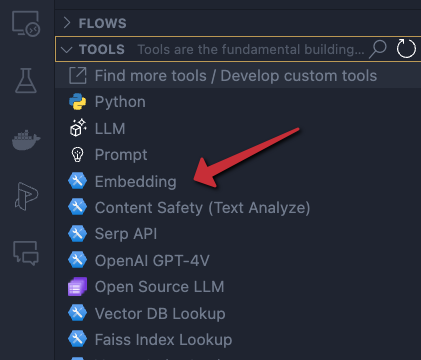
In Prompt Flow, you create flows. Flows link LLMs (large language models), prompts and tools together in an executable workflow. An example of such a flow is show below:

The flow above (basically a distributed acyclical graph – DAG – of functions) sends its input, a description to search for an image, to a tool that embeds the description with an Azure OpenAI embedding model. The embedding is used as input to a Python tool that does a similarity search in Azure AI Search. The search returns three results. The original input, together with the query results, are subsequently handed to an LLM (above, the final_result node) that hopefully picks the correct image url.
Although you could write your own API that does all of the above, Prompt Flow allows you to visually build, run and debug a flow that has input and output. When you are happy with the flow, you can convert it to an API. One of the ways to host the API is via a container.
We will build this flow on our local machine and host it as a container. Note that Prompt Flow can also be used from the portal using Azure Machine Learning or Azure AI Studio.
👉 Another blog post will describe how to build and run the container
Installing Prompt Flow on your machine
To install Prompt Flow you will need Python on your machine. Use Python 3.9 or higher. I use Python 3.11 on an Apple M2. Check the full installation instructions here. Without using a Python virtual environment, you can just run the following command to install Prompt Flow:
pip install promptflow promptflow-toolsNext, run pf -v to check the installation.
⚠️ Do not forget to install promptflow-tools because it enables the embedding tool, llm tool and other tools to be used as nodes in the flow; also ensure this package is installed in the container image that will be created for this flow
In Visual Studio Code, install the Prompt flow for VS Code extension. It has the VS Code Python Extension as a prerequisite. Be sure to check the Prompt Flow Quick Start for full instructions.
We will mainly use the Visual Code extension. Note that the pf command can be used to perform many of the tasks we will discuss below (e.g, creating connections, running a flow, etc…).
Creating an empty flow
In VS Code, ensure you opened an empty folder or create a new folder. Right click and select New flow in this directory. You will get the following question:

Select Empty Flow. This creates a file called flow.dag.yaml with the following content:

If you look closely, you will see a link to open a Visual editor. Click that link:
We can now add input(s) and output(s) and add the nodes in between.
Inputs and outputs
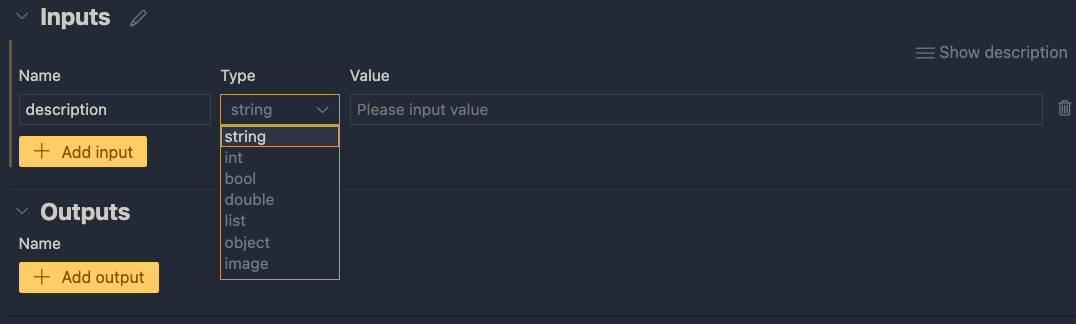
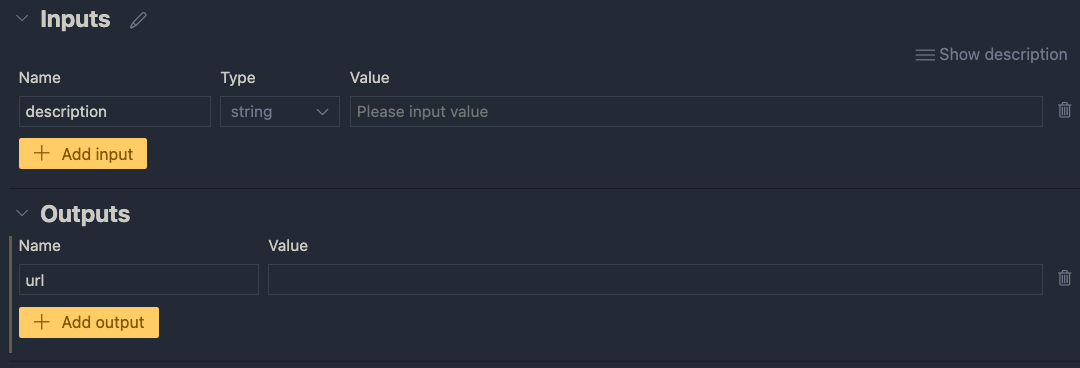
Inputs have a type and a value. Add a string input called description:
When you later run the flow, you can type the description in the Value textbox. When the flow is converted to an API, the API will except a description in the POST body.
Next, add an output called url. In the end, the flow returns a url to an image that matches the description:
The value of the output will be the coming from another node. We still have to add those. If you click the Value dropdown list, you will only be able to select the input value for now. You can do that and click the run icon. Save your flow before running it.

When you click the run button, a command will be run in the terminal that runs the flow:
python3 -m promptflow._cli._pf.entry flow test --flow /Users/geertbaeke/projects/promptflow/images/blogpost --user-agent "prompt-flow-extension/1.6.0 (darwin; arm64) VSCode/1.85.0"The output of this command is:

Although this is not very useful, the flow runs and produces a result. The output is our input. We can now add nodes to do something useful.
Creating an embedding from the description
We need to embed the description to search for similar descriptions in an Azure AI Search index. If you are not sure what embeddings are, check Microsoft Learn for a quick intro. It short, it’s a bunch of numbers that represents the meaning of a piece of text. We can use the numbers of the description to compare it to the sets of numbers of image descriptions to see how close they are.
To create an embedding, we need access to an Azure OpenAI embedding model. Such a model takes text as input and returns the bunch of numbers we talked about. This model returns 1536 numbers, aka dimensions.
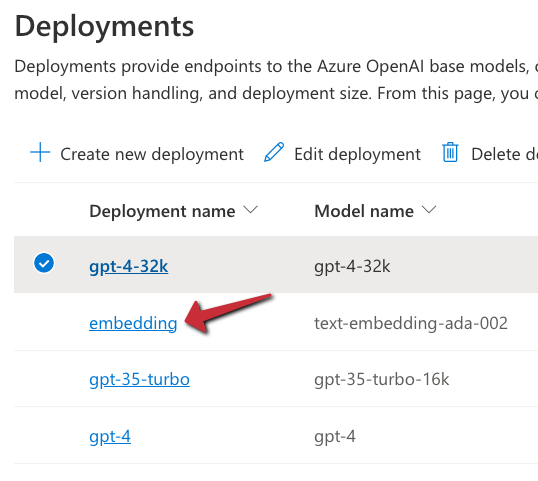
To use the model, we will need an Azure OpenAI resource’s endpoint and key. If you do not have an Azure OpenAI resource in Azure, create one and deploy the text-embedding-ada-002 model. In my example, the deployment is called embedding:
With the Azure resources created, we can add a connection in Prompt Flow that holds the OpenAI endpoint and key:
Click the Prompt Flow extension icon and click + next to Azure OpenAI in the Connections section:

A document will open that looks like the one below:

Fill in the name and api_base only. The api_base is the https url to your Azure OpenAI instance. It’s something like https://OPENAIRESOURCENAME.openai.azure.com/. Do not provide the api_key. When you click Create connection (the smallish link at the bottom), you will be asked for the key.
After providing the key, the connection should appear under the Azure OpenAI section. You will need this connection in the embedding tool to point to the embedding model to use.
In the Prompt Flow extension pane, now click + next to Embedding in the TOOLS section:
You will be asked for the tool’s name (top of VS Code window). Provide a name (e.g, embedding) and press enter. Select the connection you just created, the deployment name of your embedding model and the input. The input is the description we configured in the flow’s input node. We want to embed that description. The output of this tool will be a list of floating point numbers, a vector, of 1536 dimensions.

The moment you set the input of the embedding, the input node will be connected to the embedding node on the canvas. To check if embedding works, you can connect the output of the embedding node to the url output and run the flow. You should then see the vector as output. The canvas looks like:

Of course, we will need to supply the embedding to a vector search engine, not to the output. In our case, that is Azure AI Search. Let’s try that…
⚠️ Instead of connecting the embedding to the output, you can simply debug the embedding by clicking the debug icon in the embedding tool. The tool will be executed with the value of the input. The result should be a bunch of numbers in your terminal:

Searching for similar images
This section is a bit more tricky because you need an Azure AI Search index that allows you to search for images using a description of an image. To create such an index, see https://atomic-temporary-16150886.wpcomstaging.com/2023/12/09/building-an-azure-ai-search-index-with-a-custom-skill/.
Although you can use a Vector DB Lookup tool that supports Azure AI Search, we will create a custom Python tool that does the same thing. The Python tool uses the azure-search-documents Python library to perform the search. Learning how to use Python tools is important to implement logic there is no specific tool for.
First, we will create a custom connection that holds the name of our Azure AI Search instance and a key to authenticate.
Similar to the Azure OpenAI connection, create a custom connection:

After clicking +, a document opens. Modify it as follows:
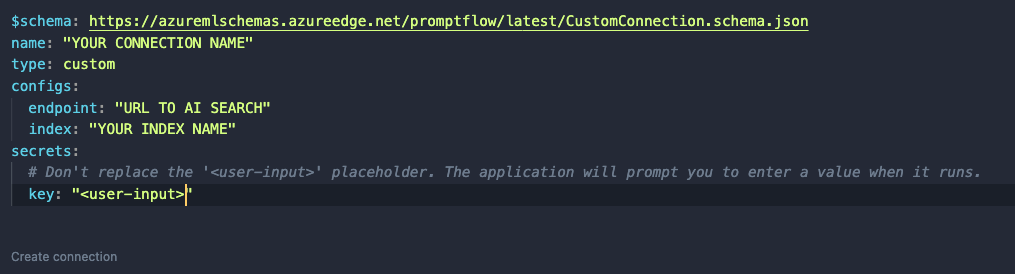
Like before, set a name. In a custom connection, you can have configs and secrets. In configs add the Azure AI Search endpoint and index name. In the secrets set key to <user-input>. When you click Create connection, you will be asked to supply the key.
⚠️ Connection information is saved to a local SQLLite database in the .promtflow folder in your home folder
We can now add a Python tool. In TOOLS, next to Python click +. Give the tool a name and select new file. You should get a new Python file in your code with the filename set to <YOURTOOLNAME>.py. The code without comments is below:
from promptflow import tool

@tool
def my_python_tool(input1: str) -> str:
    return 'hello ' + input1
This tool takes a string input and returns a string. The @tool decorator is required.
We need to change this code to get the custom connection information, query Azure AI Search and return search results as a list. The code is below:
from promptflow import tool
from promptflow.connections import CustomConnection
from azure.core.credentials import AzureKeyCredential
from azure.search.documents import SearchClient
from azure.search.documents.models import VectorizedQuery

@tool
def my_python_tool(vector: list, ai_conn: CustomConnection) -> list:
    ai_conn_dict = dict(ai_conn)
    endpoint = ai_conn_dict['endpoint']
    key = ai_conn_dict['key']
    index = ai_conn_dict['index']

    # query azure ai search
    credential = AzureKeyCredential(key)
    client = SearchClient(endpoint=endpoint,
                          index_name=index,
                          credential=credential)
    vector_query = VectorizedQuery(vector=vector, k_nearest_neighbors=3, fields="textVector", exhaustive=True)
    results = client.search(
        search_text=None,
        vector_queries=[vector_query],
        select=["name", "description", "url"]
    )

    # convert results to json list
    results = [dict(result) for result in results]

    return results
The function has two parameters: a vector of type list to match the output of the embedding tool, and a variable of type CustomConnection. The custom connection can be converted to a dict to retrieve both the configs and the secret.
Next, we use the configs and secret to perform the query with a SearchClient. The query only returns three fields from our index: name, description and url. The result returned from Azure AI Search is converted to a list and returned.
When you save the Python file and go back to your flow, you should see the Python tool (aisearch) with the vector and ai_conn field. If not, click the regenerate link. Set it as below:

The input to the Python tool is the output from the embedding tool. We also pass in the custom connection to provide the configs and key to the tool.
You can set the output of the entire flow (url) to the output of the Python tool to check the results of the search when you run the flow:
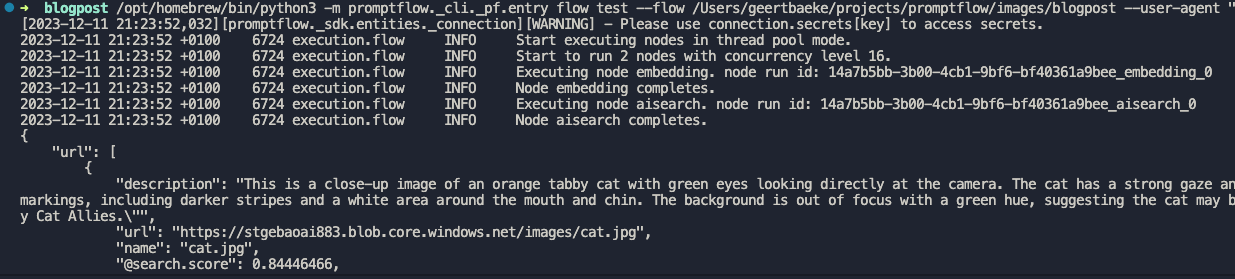
I ran the flow with a description equal to cat. A list of three JSON objects is returned.The first search result is the url to cat.jpg but there are other results as well (not shown above).
Adding an LLM tool
Although we could just pick the first result from the search, that would not work very well. Azure AI Search will always return a result, even if it does not make much sense. In a search for nearest neighbors, your nearest neighbor could be very far away! 😀
For example, if I search for person with a hat, I will get a result even though I do not have such a picture in my index. It simply finds vectors that are “closest” but semantically “far” away from my description. That is bound to happen with just a few images in the index.
An LLM can look at the original description and see if it matches one of the search results. It might pick the 3rd result if it fits better. It might also decide to return nothing if there is no match. In order to do so, we will need a good prompt.
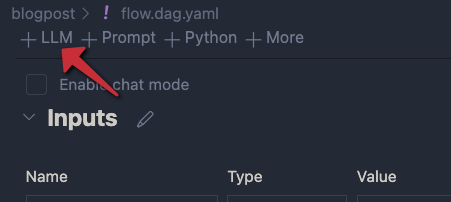
Click + LLM at the top left of the flow to add an LLM tool:
Give the LLM tool a name and select new file. In the flow editor, set the LLM model information:
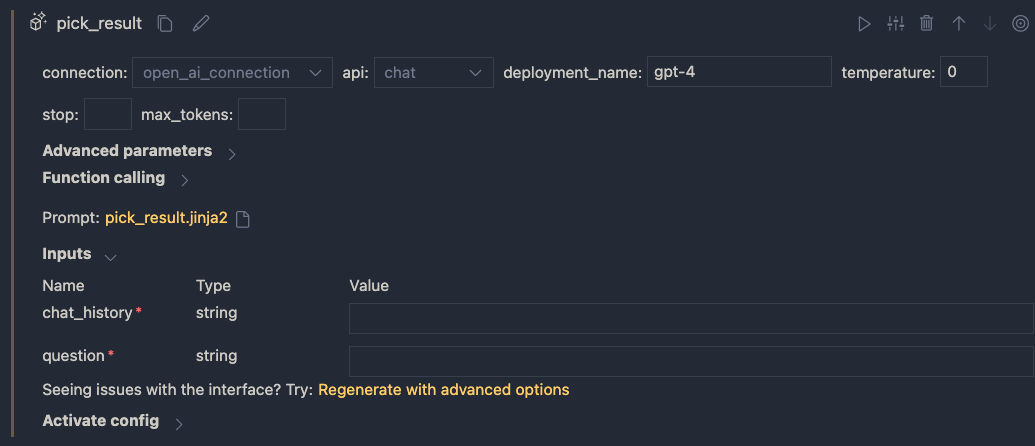
You can reuse the connection that was used for the embedding. Ensure you have deployed a chat model in your Azure OpenAI resource. I deployed gpt-4 and called the deployment gpt-4 as well. I also set temperature to 0.
The inputs of the node do not make much sense. We do not need chat history for instance. The inputs come from a .jinja2 file that was created for you. The file has the name of the LLM tool. Following the example above, the name is pick_result.jinja2. Open that file and replace it with the following contents and save it:
system:
You return the url to an image that best matches the user's question. Use the provided context to select the image. Only return the url. When no
matching url is found, simply return NO_IMAGE

user:
{{description}}

context : {{search_results}}
The file defines a system message to tell the LLM what to do. The input from the user is the description from the input node. We provide extra context to the LLM as well (the output from search). The {{…}} serve as placeholders to inject data into the prompt.
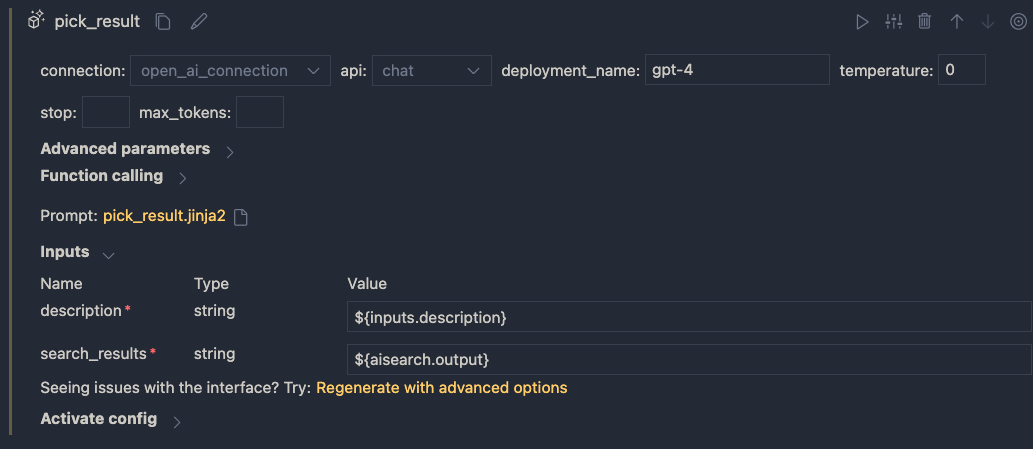
When you save the file and go back to the flow designer, you should see description and search_results as parameters. Set them as follows:
In addition, set the output of the flow output node to the output of the LLM node:

Save your flow and run it. In my case, with a description of cat I get the following output:

It I use man with a hat as input, I get:

Using a prompt variant
Suppose we want to try a different prompt that returns JSON instead of text. To try that, we can create a prompt variant.
In the LLM node, click the variants icon:

You will see a + icon to create a new variant. Click it.

The variant appears under the original variant and is linked to a new file: pick_result_variant_1.jinja2. I have also set the variant as default. Let’s click the new file to open it. Add the following prompt:
system:
You return the url to an image that best matches the user's question. Use the provided context to select the image.
Return the url and name of the file as JSON. Here is an example of a response. Do not use markdown in the response. Use pure JSON.
{
  "url": "http://www.example.com/images/1.jpg",
  "name": "1.jpg"
}

If there is not matching image, return an empty string in the JSON:
{
  "url": ""
}

user:
{{description}}

context : {{search_results}}
This prompt should return JSON instead of just the url or NO_IMAGE. To test this, run the flow and select Use default variant for all nodes. When I run the flow with description cat, I get the following output:

Because the flow’s output is already JSON, the string representation of the JSON result is used. Adding an extra Python tool that parses the JSON and outputs both the URL and file name might be a good idea here.
You can modify and switch between the prompts and see which one works best. This is especially handy when you are prototyping your flow.
Conclusion
On your local machine, Prompt Flow is easy to install and get started with. In this post we built a relatively simple flow that did not require a lot of custom code. We also touched on using variants, to test different prompts and their outcome.
In a follow-up post, we will take a look at turning this flow into a container. Stay tuned! 📺
