In a previous post, I wrote about Diagrid Catalyst. Catalyst provides services like pub/sub and state stores to support the developer in writing distributed applications. In the post, we discussed a sample application that processes documents and extracts fields with an LLM (gpt-4o structured extraction). Two services, upload and process, communicate via the pub/sub pattern.
In that post, we used a pub/sub broker built-in to Catalyst. Using the built-in broker makes it extremely easy to get started. You simply create the service and topic subscription and write code to wire it all up using the Dapr APIs.
But what if you want to use your own broker? Read on to learn how that works.
Using Azure Service Bus as the broker
To use Azure Service Bus, simply deploy an instance in a region of your choice. Ensure you use the standard tier because you need topics, not queues:

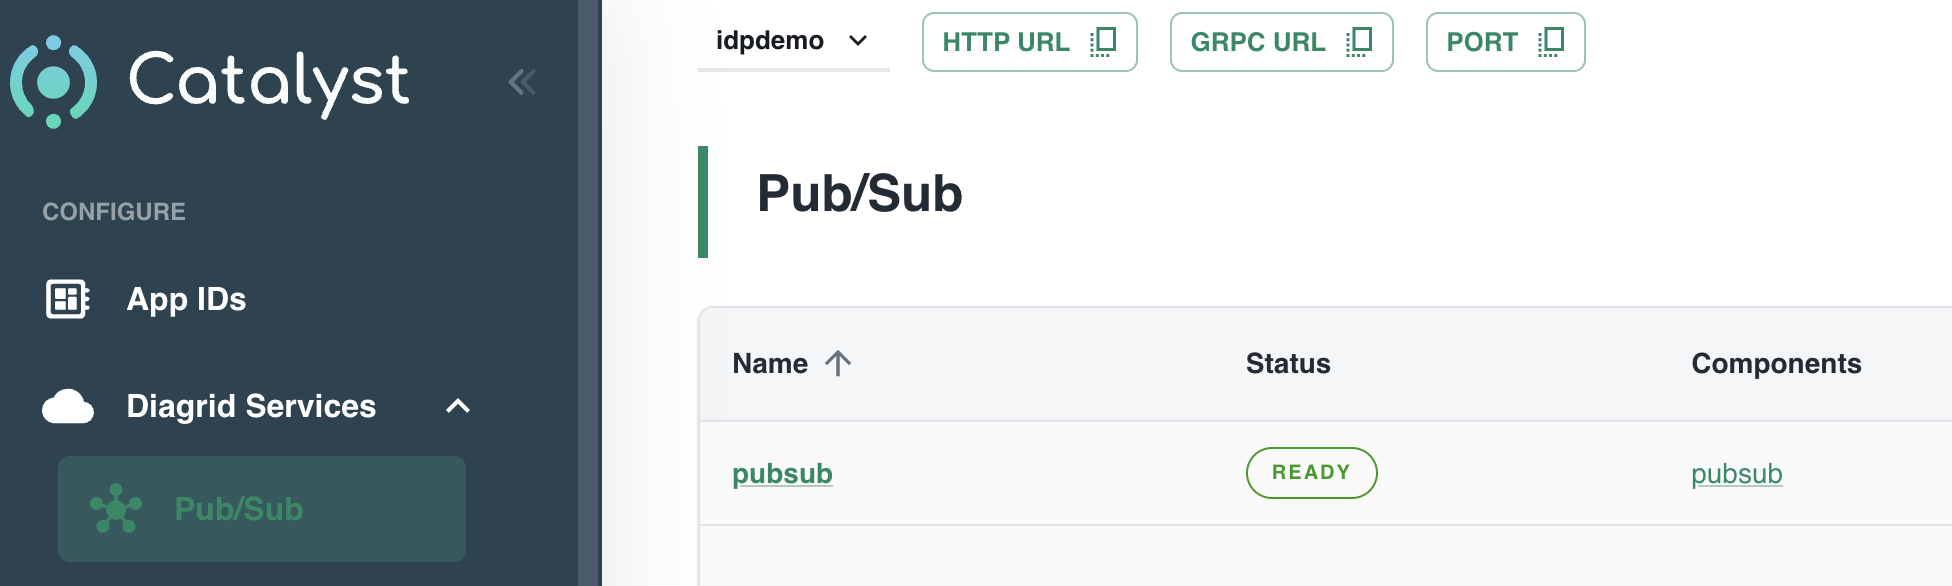
With Service Bus deployed, we can now tell Catalyst about it. You do so in Components in the Catalyst portal:
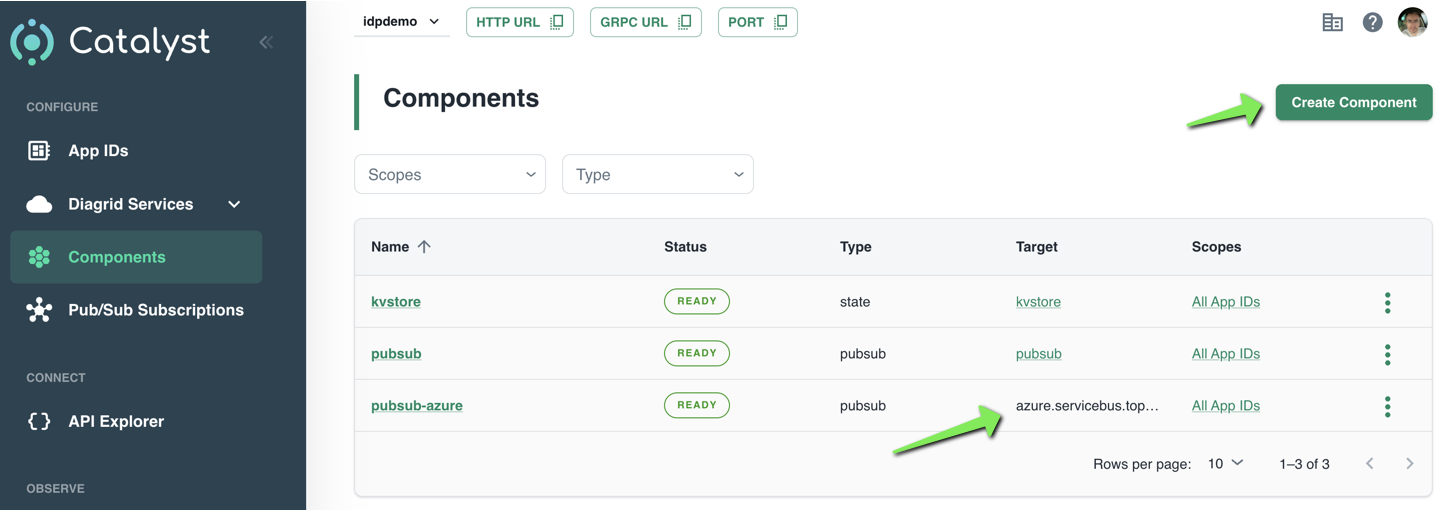
Simply click Create Component to start a wizard. After completion of the wizard, your component will appear in the list. Above, at the bottom, a component with Azure Service Bus as the target is in the list.
The wizard itself is fairly straightforward. The first screen is shown below:

Above, in the first step, I clicked Pub/Sub and selected Azure Service Bus Topics. As you can see, several other pub/sub brokers are supported. The above list is not complete.
In the next steps, the following is set:
- Assign access: configure the services that can access this component; in my case, that is the upload and process service
- Authentication profile: decide how to authenticate to Azure Service Bus; I used a connection string
- Configure component: set the component name and properties such as timeouts. These properties are specific to Service Bus. I only set the name and left the properties at their default.
That’s it. You now have defined a component that can be used by your applications. When you click the component, you can also inspect its YAML definition:
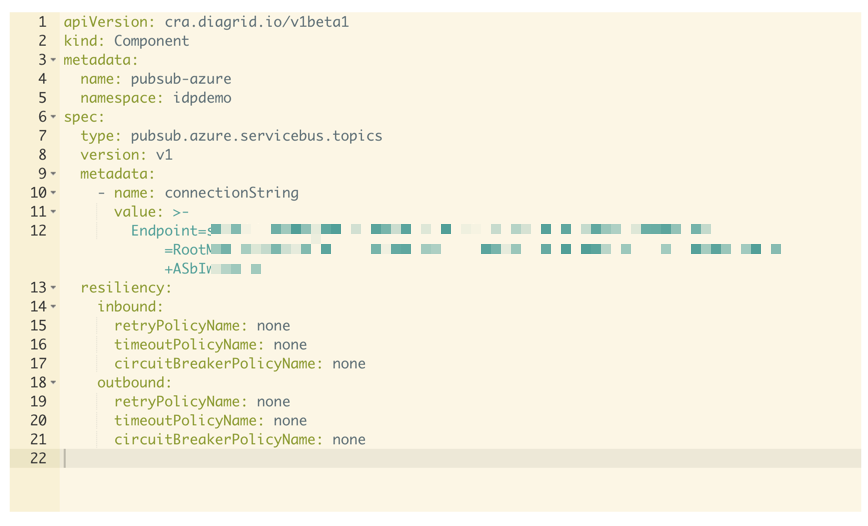
You can use these YAML files from the diagrid CLI to create components. In the CLI they are called connections but it’s essentially the same from what I can tell at this point:

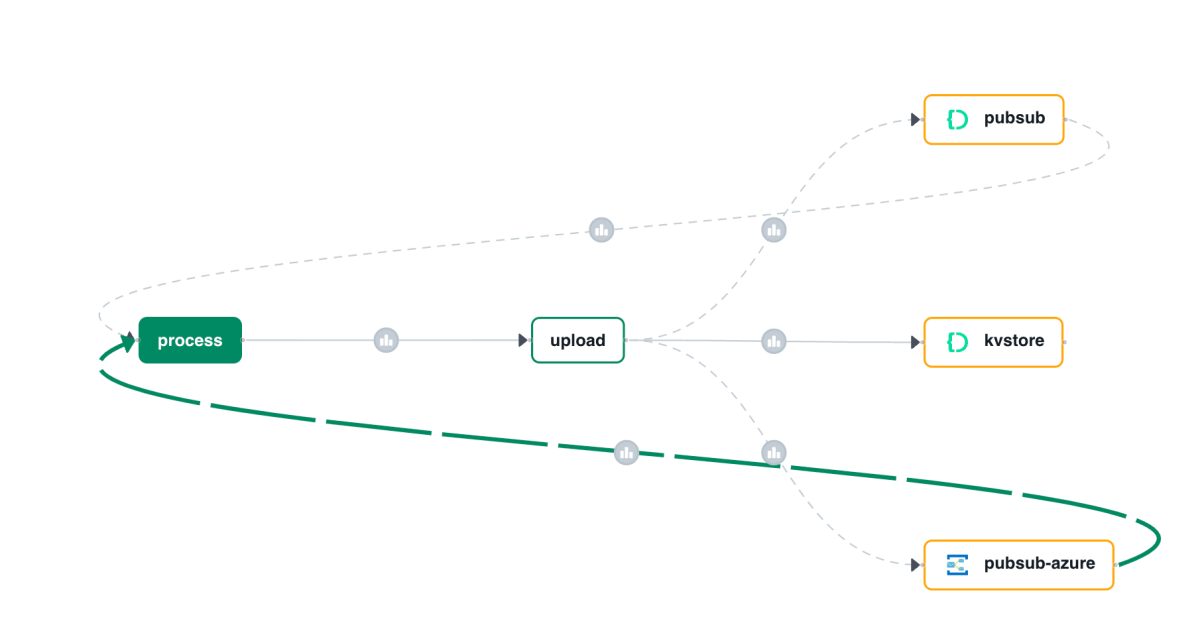
Showing the call graph
With Catalyst, all activity is logged and can be used to visualize a call graph like the one below:

Above, I clicked on the subscription that delivers messages to the process service. The messages come from our Azure pub/sub broker.
Note: you can also see the older pub/sub Catalyst broker in the call graph. It will be removed from the call graph some time after it is not used anymore.
Creating a subscription
A subscription to an Azure Service Bus topic looks the same as a subscription to the built-in Pub/Sub broker:

The only difference with the previous blog post is the component. It’s the one we just created. The /process handler in your code will stay the same.
Code changes
The code from the previous post does not have to change a lot. That code uses an environment variable, PUBSUB_NAME, that needs to be set to pubsub-azure now. That’s it. The Dapr SDK code is unchanged:
with DaprClient() as d:
    try:
        result = d.publish_event(
            pubsub_name=pubsub_name,
            topic_name=topic_name,
            data=invoice.model_dump_json(),
            data_content_type='application/json',
        )
        logging.info('Publish Successful. Invoice published: %s' %
                        invoice.path)
        logging.info(f"Invoice model: {invoice.model_dump()}")
        return True
    except grpc.RpcError as err:
        logging.error(f"Failed to publish invoice: {err}")
        return False
Conclusion
Instead of using the default Catalyst pub/sub broker, we switched the underlying broker to a broker of our choice. This is just configuration. You code, besides maybe an environment variable, does not need to change.
In this post, we only changed the pub/sub broker. You can also easily change the underlying state store to Azure Blob Storage or Azure Cosmos DB.
