I have written before about Azure OpenAI on your data. For a refresher, see Microsoft Learn. In short, Azure OpenAI on your data tries to make it easy to create an Azure AI Search index that supports advanced search mechanisms like vector search, potentially enhanced with semantic reranking.
On of the things you can do is simply upload your documents and start asking questions about these documents, right from within the Azure OpenAI Chat playground. The screenshot below shows the starting screen of a step-by-step wizard to get your documents into an index:

Note that whatever option you choose in the wizard, you will always end up with an index in Azure AI Search. When the index is created, you can start asking questions about your data:

Instead of uploading your documents, you can use any Azure AI Search index. You will have the ability to map the fields from your index to the fields Azure OpenAI expects. You will see an example in the Semantic Kernel code later and in the next section.
Extensions to the OpenAI APIs
To make this feature work, Microsoft extended the OpenAI APIs. By providing extra information to the API about Azure AI Search, mapped fields, type of search, etc… the APIs retrieve relevant content, add that to the prompt and let the model answer. It is retrieval augmented generation (RAG) but completely API driven.
The question I asked in the last screenshot was: “Does Redis on Azure support vector queries?”. The API creates an embedding for that question to find similar vectors. The vectors are stored together with their source text (from your documents). That text is added as context to the prompt, allowing the chosen model to answer as shown above.
Under the hood, the UI makes a call to the URL below:
{openai.api_base}/openai/deployments/{deployment_id}/extensions/chat/completions?api-version={openai.api_version}This looks similar to a regular chat completions call except for the extensions part. When you use this extension API, you can supply extra information. Using the Python OpenAI packages, the extra information looks like below:
dataSources=[
  {
    "type": "AzureCognitiveSearch",
    "parameters": {
      "endpoint": "'$search_endpoint'",
      "indexName": "'$search_index'",
      "semanticConfiguration": "default",
      "queryType": "vectorSimpleHybrid",
      "fieldsMapping": {
        "contentFieldsSeparator": "\n",
        "contentFields": [
          "Content"
        ],
        "filepathField": null,
        "titleField": "Title",
        "urlField": "Url",
        "vectorFields": [
          "contentVector"
        ]
   ... many more settings (shortened here)
The dataSources section is used by the extension API to learn about the Azure AI Search resource, the API key to use (not shown above), the type of search to perform (hybrid) and how to map the fields in your index to the fields this API expects. For example, we can tell the API about one or more contentFields. Above, there is only one such field named Content. That’s the name of a field in your chosen index.
You can easily get a Python code example to use this API from the Chat Completions playground:

How to do this in Semantic Kernel?
In what follows, I will show snippets of a full sample you can find on GitHub. The sample uses Streamlit to provide the following UI:

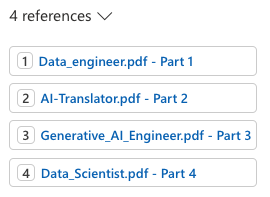
Above, (1) is the original user questions. Using Azure OpenAI on your data, we use Semantic Kernel to provide a response with citations (2). As an extra, all URLs returned by the vector search are shown in (3). They are not reflected in the response because not all retrieved results are relevant.
Let’s look at the code now…
st.session_state.kernel = sk.Kernel()

# Azure AI Search integration
azure_ai_search_settings = sk.azure_aisearch_settings_from_dot_env_as_dict()
azure_ai_search_settings["fieldsMapping"] = {
    "titleField": "Title",
    "urlField": "Url",
    "contentFields": ["Content"],
    "vectorFields": ["contentVector"],
}
azure_ai_search_settings["embeddingDependency"] = {
    "type": "DeploymentName",
    "deploymentName": "embedding"  # you need an embedding model with this deployment name is same region as AOAI
}
az_source = AzureAISearchDataSources(**azure_ai_search_settings, queryType="vectorSimpleHybrid", system_message=system_message) # set to simple for text only and vector for vector
az_data = AzureDataSources(type="AzureCognitiveSearch", parameters=az_source)
extra = ExtraBody(dataSources=[az_data]) if search_data else None
Above we create a (semantic) kernel. Don’t bother with the session state stuff, that’s specific to Streamlit. After that, the code effectively puts together the Azure AI Search information to be added to the extension API:
- get Azure AI Search settings from a .env file: contains the Azure AI Search endpoint, API key and index name
- add fieldsMapping to the Azure AI Search settings: contentFields and vectorFields are arrays; we need to map the fields in our index to the fields that the API expects
- add embedding information: the deploymentName is set to embedding; you need an embedding model with that name in the same region as the OpenAI model you will use
- create an instance of class AzureAISearchDataSources: creates the Azure AI Search settings and add additional settings such as queryType (hybrid search here)
- create an instance of class AzureDataSources: this will tell the extension API that the data source is AzureCognitiveSearch with the settings provided via the AzureAISearchDataSources class; other datasources are supported
- the call to the extension API needs the dataSources field as discussed earlier: the ExtraBody class allows us to define what needs to be added to the POST body of a chat completions call; multiple dataSources can be provided but here, we have only one datasource (of type AzureCognitiveSearch); we will need this
extravariable later in our request settings
Note: I have a parameter in my code, search_data. Only if search_data is True, Azure OpenAI on your data should be enabled. If it is false, the variable extra should be None. You will see this variable pop up in other places as well
In Semantic Kernel, you can add one or more services to the kernel. In this case, we only add a chat completions service that points to a gpt-4-preview deployment. A .env file is used to get the Azure OpenAI endpoint, key and deployment.
service_id = "gpt"
deployment, api_key, endpoint = azure_openai_settings_from_dot_env(include_api_version=False)
chat_service = sk_oai.AzureChatCompletion(
    service_id=service_id,
    deployment_name=deployment,
    api_key=api_key,
    endpoint=endpoint,
    api_version="2023-12-01-preview" if search_data else "2024-02-01",  # azure openai on your data in SK only supports 2023-12-01-preview
    use_extensions=True if search_data else False # extensions are required for data search
)
st.session_state.kernel.add_service(chat_service)
Above, there are two important settings to make Azure OpenAI on your data work:
api_version: needs to be set to2023-12-01-preview; Semantic Kernel does not support the newer versions at the time of this writing (end of March, 2024). However, this will be resolved soon.use_extensions: required to use the extension API; without it the call to the chat completions API will not have the extension part.
We are not finished yet. We also need to supply the ExtraBody data (extra variable) to the call. That is done via the AzureChatPromptExecutionSettings:
req_settings = AzureChatPromptExecutionSettings(
    service_id=service_id,
    extra_body=extra,
    tool_choice="none" if search_data else "auto", # no tool calling for data search
    temperature=0,
    max_tokens=1000
)
In Semantic Kernel, we can create a function from a prompt with chat history and use that prompt to effectively create the chat experience:
prompt_template_config = PromptTemplateConfig(
    template="{{$chat_history}}{{$user_input}}",
    name="chat",
    template_format="semantic-kernel",
    input_variables=[
        InputVariable(name="chat_history", description="The history of the conversation", is_required=True),
        InputVariable(name="user_input", description="The user input", is_required=True),
    ],
)

# create the chat function
if "chat_function" not in st.session_state:
    st.session_state.chat_function = st.session_state.kernel.create_function_from_prompt(
        plugin_name="chat",
        function_name="chat",
        prompt_template_config=prompt_template_config,
    )
Later, we can call our chat function and provide KernelArguments that contain the request settings we defined earlier, plus the user input and the chat history:
arguments = KernelArguments(settings=req_settings)

arguments["chat_history"] = history
arguments["user_input"] = prompt
response = await st.session_state.kernel.invoke(st.session_state.chat_function, arguments=arguments)
The important part here is that we invoke our chat function. With the kernel’s chat completion service configured to use extensions, and the extra request body field added to the request settings, you effectively use the Azure OpenAI on your data APIs as mentioned earlier.
Conclusion
Semantic Kernel supports Azure OpenAI on your data. To use the feature effectively, you need to:
- Prepare the extra configuration (ExtraBody) to send to the extension API
- Enable the extension API in your Azure chat completion service and ensure you use the supported API version
- Add the ExtraBody data to your AzureChatPromptExecutionSettings together with settings like temperature etc…
Although it should be possible to use Azure OpenAI on your data together with function calling, I could not get that to work. Function calling requires a higher API version, which is not supported by Semantic Kernel in combination with Azure OpenAI on your data yet!
The code on GitHub can be toggled to function mode by setting MODE in .env to anything but search. In that case though, add your data is not used. Be sure to restart the Streamlit app after you change that setting in the .env file. In function mode you can ask about the current time and date. If you provide a Bing api key, you can also ask questions that require a web search.