
In a previous post, I talked about the Add your data feature in the Azure OpenAI Chat playground. Recently, there have been some updates to this feature, including vector search. Let’s take a look at the updated experience and focus on vector search.
Starting point
I have some PDF documents in a storage account container. They are PDFs containing job descriptions for a select group of companies. You can use .txt, .md, .html, Microsoft Word files, Microsoft PowerPoint files, or PDFs.

At the storage account level, CORS settings should be GET from all origins (*). This can also be set from the Add your data wizard in the OpenAI Playground.

In addition to the storage account, you need an OpenAI resource deployed to a region of choice. I have chosen France Central which provides access to gpt-4 and the text-embedding-ada-002 embedding model (a text embedding model is required for vector search). Ensure those models are deployed. For example:

Running the wizard
In OpenAI Chat Playground, you will find the Add your data (preview) tab. Use the + Add a data source button to start.
There are several sources to start from. Because I already have my files in a storage account, I will select Azure Blob Storage as the source and select the name of the storage account and the container with my files. You can also upload files or use an existing index in Cognitive Search. Whatever the option you choose, you will always end up with a Cognitive Search index that serves relevant content to the chat.

As you can see from the above screenshot, in addition to the storage account, you have to select an Azure Cognitive Search instance. It will not be created for you. If you do not have such an instance, either click the link under the Select Azure Cognitive Search resource dropdown or create one yourself and use the refresh icon. I already have such a resource called acs-geba. Use the Basic pricing tier as a minimum. This gives you a vector quota of 1GB.
After selecting the Azure Cognitive Search resource, enter an index name. The documents in the storage account will be added to this index so we can search via this index later. The index will be created for you. I will use oai as the index name and also set a schedule to Hourly to update the index automatically. The schedule can be adjusted afterward in Azure Cognitive Search.
We now have the following in the wizard:

You can now add vector search. This is in addition to keyword and semantic search. To use vector search, you need to specify an embedding model. If you do not have text-embedding-ada-002 deployed in your region, you will not be able to turn on vector search. This feature requires at least the Basic or higher SKU.

Above, I called my deployment of the text-embedding-ada-002 model embedding but you can use any name you like. It’s just a deployment name.
Now we can press Next, to be presented with the Data management page:

You can find more information about those options here. In most cases, using Vector search alone is sufficient but it depends a bit on your dataset and use-case. I will just use Vector search. When we use Redis, Qdrant, Pinecone, or other vector stores, we also use vectorized search exclusively, which works very well.
After clicking Next, review what will happen and click Save and Close. The data will be added to the index:

Asking questions about the data
When the data has been added to Azure Cognitive Search, you can start asking questions. If you want to limit the chat to only your data, ensure that Limit Responses to your data content is checked.

In the Chat Platground, I selected gpt-4 and asked the following question: “Who are MBarQ and do they need AI translators?”. The answer is as follows:

This answer comes from one of the PDFs containing the job description.
Behind the scenes
For the above interaction to work, the question “Who are MBarQ and do they need AI translators?” is vectorized using the selected embedding model. Let’s call this the query vector. The selected embedding model creates a vector with 1536 dimensions that represent the text within a vector space. The nice thing here is that the embedding of the query is created automatically as part of the extended Azure OpenAI API.
The vectors for your documents are stored in an index that ends with the word chunks. Here’s my index and its defined fields. This is all the result of the wizard. No changes have been made to Azure Cognitive Search manually.

As you can see, there is a field for the contentVector which also notes the number of dimensions. The embedding model we used just happens to output 1536 numbers. Other embedding models use a different number of dimensions. Next to the contentVector, the content field contains the actual text that the vector was created from. That text will later be injected, behind the scenes, in the gpt-4 prompt. But we first have to find these pieces of text!
With the query vector in hand, Add your data searches for pieces of text with vectors that are close to the query vector. Cognitive Search uses cosine similarity to do that but there is no real need to know that. Note that we only use vector search in this scenario. When you do hybrid and/or semantic searches, the query process is different. Also, note that the index with vectors works on chunks of text coming from your documents. This chunking happens transparently in the background when the indexer runs.
Once the top N (usually n=5 but can be adjusted in code) vectors that are closest to the query vector are found, we also have the pieces of text closest to the query (from the content field). The original pieces of text that the vectors were calculated from get added to the query and sent to gpt-4. The prompt sent to gpt-4 could be something like the one below (just an example):
Who are MBarQ and do they need AI translators?

Only answer based on the context below after ---

---

First piece of text (no vectors here, just plain text!!!)

Second piece of text

...
Based on this prompt and hopefully relevant context below the — mark, the model can answer the original question.
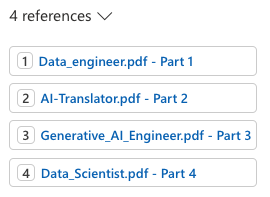
Note that the Add your data experience also returns references. In the UI, you can click these to see the source text:
Deployment
From the Playground, you can deploy the chat experience to a web app or a Power Virtual Agent bot:

At this moment (September 2023) the Power Virtual Agent deployment does not work if your default environment is not in the United States. When you click A new Power Virtual Agent bot…, you should quickly copy the URL and replace the environment ID with another one that is in the United States. Navigate to the modified URL to create the bot.
Deploying to a web app is a bit more straightforward because that is just a web app in Azure. No Power Platform madness here… 😀

Note that if you enable chat history, CosmosDB is used. Here’s the app with chat history visible at the right, similar to chat history in ChatGPT or Bing Chat. This app uses Azure Active Directory (Microsoft Entra ID) for authentication.

Conclusion
The main addition to Add your data surely is vector search. That capability was already a part of Cognitive Search but the Add your data feature did not use it. When you do use it, a lot of stuff happens in the background automatically:
- An index that supports vectors is created; if selected the index is automatically updated based on the contents in the storage account container
- Documents are chunked and vectors are created for each of these chunks based on the selected embeddings model
- There is no need to vectorize the user’s query yourself, performing a nearest neighbor search and stuffing the gpt prompt with content; everything is handled by the underlying API
It will be interesting to see how it evolves further.
