# Giving Argo CD a spin
- URL: https://baeke.info/2019/12/25/giving-argo-cd-a-spin/
- Author: Geert Baeke
- Published: December 25, 2019 (updated March 12, 2025)
- Topics: automation, azure, cloud, containers, docker, kubernetes, argo, flux, gitops
If you have followed my blog a little, you have seen a [few posts](https://baeke.info/?s=flux) about GitOps with [Flux CD](https://fluxcd.io/). This time, I am taking a look at [Argo CD](https://argoproj.github.io/argo-cd/) which, like Flux CD, is a GitOps tool to deploy applications from manifests in a git repository.
Don’t want to read this whole thing?
*Here’s the video version of this post*
There are several differences between the two tools:
- At first glance, Flux appears to use a single git repo for your cluster where Argo immediately introduces the concept of apps. Each app can be connected to a different git repo. However Flux can also use multiple git repositories in the same cluster. See [https://github.com/fluxcd/multi-tenancy](https://github.com/fluxcd/multi-tenancy) for more information
- Flux has the concept of workloads which can be automated. This means that image repositories are scanned for updates. When an update is available (say from tag v1.0.0 to v1.0.1), Flux will update your application based on filters you specify. As far as I can see, Argo requires you to drive the update from your CI process, which might be preferred.
- By default, Argo deploys an administrative UI (next to a CLI) with a full view on your deployment and its dependencies
- Argo supports RBAC and integrates with external identity providers (e.g. Azure Active Directory)
The Argo CD admin interface is shown below:
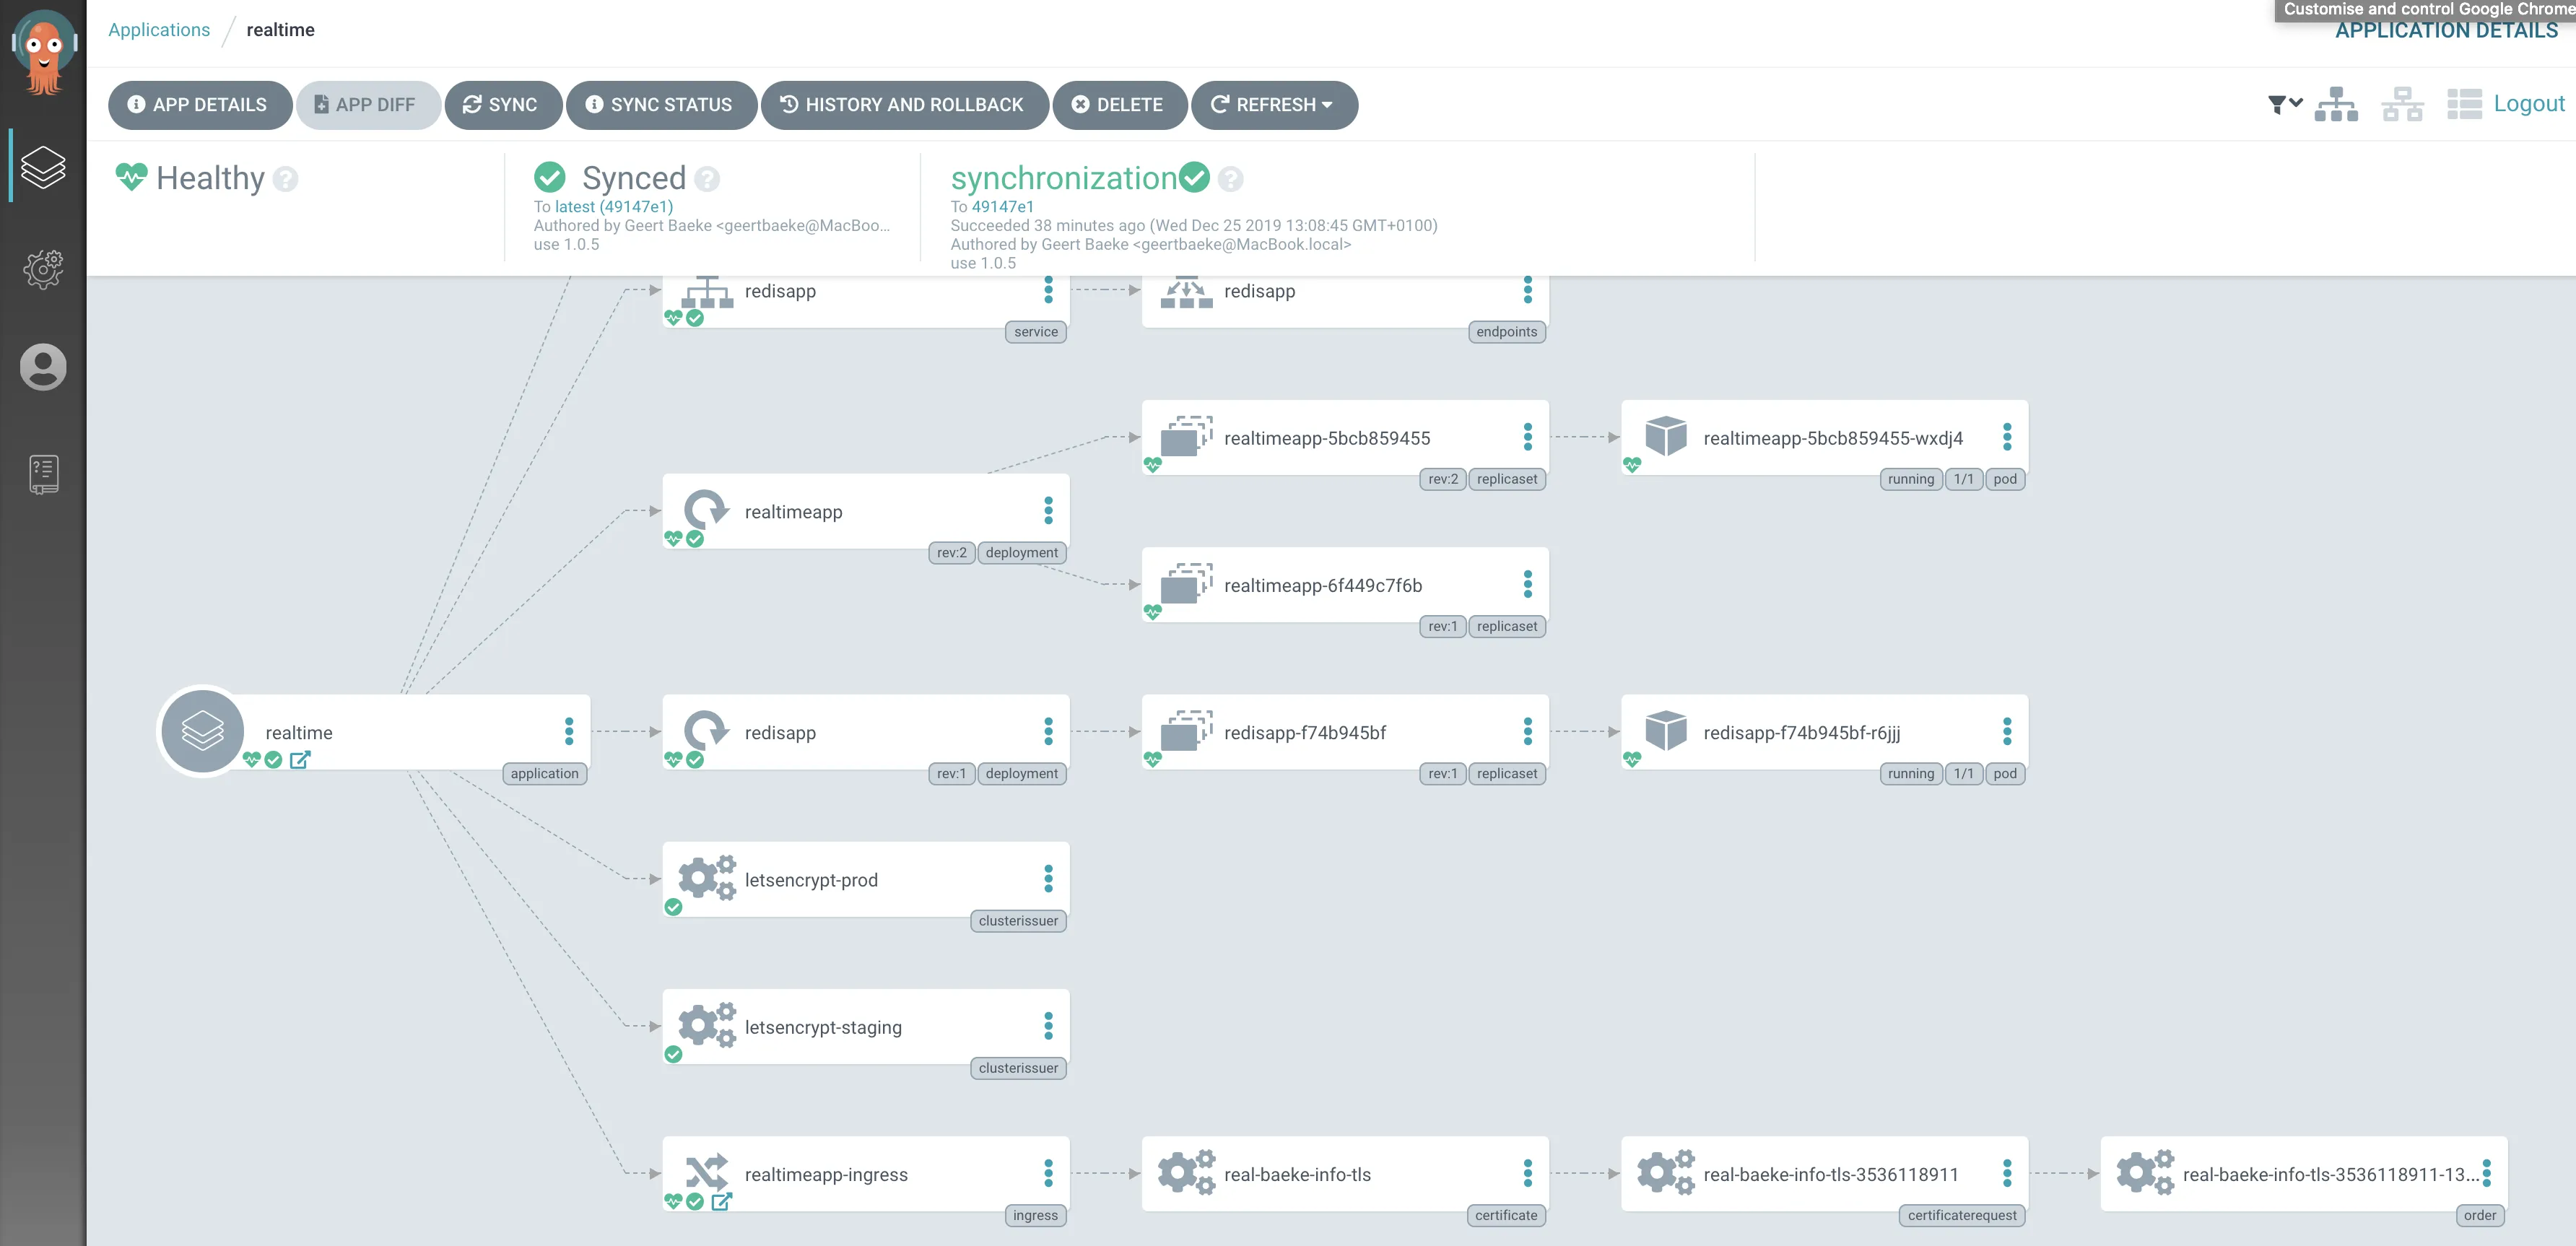
*Argo CD admin interface… not too shabby*
Let’s take a look at how to deploy Argo and deploy the app you see above. The app is deployed using a single yaml file. Nothing fancy yet such as [kustomize](https://argoproj.github.io/argo-cd/user-guide/kustomize/) or [jsonnet](https://argoproj.github.io/argo-cd/user-guide/jsonnet/).
## Deployment
The [getting started](https://argoproj.github.io/argo-cd/getting_started/) guide is pretty clear, so do have a look over there as well. To install, just run (with a deployed Kubernetes cluster and kubectl pointing at the cluster):
```bash
kubectl create namespace argocd
kubectl apply -n argocd -f https://raw.githubusercontent.com/argoproj/argo-cd/stable/manifests/install.yaml
```
Note that I installed Argo CD on Azure (AKS).
Next, install the CLI. On a Mac, that is simple (with [Homebrew](https://brew.sh/)):
```bash
brew tap argoproj/tap
brew install argoproj/tap/argocd
```
You will need access to the API server, which is not exposed over the Internet by default. For testing, port forwarding is easiest. In a separate shell, run the following command:
```bash
kubectl port-forward svc/argocd-server -n argocd 8080:443
```
You can now connect to [https://localhost:8080](https://localhost:8080) to get to the UI. You will need the admin password by running:
```bash
kubectl get pods -n argocd -l app.kubernetes.io/name=argocd-server -o name | cut -d'/' -f 2
```
You can now login to the UI with the user admin and the displayed password. You should also login from the CLI and change the password with the following commands:
```bash
argocd login localhost:8080
argocd account update-password
```
Great! You are all set now to deploy an application.
## Deploying an application
We will deploy an application that has a couple of dependencies. Normally, you would install those dependencies with Argo CD as well but since I am using a cluster that has these dependencies installed via Azure DevOps, I will just list what you need (Helm commands):
```bash
helm upgrade --namespace kube-system --install --set controller.service.loadBalancerIP=,controller.publishService.enabled=true --wait nginx stable/nginx-ingress
helm upgrade --namespace kube-system --install --values /home/vsts/work/1/s/externaldns/values.yaml --set cloudflare.apiToken= --wait externaldns stable/external-dns
kubectl create ns cert-manager
helm upgrade --namespace cert-manager --install --wait --version v0.12.0 cert-manager jetstack/cert-manager
```
To know more about these dependencies and use an Azure DevOps YAML pipeline to deploy them, see [this post](https://baeke.info/2019/12/06/deploy-aks-with-nginx-external-dns-helm-operator-and-flux/). If you want, you can skip the externaldns installation and create a DNS record yourself that resolves to the public IP address of Nginx Ingress. If you do not want to use an Azure static IP address, you can remove the loadBalancerIP parameter from the first command.
The manifests we will deploy with Argo CD can be found in the following public git repository: [https://github.com/gbaeke/argo-demo](https://github.com/gbaeke/argo-demo). The application is in three YAML files:
- Two YAML files that create a certificate cluster issuer based on custom resource definitions (CRDs) from cert-manager
- [realtime.yaml](https://raw.githubusercontent.com/gbaeke/argo-demo/master/manifests/realtime.yaml): Redis deployment, Redis service (ClusterIP), realtime web app deployment (based on [this](https://github.com/gbaeke/realtime-go/tree/httponly)), realtime web app service (ClusterIP), ingress resource for [https://real.baeke.info](https://real.baeke.info) (record automatically created by externaldns)
It’s best that you fork my repo and modify realtime.yaml’s ingress resource with your own DNS name.
## Create the Argo app
Now you can create the Argo app based on my forked repo. I used the following command with my original repo:
```bash
argocd app create realtime \
--repo https://github.com/gbaeke/argo-demo.git \
--path manifests \
--dest-server https://kubernetes.default.svc \
--dest-namespace default
```
The command above creates an app called realtime based on the specified repo. The app should use the manifests folder and apply (kubectl apply) all the manifests in that folder. The manifests are deployed to the cluster that Argo CD runs in. Note that you can run Argo CD in one cluster and deploy to totally [different clusters](https://argoproj.github.io/argo-cd/operator-manual/declarative-setup/#clusters).
The above command does not configure the repository to be synced automatically, although that is an option. To sync manually, use the following command:
```bash
argocd app sync realtime
```
The application should now be synced and viewable in the UI:

*Application installed and synced*
In my case, this results in the following application at [https://real.baeke.info](https://real.baeke.info):
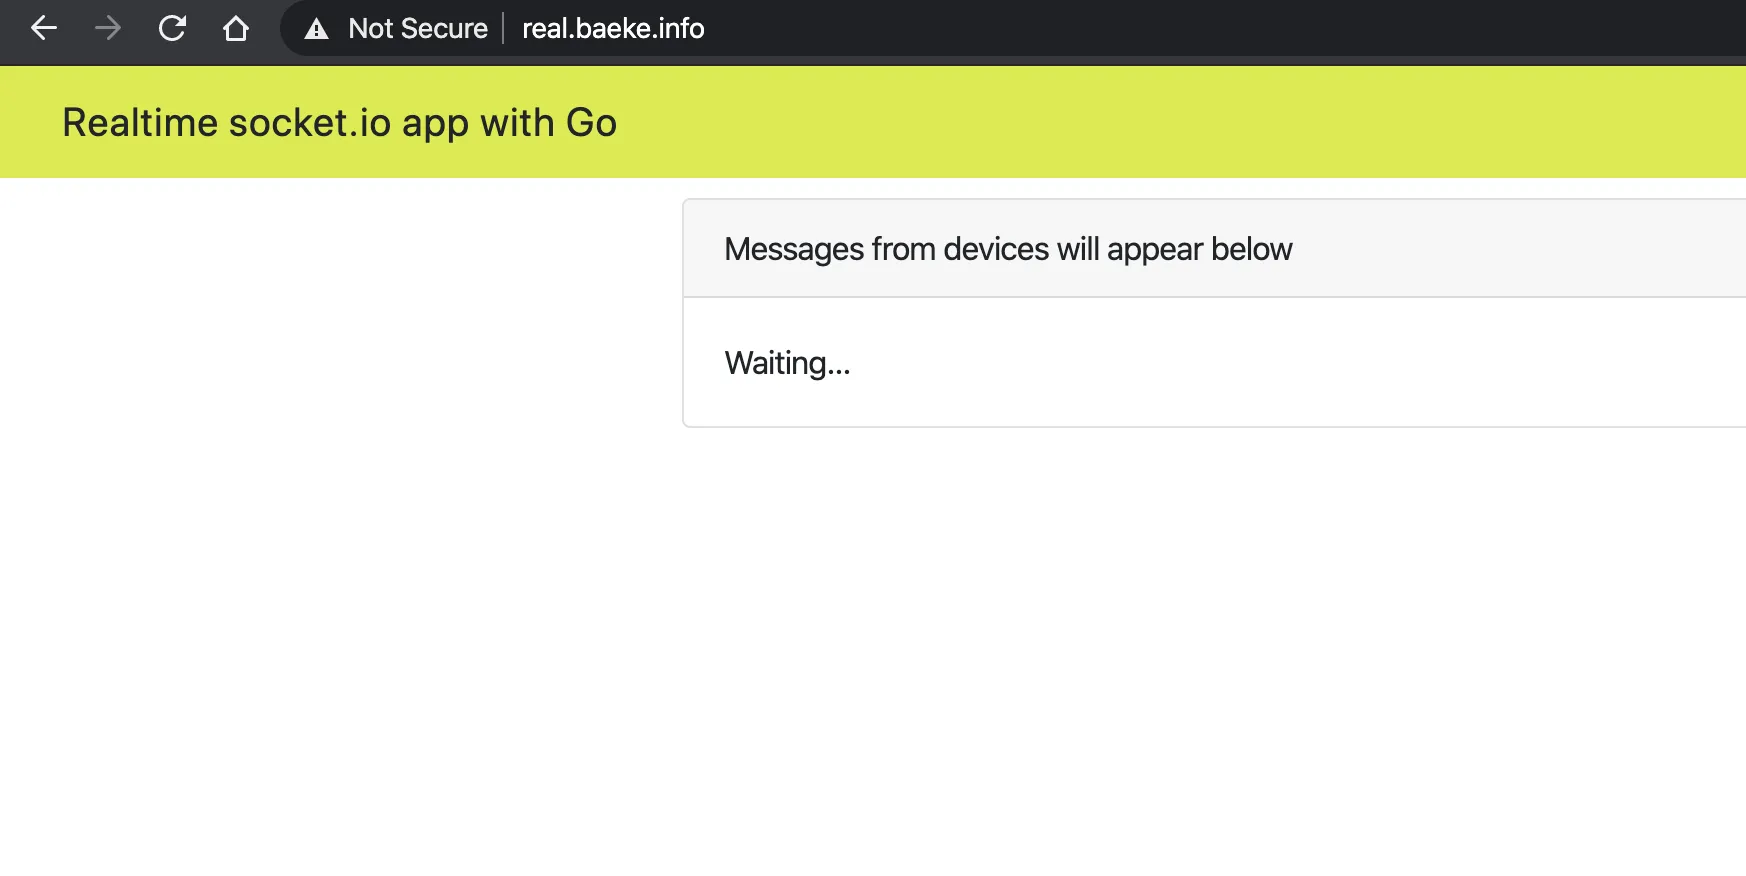
*Not Secure because we use Let’s Encrypt staging for this app*
## Set up auto-sync
Let’s set up this app to automatically sync with the repo (default = every 3 minutes). This can be done from both the CLI and the UI. Let’s do it from the UI. Click on the app and then click **App Details**. You will find a **Sync Policy** in the app details where you can enable auto-sync
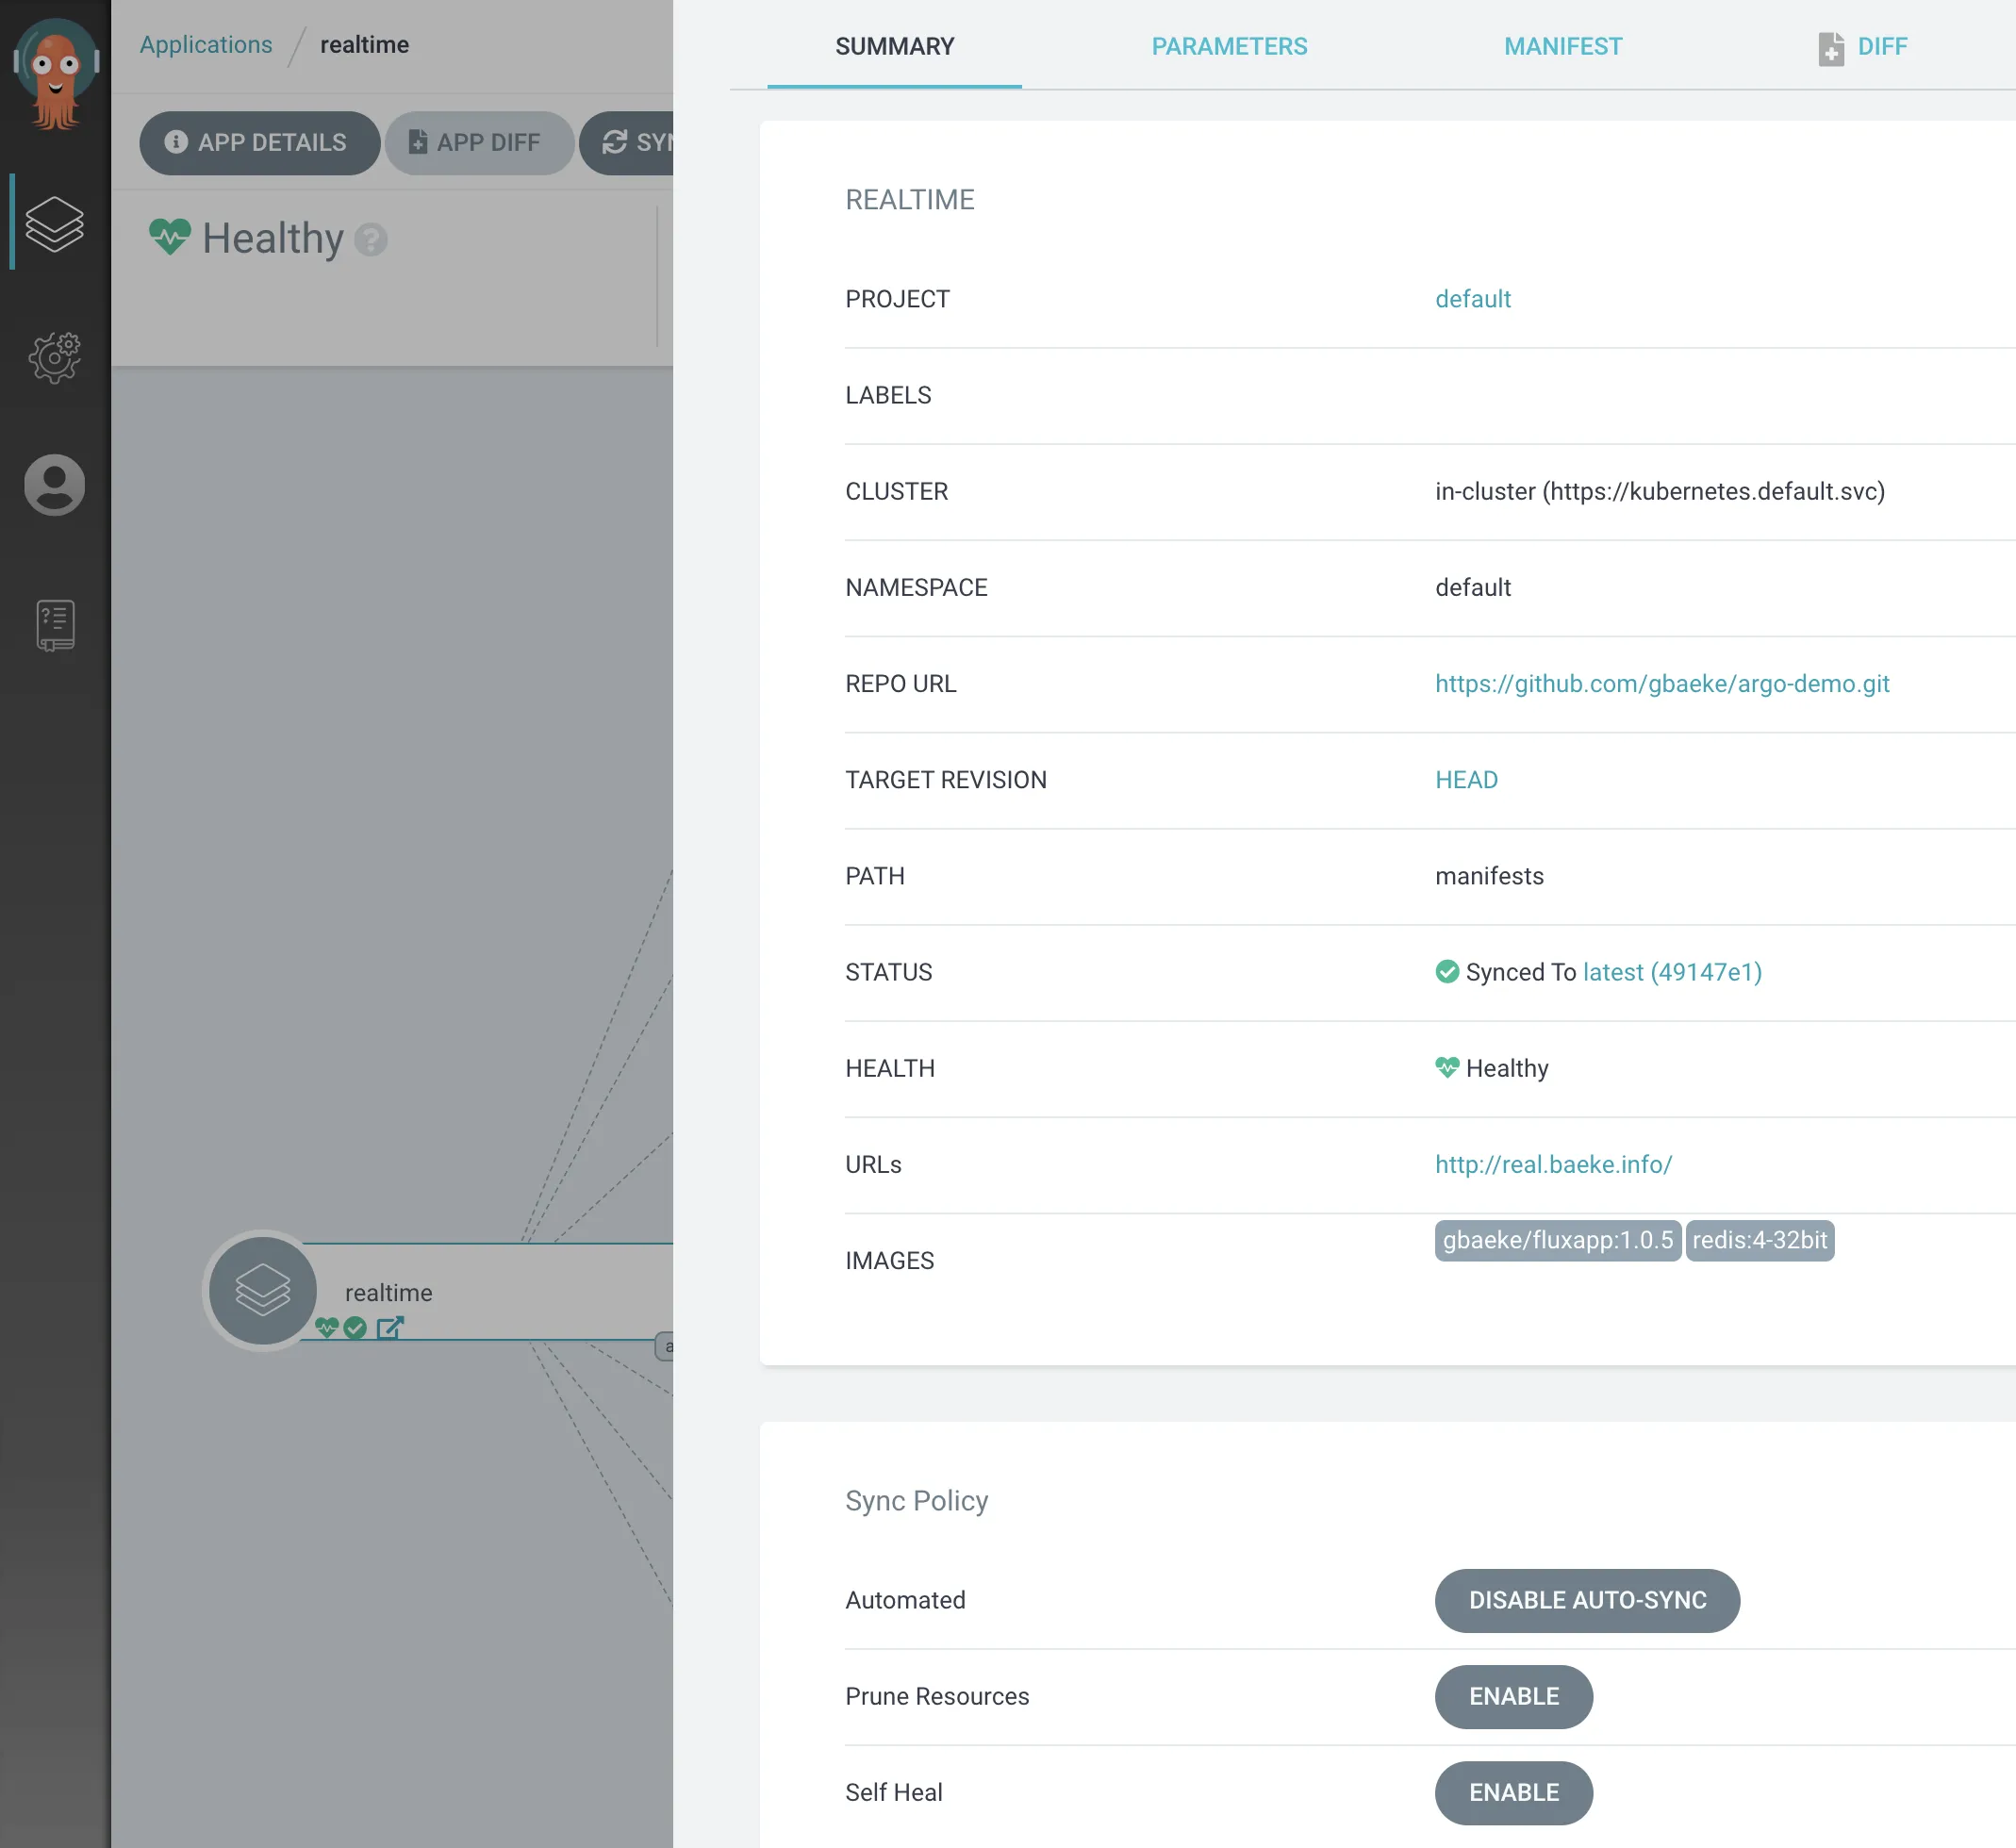
*Setting up auto-sync from the UI*
You can now make changes to the git repo like changing the image tag for gbaeke/fluxapp (yes, I used this image with the Flux posts as well 😊 ) to 1.0.6 and wait for the sync to happen. Or sync manually from the CLI or the UI.
## Conclusion
This was a quick tour of Argo CD. There is much more you can do but the above should get you started quickly. I must say I quite like the solution and am eager to see what the [collaboration](https://www.weave.works/blog/argo-flux-join-forces) of Flux CD, Argo CD and Amazon comes up with in the future.